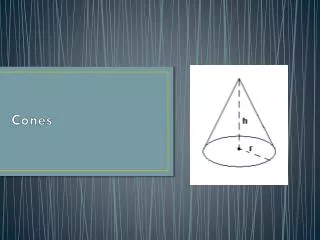
Cones
Learn how to load kiln, ensure temperature accuracy with cones, troubleshoot, cool down, & maintain kiln for longevity. Follow step-by-step procedures for electrical & mechanical upkeep.


Cones
E N D
Presentation Transcript
Cones • Time & Temperature • Permanent record of each firing • Inexpensive 10¢ per cone • Troubleshooting aid • Use a Cone Template for accuracy • Best way to detect a decalibrating Thermocouple
Loading the kiln • Shelves • Size - 2” less than kiln diameter • Clearance • Shelves 1” from walls • Shelves 2” from Thermocouple • Ware 2” from walls • Location • First shelf 1” up from floor
Loading, continued • Density of load • Hot & Cold spots • Uniformity • Tall items toward the center • Allow space for air flow • Stagger ½ shelves if possible
Cooling and Unloading • Run the downdraft vent system • Force cooling with a fan • Lid closed, peep plugs are in • Small fan blowing at controller • Wind velocity • air exchange around kiln • cooling time • Unload safely at (or below) 125°F
Preventive Maintenance • Electrical items • Thermocouples • Relays • Elements • Mechanical items • Lid brace & hinge • Section Handles • Brickwork
Maintenance, electrical • Opening Electrical Box • Unplug Kiln or • Disconnect power • Phillips screwdriver • Remove all screws on Left side of box
Maintenance, electrical • Thermocouple Replacement • Unplug Kiln • Open Box • Unscrew Porcelain Block • Loosen Screws and Remove Thermocouple • Install in Reverse Order
Maintenance, mechanical • Lid Brace & Hinge • Anchor pads • Lid • Body
Maintenance, mechanical • Lid Hinge • Screws • Cotter pin • Struts • Other hardware • Handles • Latches
Maintenance, mechanical • Temporary Brick Repair • Unplug Kiln • Insert pins at 30 degree angle to form a ledge • Space pins every ¾ inch
Repairs • Relays • Unplug Kiln • Remove Box • Remove Baffle • Label and Remove Relay Control Wiring • Unscrew and Remove Relay • Install in Reverse Order
Repairs • Element Replacement • Unplug Kiln • Open Control Box • Cut Element Close To Connector • Remove Pins • Carefully Remove Element • Insert New Element • Crimp On Feeder Wire With Barrel Connector • Close and Fasten Box • Use Factory Original Parts
Locate receptacle Use insulated probes Insert at slight angle Checking Voltage