Download

1 / 36
380 likes | 624 Vues
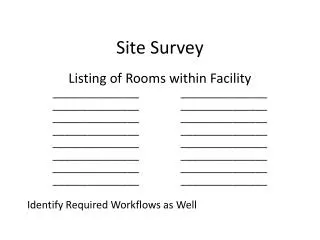
Site Survey. Introduction. This section instructs you on how to perform a thorough site survey. Objectives. After completing this module, you should be able to: List the steps to conduct a proper site survey

E N D
Introduction This section instructs you on how to perform a thorough site survey.
Objectives After completing this module, you should be able to: • List the steps to conduct a proper site survey • Explain the installation plan to the customer (mounting locations, cable routing, etc.) • Keep the customer informed of any revisions, if they occur
Site Survey Pre-Arrival Determine the ODU Pointing Coordinates • DIRECTV receiver • Azimuth – left and right • Elevation – up and down • Tilt – clockwise and counter-clockwise
Site Survey ODU Pointing Coordinates
Site Survey Arrival Observe the Site • Look for obstructions, trees, buildings, future construction, etc • Look for the type of construction of the home, roof pitch, etc. Observe • Look for power and phone entry points to the residence Do not walk around the home until you introduce yourself to the customer.
Site Survey Arrival • State who you are and who you are with • Show your badge • Greet the customer by Mr. or Mrs. and their last name • Confirm that the customer is over the age of 18 • Ask about animals and children Meet & Greet
Site Survey Customer Communication • Confirm with the customer the services and equipment ordered • Show the customer the protection plan paper work, customer satisfaction checklist and receiver manuals • Look for items that could be damaged by you or your tools • Explain that you will be performing an internal and external site survey
Internal Site Survey • Receiver location • Current television picture quality (benchmark) • Customer equipment configuration • Telephone jacks • Ask the customer if the have DSL service • Operating electric outlet > (Is this a switched outlet?) • Internal cable routing • Potential safety issues, pets, inaccessible parts of the property, etc.
Internal Site Survey • Check the electrical outlets • It is advised to not install the IRD under the following conditions: • Open ground • Open hot • Open neutral • Hot ground reversed • Hot neutral reversed • Advise the customer of any problems
External Site Survey • Locate house utility ground • Locate power entry • Locate phone entry (NID – Network Interface Device) • Line of sight • Obstructions • Future obstructions • ODU mounting • Type of home construction • Cable routing • Determine installation requirements
External Site Survey Locating the Satellites Inclinometer Elevation – 0° to 90° • Compass • Azimuth - • 0° to 360°
External Site Survey Practice Exercise • Locate the azimuth coordinates using the compass
External Site Survey Practice Exercise • Locate the elevation coordinates using the inclinometer
External Site Survey • Dial 360 degrees • 0 degrees is magnetic North • Needle points North • Align needle on 0 degrees, or North • Locate the azimuth degrees on the dial Using Another Type of Compass
External Site Survey Clear Line of Sight • Obstructions • Tree growth • Foliage in the spring • Buildings • New construction
External Site Survey Clear Line of Sight?
External Site Survey Clear Line of Sight • Programming required • Satellite locations • Determine satellites used based on ODU types from the work order, (99°, 101°, 103°, 110°, and119°), as well as second ODUs for satellites at 95° and 72.5° • 10° on each side • Future upgrades
External Site Survey Clear Line of Sight
External Site Survey Clear Line of Sight
External Site Survey Clear Line of Sight
External Site Survey Bore Sight • What is bore sight?
External Site Survey The LNB Arm The Satellite
External Site Survey Bore Sight
110° 103° 99° 101° 119° Site Survey – Line of SightAzimuth Denver, Colorado Azimuth required to see the 101° satellite “bore sight” = 166° Los Angles, CA Azimuth required to see the 101° satellite “bore sight” = 137° Orange, NJ Azimuth required to see the 101° satellite “bore sight” = 231°
External Site Survey Line of Sight - Elevation • The satellites orbit 22,300 miles from Earth near to the equator line • North America is between 26° N and 71° N above the equator
Site Survey:Review the Plan Customer Communication • ODU location • Cable route • Receiver locations • Additional charges • Get approval
Summary Now that you have completed this section you should be able to: • List the steps to conduct a proper site survey • Explain the installation plan to the customer (mounting locations, cable routing, etc.) • Keep the customer informed of any revisions, if they occur
Exercise • Written Exam • Place site survey steps in the correct order • Hands-on • Use a DIRECTV receiver to locate the azimuth, elevation and tilt of the ZIP codes provided • Locate utility ground • Use the compass and inclinometer • Role Play: Customer Communication