LIFE CYCLES
Amy, Kasey, Nyla , & Ashley Schlaegle. LIFE CYCLES . Overarching Rationale Intended Grade Level: 2 nd – 3 rd Grade.

LIFE CYCLES
E N D
Presentation Transcript
Amy, Kasey, Nyla, & Ashley Schlaegle LIFE CYCLES
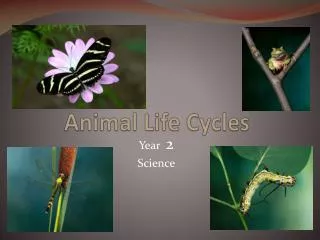
Overarching RationaleIntended Grade Level: 2nd – 3rd Grade In this lesson, students will explore and understand the process of life cycles, such as that of frogs, butterflies, and leaves. They will also explore their own life cycles, as well as make connections to their own lives. Students will learn this by using different modalities and also having art integrated into these lessons. Life cycles are a part of us and a part of every living thing. It is important to introduce children to the life cycle process because it helps them understand the world around them and every day changes. Learning about the life cycle of living things helps students gain respect and compassion for the world around them. A unit on life cycles is a great way to spark students’ interests and engage their curiosity. Students are often kinesthetic and visual learners, so allowing students to physically and visually manipulate life cycles helps them make further meaning than they would through just teacher lecture. In all of our lessons we allow students to explore different life cycles and connect these cycles to their own individual lives. With art integrated throughout all of the lessons, these normal science lessons become more engaging and fun for students to complete. Art also helps the students get a better understanding of what they are trying to accomplish.
Guiding Questions • What is a life cycle? • How are different life cycles interconnected? • How are YOU, as an individual, affected by life cycles.
Lesson 1: Leaf Life Cycle • Projected Time Frame: 50 minutes • Rationale: One rationale of this lesson is to have students explore the life cycle of leaves and the seasons. Another aspect this lesson is aiming towards is for the students to connect their own lives to the life cycle and realize how they as individuals grow and change as well. • Objectives: a.) Students will be able to compare and contrast the four seasons. b.) Students will be able to gain an understanding of the ways leaves on a tree change over a year. c.) Students will be able to connect this life cycle to their own lives. • PA Standards: 3.1.4c: Illustrate patterns that regularly occur and reoccur in nature. -Identify observable patterns ex)growth patterns in plants, crystal shapes in minerals, climate, structural patterns in bird feathers... -Use knowledge of natural patterns to predict next occurrences ex)seasons, leaf patterns, lunar phases • PA Art Standards: 9.1.3.E. Demonstrate the ability to define objects, express emotions, illustrate an action or relate an experience through creation of works in the arts. • National Art Standard: Content Standard: Using knowledge of structures and functions Achievement Standard: Students will… a. know the differences among visual characteristics and purposes of art in order to convey ideas b. describe how different *expressive features and *organizational principles cause different responses c. use visual structures and functions of art to communicate ideas
Lesson 1: Leaf Life Cycle(continued) • Overview: • We would begin this lesson by introducing the artist, Arcimboldo (1526–1593). Arcimboldo was an Italian painter who was best known for creating portraits made out of plants, fish, fruit, vegetables, and various other natural objects.
Lesson 1: Leaf Life Cycle(continued) • Overview • Using this Leaf Life Cycle Lesson, the entire class will learn how to compare and contrast the four seasons, and will gain an understanding of the way leaves on a tree change over the course of a year. Students will be asked to raise their hands to participate in a discussion about what they know about life cycles in general. The teacher will then explain how trees have life cycles as well, and how these life cycles determine the seasons. This discussion will get students talking about how the life cycle of trees and how the seasons are interconnected into their own lives. As seasons change and leaves go through their life cycle, students lives are affected by the weather, what activities they can take part in, what clothes they can wear, and what food is available to eat. • After the introduction discussion, students will listen to a telling of the book, Fall Is Not Easy, by Marty Kelley. Next,students will have the opportunity to share any prior knowledge they have about what happens to trees’ leaves in the autumn. Students will get to discuss why the title of the book might be called, Fall Is Not Easy. The class will read the book together and talk about what usually happens to trees’ leaves in the fall and what is happening in this book. It should also be discussed that this book is a fantasy because of the trees talking and making pictures with their leaves.
Lesson 1: Leaf Life Cycle(continued) • Overview: • For the art activity, the students will complete a piece like Arcimboldo. They will be creating a self portrait by picking their favorite season, followed by choosing appropriate objects to go along with that particular time of year. For example, the picture shown to the right is a portrait of a person, but the objects included are ones that are typically found in the fall. The portrait shows the person covered in dying leaves, squash, pumpkin, etc. The colors in the picture are also darker, representing the cooler temperatures that can be associated with fall. By completing this activity, students will understand that objects like leaves are changing over time, and items that are available to them are changing as well.
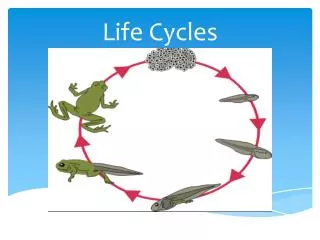
Lesson 2: Frog Life Cycle • Projected Time Frame: 60 minutes • Rationale: The main aim of this lesson is to help students understand the life cycle of a frog, through studying and exploring the cycle. • Objectives: a.) Students will be able to gain an understanding of a frog’s life cycle by listening to a story about frogs as well as taking part in a discussion. b.) Students will be able to demonstrate their learned knowledge of a frog’s life cycle by completing a frog life cycle craft. • PA Standards: 3.1.3.A3.Illustrate how plants and animals go through predictable life cycles that include birth, growth, development, reproduction, and death. • PA Art Standard: Standard 9.3.3.A Recognize critical processes used in the examination of works in the arts and humanities. • National Standards: Content Standard: Using knowledge of structures and functions Achievement Standard: Students will… • a. know the differences among visual characteristics and purposes of art in order to convey ideas • b. describe how different *expressive features and *organizational principles cause different responses • c. use visual structures and functions of art to communicate ideas
Lesson 2: Frog Life Cycle(continued) • Overview • To begin this lesson, the entire class will brainstorm what they already know about the frog life cycle. They will also explore questions they wish to answer during the completion of this project. To continue to encourage thinking about frogs, the students will next read, From Tadpole to Frog, by Gerald Legg. This book has clear and colorful illustrations to explain the growth and change of a tadpole to a frog. The book also contains an information section with ‘frog words,’ that could be beneficial throughout the lesson • The teacher will have an in-depth conversation about the life cycle of a frog. As the teacher is talking about this cycle further, she will be filling in a frog life cycle chart on the board. As the teacher is doing this, the students will be filling in their own chart on a piece of paper.
Lesson 2: Frog Life Cycle(continued) • Overview • The students will be given four, square pieces of paper. On these separate pieces of paper, the students will draw a picture of frog eggs, tadpole, froglet, and frog. Then, on a green strip of paper that is folded in fours (accordion style), students will glue their hand-drawn pictures of the different life cycle phases, in the correct order. The students will then fold up the green strip of paper, so that none of the pictures can be seen. On the first green square (where the eggs will be drawn inside) students will glue on a round, piece of white paper, which represents an egg. On the other end of the green strip of paper, the students will glue a picture of a giant green frog. Once this is finished, the students will have a frog life cycle book. The front of the book will have the giant white egg, and when they open it up, the hand-drawn phases will be on the inside. When the students close the book, the will see the giant green frog. The teacher will assist and explain how to complete each step with the students. Also, while the students are completing this, the teacher will be walking around helping students complete this. To end this project, students will walk around the room, looking at everyone’s finished project. While they completed the same activity, each piece will be unique in its own way. This is a fun way for the students to see everyone’s creativity. • To close the lesson on frog life cycles, students will pretend that they are a tadpole, and will create a story about their life. Students will be required to make certain that they mention their life cycle somewhere in their tale. Their stories should be as creative as possible, and ‘frog words,’ like the ones found in From Tadpole to Frog, should be included throughout, to explain the students’ journeys as tadpoles. Also, students can also choose to illustrate their journey.
Lesson 3: Butterfly Life Cycle • Projected Time Frame: 45 Minutes • Rationale: Learners will demonstrate their understanding of the life cycle of the Monarch Butterfly by using different types of pasta to represent the different stages of the butterfly’s life cycle. • Objectives:a.)Students will be able to identify unfamiliar vocabulary words found in the read aloud, From Caterpillar to Butterfly by Deborah Heiligmanb.) Students will be able to demonstrate understanding of the life cycle of a butterfly by doing a crafts project, and using pasta to represent the four stages. c.) Students will be able to further understand the process of life cycles by connecting the phases of a life cycle to their own lives. • PA Standards: S3.B.1.1.4: Describe how plants and animals go through life cycles 1.1.3.F: Understand the meaning of and use correctly new vocabulary learned in various subject areas. • PA Art Standards: 9.1.3.E: Demonstrate the ability to define objects, express emotions, illustrate an action or relate an experience through creation of works in the arts • National Standards: Content Standard: Choosing and evaluating a range of subject matter, symbols, and ideas Achievement Standard: Students will… • a. explore and understand prospective content for works of art • b. select and use subject matter, symbols, and ideas to communicate meaning
Lesson 3: Butterfly Life Cycle(continued) • Overview: • In this lesson, the teacher will begin by reading, From Caterpillar to Butterfly, by Deborah Heiligman, to the students. The teacher will guide the students to look at the pictures. Then, as a group, the students will pick out unfamiliar vocabulary words in the book and raise their hands to tell the teacher so she can define them. She will then put them on a word wall of important thematic words to be aware of. • At the end of the book, the teacher will ask the students to discuss and come up with a clear understanding of each stage of the life cycle of a butterfly. The teacher will prompt the students’ thinking to keep them on the right track. • Next, the teacher will give the students the pasta that will represent each stage of the life cycle. The students will explore the different types of pasta and ask them why they think each type of pasta was chosen for different stages. (Egg: rice kernel, larva or caterpillar: penne pasta, chrysalis: shell pasta, and the adult butterfly: bow tie pasta). The teacher will give each of the four students a paper plate with four drawn on divisions on each side, crayons, markers, and glue. • The students will show their knowledge of the four different stages of the life cycle of a butterfly, by placing the pasta in the correct sequence. The students will be asked what it means that a life cycle is ongoing. Why is the order of sequence important? For example, after the adult butterfly stage, the egg stage must follow. • The teacher will then look at each of the students’ plates to make sure that the pasta is all in the correct locations. Once the teacher approves, the students can glue the pasta in the correct sequence to their plates and decorate them. Next, the students will brainstorm four significant stages in their lives. The teacher can help guide them by listing some monumental events in their lives such as being born, going to high school, getting their dream job, having a family etc… The teacher will then speak with each student to approve of her stages and encourage and boost their creativity. Finally, the students will draw their four chosen stages of their own life cycles. On the back of their plates.
Lesson 3: Butterfly Life Cycle(continued) • After we look at the phases of a butterfly in parts, the teacher will introduce Escher's Metamorphosis. The teacher will show this example, and explain what metamorphosis is. The teacher will also have the students create their own creative metamorphosis image on the butterfly. By doing this, the students will be able to understand that the phases that the butterfly goes through is one continuous motion.
Lesson 4: Life Cycle Descriptive Poem • Projected Time Frame: 40 minutes • Rationale: For this lesson, students will be able to explore vocabulary words, learned through information about life cycles, through poetry and art. • Objectives: a.) Students will be able to demonstrate their understanding of vocabulary words by using them in a descriptive poem. b.) Students will be able to demonstrate their understanding of adjectives by creating a narrative poem. c.) Students will be able to demonstrate their understanding of interpretive art through their creation of a work illustrating a section of their poem. • PA Standards: Standard 1.4.3a Write narrative pieces (e.g., stores, poems, plays) -Include detailed descriptions of people, places and things -Use relevant illustrations -Include literary elements Standard 1.5.3d Write with an awareness of stylistic aspects of composition. -Use sentences with differing lengths and complexities -Use descriptive words and action verbs. • PA Art Standard: Standard 9.3.3.A Recognize critical processes used in the examination of works in the arts and humanities. Content Standard: Using knowledge of structures and functions Achievement Standard: Students will… • a. know the differences among visual characteristics and purposes of art in order to convey ideas • b. describe how different *expressive features and *organizational principles cause different responses • c. use visual structures and functions of art to communicate ideas)
Lesson 4: Life Cycle Descriptive Poem(continued) • Overview • To begin this lesson, the teacher will show the students a butterfly poem, like the one below. The teacher will then pull a small part of the poem out, and illustrate it on an easel to the class. While she is illustrating, the teacher will think out loud, so that the students understand what their thought process should be like. The teacher could also choose to already have the section of the poem illustrated, just as a sample to show the students. • Next, the entire class will use the vocabulary provided, and possibly add to the list of vocabulary, to create a descriptive poem. The vocabulary provided is vocabulary used in the life cycle of a butterfly. The descriptive poems should include the vocabulary, but in a descriptive way; such as, “the very fuzzy and wiggly caterpillar.” This opens up an opportunity for student to focus on their use of adjectives and form a concrete meaning of adjectives as descriptive words. Students will then pull a small descriptive section out of their poem and illustrate it any way they see fit. Not all students are interested in science, so this lesson gives students the opportunity to express themselves and their gained knowledge in different modes while incorporating other subjects. They are welcome to use all modes to illustrate especially descriptive part of their poem.
Lesson 5: Plant Life Cycle • Projected Time Frame: 60 Minutes • Rationale: For this lesson students will be prepared with real world experiences and become familiar with the life cycle of a plant. Students will be hands-on and observe the growth of their own plants and have two final products of a garden to show an artistically created banner. • Objectives: a.) Students will properly identify the stages of a plant’s life cycle b.) Students will scientifically monitor and record changes in their plant over time • PA Standards S3.B.1.1.4: Describe how plants and animals go through life cycles • PA Art Standards S3.A.2.1.2: Make predictions based on observations. • National Standards S3.B.1.1.1: Identify and describe the functions of basic structures of animals and plants (e.g., animals [skeleton, heart, lungs]; plants [roots, stem, leaves]).
Lesson 5: Plant Life Cycle(continued) • Overview • The teacher will begin by reading, From Seed to Plant, by Gail Gibbons to the students. The teacher will prompt the students to look at the pictures, and be familiar with the cycle and different stages. In small groups, the students will discuss what they learned in the book, and review the phases of a plant’s life cycle. Students will then individually make predictions of what their plant will look like periodically on a worksheet throughout the growing process. Next, the students will retrieve their materials and plant their marigold seed into the soil of a plastic cup. Students will water plants on a daily basis and record its growth/measure the height in their science log. When the plants start becoming visible, the class as a whole will take a trip outside and plant all their plants in the front of the school to make a garden. This will be good for this particular group of students since many of them enjoy outdoors and nature. Students will write their names on a popsicle stick, to stick next to their plant so that they know it is theirs. Students will then work together to make invitations and hand them out to the other classes in the grade. The teacher will guide a discussion on the steps they took as a class to make the plants grow, and the parts and the functions of the plant, and the changes they saw. The teacher will ask them to come up with ideas on how to give a good tour of their garden. Finally, students will hold a tour of their garden and stand by their plants to show them off. • Students will create an artistic banner with the phases that their plant went through. They will label the parts of their plant to make it decorative and artistic at the same time. To create the pictures on the banner, students will go outside and collect items like leaves, grass, dirt, etc. They will bring these objects into the classroom, and use those to create their pictures. Using the natural objects, students will depict the journey of their plant from seed to its current state.
Lesson 6: Exploring Life Cycles • Projected Time Frame: 60 minutes • Rationale: The rationale of this lesson is for students to be able to demonstrate their understanding of life cycles by exploring the “life cycle” of something that is important to them (living or none living as long as the process of the object or being is understood) • Objectives: a.) Students will be able to demonstrate their understanding of the process of life cycles by exploring additional “life cycles” of their choice. b.) Students will be able to construct their “life cycle” in an effective mode with all the appropriate steps in the process. • PA Standard 3.1.3.A3.Illustrate how plants and animals go through predictable life cycles that include birth, growth, development, reproduction, and death. • PA Art Standard: 9.1.3e Use knowledge of varied styles within each art form through a performance or exhibition of unique work. • National Art Standard: Content Standard: Using knowledge of structures and functions Achievement Standard: Students will… • a. know the differences among visual characteristics and purposes of art in order to convey ideas • b. describe how different *expressive features and *organizational principles cause different responses • c. use visual structures and functions of art to communicate ideas
Lesson 6: Exploring Life Cycles (continued) • Overview: • It is important for students to understand life cycles and that every living thing goes through a process. To help students grasp this concept, students will explore a “life cycle” of something that is important to them. It could be a living or none living being, as long as students can demonstrate they understand its process. For example, a students could talk about the life cycle of their favorite stuffed animal and the process of getting it from the toy store, bringing it home, playing with it…etc. Students have complete freedom with creativity in this project. They can write a story, draw pictures, make diagrams, act out, or any other mode they want to explore. After completing their “life cycle,” they will share it with the class and reiterate their understanding of life cycles by talking about why each part of their life cycle is important to their items’ existence. This lesson allows students to explore life cycles in a new, creative way while still teaching the notion of life cycles. It may help students who are struggling with the science aspect of life cycles see it in a different life and understand the notion of the process better.