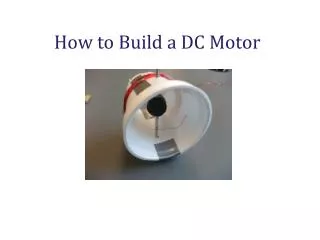
Build a DC motor
Build a DC motor. Prof. Anderson Alphabrima Barrie, Hassan Hayat , Matt Madjar , Mitesh Patel, and Nate Pelton Electrical and Computer Engineering. Contents of Your Bag. A two square inch piece of foam to serve as the base of your motor 1 bar style magnet (ceramic, 2”x ¾ “)

Build a DC motor
E N D
Presentation Transcript
Build a DC motor Prof. Anderson Alphabrima Barrie, Hassan Hayat, Matt Madjar, Mitesh Patel, and Nate Pelton Electrical and Computer Engineering
Contents of Your Bag • A two square inch piece of foam to serve as the base of your motor • 1 bar style magnet (ceramic, 2”x ¾ “) • 4 jumbo paper clips, only two of which will be used • A two inch section of plastic drinking straw • Two sections of insulated wire, with both ends stripped • 1 D-size battery • A two foot length of magnet wire (AWG 24) • 1 sheet of sand paper • 2 rubber bands • 1 Section of wooden dowel • PLEASE LET US KNOW IF YOU ARE MISSING ANY SUPPLIES
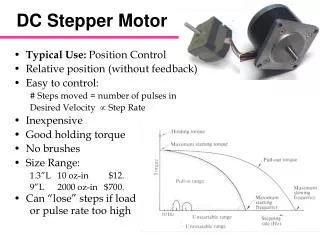
Step 1: Building the Coil • Leave two inches of spare wire • Wrap the wire around the dowel 8 times • Make sure to finish wrapping where you started • Wrap the long section of magnet wire around one half of the coil • So that you have a two inch section of spare wire on each half of the coil • Wrap the two inch section of wire around the coil twice to ensure that the coil will be stable
Make the commutator • Sand the bottom half of each of the two inch sections of spare wire • Hint: Place the sand paper on the table and drag the wire across it, making sure to get as much insulation off as possible
Step 2: Building the Base • Unfold the open ends of the two paper clips • Stick them into the flat face of the foam block, as close to the edges as possible
Step 2 Continued • Wrap one end of the insulated wire around the paper clip, as close to the foam block base as possible. • Repeat for other side
Step 3: Connect Battery • Place the two rubber bands around the battery, so that an ‘X’ is made by the two rubber bands on each end of the battery • Connect the ends of the wire on the base to each end of the battery • Polarity does not matter in this experiment
Step 4; adding the magnet • Just lay the magnet on the foam between the paper clips
Step 5: Add the coil • Hang the coil from step one in the bottom of the open end of the paper clips • It will complete the circuit when the sanded side of the commutator is down • Hints: • Make sure all components are level and that the wires coming out of the coil are as straight as possible. • When unfolding the paperclips, try to make their unfolded length the same • Use the section of plastic drinking straw to support the paper clips if needed
Making Your Motor Run • If all steps were done correctly and carefully, your motor should run just by manually turning the coil and then letting go. • If your motor does not run correctly, there are several things that could be wrong: • Not enough insulation was sanded from the bottom half of the coil lead wires, try to get as close to the coil as possible when sanding • A wire or coil lead wire is either bent or out of alignment. Check these components. • Sometimes it takes a bit of intuition to bend a paperclip or coil wire in the right direction to balance all the necessary components.