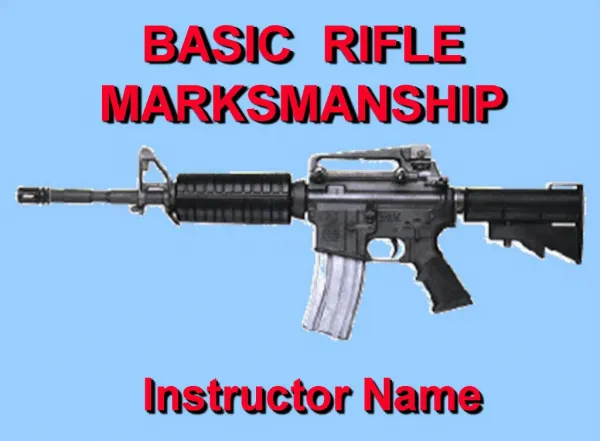
M16A2 Basic Rifle Marksmanship
M16A2 Basic Rifle Marksmanship. Parts of M16A2. As part of mechanical training, soldiers must be taught and must practice procedures for properly loading ammunition into magazines to include both single loose rounds and speed loading of 10-round clips ( Figure 3-2 ).

M16A2 Basic Rifle Marksmanship
E N D
Presentation Transcript
As part of mechanical training, soldiers must be taught and must practice procedures for properly loading ammunition into magazines to include both single loose rounds and speed loading of 10-round clips (Figure 3-2). Emphasis on maintenance and understanding of the rifle can prevent most problems and malfunctions. However, a soldier could encounter a stoppage or malfunction. The soldier must quickly correct the problem by applying immediate action and continue to place effective fire on the target.
Immediate-action procedures contained in Chapter 2 and the operator's technical manual should be taught and practiced as part of preliminary dry-fire exercises, and should be reinforced during live-fire exercises. • Immediate-action drills should be conducted using dummy ammunition (Ml99) loaded into the magazine. The soldier chamber the first dummy round and assume a firing position. When he squeezes the trigger and the hammer falls with no recoil, this is the cue to apply the correct immediate-action procedure and to refire. Drill should continue until soldiers can perform the task in three to five seconds. • The word SPORTS is a technique for assisting the soldier in learning the proper procedures for applying immediate action to the M16Al and M16A2 rifles. • First, THINK, then: • Slap up on the bottom of the magazine. • Pull the charging handle to the rear. • Observe the chamber for an ejection of the round. • Release the charging handle. • Tap the forward assist. • Squeeze the trigger again. • NOTE: When slapping up on the magazine, be careful not to knock a round out of the magazine onto the line of the bolt carrier, causing more problems. Slap hard enough only to ensure the magazine is fully seated.
MARKSMANSHIP FUNDAMENTALS The soldier must understand the four key fundamentals before he approaches the firing line. He must be able to establish a steady position that allows observation of the target. He must aim the rifle at the target by aligning the sight system, and he must fire the rifle without disturbing this alignment by improper breathing or during trigger squeeze. The skills needed to accomplish these are known as riflemarksmanship fundamentals. These simple procedures aid the firer in achieving target hits under many conditions when expanded with additional techniques and information. Applying these four fundamentals rapidly and consistently is called the integrated act of firing. Steady Position. When the soldier approaches the firing line, he should assume a comfortable, steady firing position in order to hit targets consistently. The time and supervision each soldier has on the firing line are limited (illustrated on the following page in Figure 3-3), Therefore, he must learn how to establish a steady position during dry-fire training. The firer is the best judge as to the quality of his position. If he can hold the front sight post steady through the fall of the hammer, he has a good position. The steady position elements are as follows:
Nonfiring hand grip. The rifle handguard rests on the heel of the hand in the V formed by the thumb and fingers. The grip of the nonfiring hand is light, and slight rearward pressure is exerted. Rifle butt position. The butt of the stock is placed in the pocket of the firing shoulder. This reduces the effect of recoil and helps ensure a steady position. Firing hand grip. The firing hand grasps the pistol grip so that it fits the V formed by the thumb and forefinger. The forefinger is placed on the trigger so that the lay of the rifle is not disturbed when the trigger is squeezed. A slight rearward pressure is exerted by the remaining three fingers to ensure that the butt of the stock remains in the pocket of the shoulder, thus minimizing the effect of recoil. Firing elbow placement. The location of the firing elbow is important in providing balance. The exact location, however, depends on the firing/fighting position used - for example, kneeling, prone, or standing. Placement should allow shoulders to remain level. Nonfiring elbow. The nonfiring elbow is positioned firmly under the rifle to allow for a comfortable and stable position. When the soldier engages a wide sector of fire, moving targets, and targets at various elevations, his nonfiring elbow should remain free from support. Stock weld. The stock weld is taught as an integral part of various positions. Two key factors emphasized are that the stock weld should provide for a natural line of sight through the center of the rear sight aperture to the front sight post and to the target. The firer's neck should be relaxed, allowing his cheek to fall naturally onto the stock. Through dry-fire training, the soldier is encouraged to practice this position until he assumes the same stock weld each time he assumes a given position. This provides consistency in aiming, which is the purpose of obtaining a correct stock weld. Proper eye relief is obtained when a soldier establishes a good stock weld. There is normally a small change in eye relief each time he assumes a different firing position. Soldiers should begin by trying to touch his nose close to the charging handle when assuming a firing position.
Support. If artificial support (sandbags, logs, stumps) is available, it should be used to steady the position and to support the rifle. If it is not available, then the bones, not the muscles, in the firer's upper body must support the rifle. Muscle relaxation. If support is properly used, the soldier should be able to relax most of his muscles. Using artificial support or bones in the upper body as support allows him to relax and settle into position. Using muscles to support the rifle can cause it to move. Natural point of aim. When the soldier first assumes his firing position, he orients his rifle in the general direction of his target. Then he adjusts his body to bring the rifle and sights exactly in line with the desired aiming point. When using proper support and consistent stock weld, the soldier should have his rifle and sights aligned naturally on the target. When this correct body-rifle-target alignment is achieved, the front sight post must be held on target, using muscular support and effort. As the rifle fires, the muscles tend to relax, causing the front sight to move away from the target toward the natural point of aim. Adjusting this point to the desired point of aim eliminates this movement. When multiple target exposures are expected (or a sector of fire must be covered), the soldier should adjust his natural point of aim to the center of the expected target exposure area (or center of sector). Aiming. Focusing on the front sight post is a vital skill the firer must acquire during practice. Having mastered the task of holding the rifle steady, the soldier must align the rifle with the target in exactly the same way for each firing. The firer is the final judge as to where his eye is focused. The instructor/trainer emphasizes this point by having the firer focus on the target and then focus back on the front sight post. He checks the position of the firing eye to ensure it is in line with the rear sight aperture. He uses the M16 sighting device to see what the firer sees through the sights. (See Appendix C.) Rifle sight alignment. Alignment of the rifle with the target is critical. It involves placing the tip of the front sight post in the center of the rear sight aperture. (Figure 3-4.) Any alignment error between the front and rear sights repeats itself for every 1/2 meter the bullet travels. For example, at the 25-meter line, any error in rifle alignment is multiplied 50 times. If the rifle is misaligned by 1/10 inch, it causes a target at 300 meters to be missed by 5 feet.
Focus of the eye. A proper firing position places the eye directly on line with the center of the rear sight. When the eye is focused on the front sight post, the natural ability of the eye to center objects in a circle and to seek the point of greatest light (center of the aperture) aid in providing correct sight alignment. For the average soldier firing at combat-type targets, the natural ability of the eye can accurately align the sights. Therefore, the firer can place the tip of the front sight post on the aiming point, but the eye must be focused on the tip of the front sight post. This causes the target to appear blurry, while the front sight post is seen clearly. Two reasons for focusing on the tip of the front sight post are: Only a minor aiming error should occur since the error reflects only as much as the soldier fails to determine the target center. A greater aiming error can result if the front sight post is blurry due to focusing on the target or other objects. Focusing on the tip of the front sight post aids the firer in maintaining proper sight alignment (Figure 3-4).
Sight picture. Once the soldier can correctly align his sights, he can obtain a sight picture. A correct sight picture has the target, front sight post, and rear sight aligned. The sight picture includes two basic elements: sight alignment and placement of the aiming point. Placement of the aiming point varies, depending on the engagement range. For example, Figure 3-5 shows a silhouette at 250 meters--the aiming point is the center of mass, and the sights are in perfect alignment; this is a correct sight picture.
A technique to obtain a good sight picture is the side aiming technique (Figure 3-6). It involves positioning the front sight post to the side of the target in line with the vertical center of mass, keeping the sights aligned. The front sight post is moved horizontally until the target is directly centered on the front sight post. Front sight. The front sight post is vital to proper firing and should be replaced when damaged. Two techniques that can be used are the carbide lamp and the burning plastic spoon. The post should be blackened anytime it is shiny since precise focusing on the tip of the front sight post cannot be done otherwise. Aiming practice. Aiming practice is conducted before firing live rounds. During day firing, the soldier should practice sight alignment and placement of the aiming point. This can be done by using training aids such as the M15AI aiming card and the Riddle sighting device. (See Appendix C.)
Breath Control. As the firer's skills improve and as timed or multiple targets are presented, he must learn to hold his breath at any part of the breathing cycle. Two types of breath control techniques are practiced during dry fire. • The first is the technique used during zeroing (and when time is available to fire a shot) (Figure 3-7A. There is a moment of natural respiratory pause while breathing when most of the air has been exhaled from the lungs and before inhaling. Breathing should stop after most of the air has been exhaled during the normal breathing cycle. The shot must be fired before the soldier feels any discomfort. • The second breath control technique is employed during rapid fire (short-exposure targets) (Figure 3-7B). Using this technique, the soldier holds his breath when he is about to squeeze the trigger. • The coach/trainer ensures that the firer uses two breathing techniques and understands them by instructing him to exaggerate his breathing. Also, the firer must be aware of the rifle's movement (while sighted on a target) as a result of breathing.
Trigger Squeeze. A novice firer can learn to place the rifle in a steady position and to correctly aim at the target if he follows basic principles. If the trigger is not properly squeezed, the rifle is misaligned with the target at the moment of firing. • Rifle movement. Trigger squeeze is important for two reasons: • First, any sudden movement of the finger on the trigger can disturb the lay of the rifle and cause the shot to miss the target. • Second, the precise instant of firing should be a surprise to the soldier. • The soldier's natural reflex to compensate for the noise and slight punch in the shoulder can cause him to miss the target if he knows the exact instant the rifle will fire. The soldier usually tenses his shoulders when expecting the rifle to fire, but it is difficult to detect since he does not realize he is flinching. When the hammer drops on a dummy round and does not fire, the soldier's natural reflexes demonstrate that he is improperly squeezing the trigger. • NOTE: See Appendix C for the Weaponeer and ball-and-dummy exercise.They are good training devices in detecting improper trigger squeeze.
Trigger finger. The trigger finger (index finger on the firing hand) is placed on the trigger between the first joint and the tip of the finger (not the extreme end) and is adjusted depending on hand size, grip, and so on. The trigger finger must squeeze the trigger to the rear so that the hammer falls without disturbing the lay of the rifle. When a live round is fired, it is difficult to see what affect trigger pull had on the lay of the rifle. Therefore, it is important to experiment with many finger positions during dry-fire training to ensure the hammer is falling with little disturbance to the aiming process. As the firer's skills increase with practice, he needs less time spend on trigger squeeze. Novice firers can take five seconds to perform an adequate trigger squeeze, but, as skills improve, he can squeeze the trigger in a second or less. The proper trigger squeeze should start with slight pressure on the trigger during the initial aiming process. The firer applies more pressure after the front sight post is steady on the target and his is holding his breath. The coach/trainer observes the trigger squeeze, emphasizes the correct procedure, and checks the firer's applied pressure. He places his finger on the trigger and has the firer squeeze the trigger by applying pressure to the coach/trainer's finger. The coach/trainer ensures that the firer squeezes straight to the rear on the trigger avoiding a left or right twisting movement. A steady position reduces disturbance of the rifle during trigger squeeze. From an unsupported position, the firer experiences a greater wobble area than from a supported position. Wobble area is the movement of the front sight around the aiming point when the rifle is in the steadiest position. If the front sight strays from the target during the firing process, pressure on the trigger should be held constant and resumed as soon as sighting is corrected. The position must provide for the smallest possible wobble area. From a supported position, there should be minimal wobble area and little reason to detect movement. If movement of the rifle causes the front sight to leave the target, more practice is needed. The firer should never try to quickly squeeze the trigger while the sight is on the target. The best firing performance results when the trigger is squeezed continuously, and the rifle is fired without disturbing its lay.
FIRING POSITIONS All firing positions are taught during basic rifle marksmanship training. During initial fundamental training, the basic firing positions are used. The other positions are added later in training to support tactical conditions. Basic Firing Positions. Two firing positions are used during initial fundamental training: the individual supported fighting position and prone unsupported position. Both offer a stable platform for firing the rifle. They are also the positions used during basic record fire. Supported fighting position. This position provides the most stable platform for engaging targets (Figure 3-8). Upon entering the position, the soldier adds or removes dirt, sandbags, or other supports to adjust for his height. He then faces the target, executes a half-face to his firing side, and leans forward until his chest is against the firing-hand corner of the position. He places the rifle handguard in a V formed by the thumb and fingers of his nonfiring hand, and rests the nonfiring hand on the material (sandbags or berm) to the front of the position. The soldier places the stock butt in the pocket of his firing shoulder and rests his firing elbow on the ground outside the position. (When prepared positions are not available, the prone supported position can be substituted.)
Once the supported fighting position has been mastered, the firer should practice various unsupported positions to obtain the smallest possible wobble area during final aiming and hammer fall. The coach/trainer can check the steadiness of the position by observing movement at the forward part of the rifle, by looking through the M16 sighting device, or by checking to see that support is being used. NOTE: The objective is to establish a steady position under various conditions. The ultimate performance of this task is in a combat environment. Although the firer must be positioned high enough to observe all targets, he must remain as low as possible to provide added protection from enemy fire. Prone unsupported position. This firing position (Figure 3-9) offers another stable firing platform for engaging targets. To assume this position, the soldier faces his target, spreads his feet a comfortable distance apart, and drops to his knees. Using the butt of the rifle as a pivot, the firer rolls onto his nonfiring side, placing the nonfiring elbow close to the side of the magazine. He places the rifle butt in the pocket formed by the firing shoulder, grasps the pistol grip with his firing hand, and lowers the firing elbow to the ground. The rifle rests in the V formed by the thumb and fingers of the nonfiring hand. The soldier adjusts the position of his firing elbow until his shoulders are about level, and pulls back firmly on the rifle with both hands. To complete the position, he obtains a stock weld and relaxes, keeping his heels close to the ground.
CONCEPT OF ZEROING The purpose of battle sight zeroing is to align the fire control system (sights) with the rifle barrel, considering the given ammunition ballistics. When this is accomplished correctly, the fire control and point of aim are point of impact at a standard battlesight zero range such as 250 (300) meters. When a rifle is zeroed, the sights are adjusted so that bullet strike is the same as point of aim at some given range. A battlesight zero (250 meters, M16Al; 300 meters, M16A2) is the sight setting that provides the highest hit probability for most combat targets with minimum adjustment to the aiming point. When standard zeroing procedures are followed, a rifle that is properly zeroed for one soldier is close to the zero for another soldier. When a straight line is drawn from target center to the tip of the front sight post and through the center of the rear aperture, it makes little difference whose eye is looking along this line. There are many subtle factors that result in differences among individual zeros; however, the similarity of individual zeros should be emphasized instead of the differences. Most firers can fire with the same zeroed rifle if they are properly applying marksmanship fundamentals. If a soldier is having difficulty zeroing and the problem cannot be diagnosed, having a good firer zero the rifle could find the problem. When a soldier must fire another soldier's rifle without opportunity to verify the zero by firing - for example, picking up another man's rifle on the battlefield - it is closer to actual zero if the rifle sights are left unchanged. This information is useful in deciding initial sight settings and recording of zeros. All rifles in the arms room, even those not assigned, should have their sights aligned (zeroed) for battlesight zero. There is no relationship between the specific sight setting a soldier uses on one rifle (his zero) to the sight setting he needs on another rifle. For example, a soldier could be required to move the rear sight of his assigned rifle 10 clicks left of center for zero, and the next rifle he is assigned could be adjusted 10 clicks right of center for zero. This is due to the inherent variability from rifle to rifle, which makes it essential that each soldier is assigned a permanent rifle on which all marksmanship training is conducted. Therefore, all newly assigned personnel should be required to fire their rifle for zero as soon as possible after assignment to the unit. The same rule must apply anytime a soldier is assigned a new rifle, a rifle is returned from DS or GS maintenance, or the zero is in question.
M16A2 STANDARD SIGHTS AND ZEROING • When the soldier can consistently place three rounds within a 4-cm circle at 25 meters, regardless of group location, he is ready to zero his rifle. • The front and rear sights are set as follows: • Rear sight. The rear sight consists of two sight apertures, a windage knob, and an elevation knob (Figure 3-25).
The larger aperture, marked 0-2, is used for moving target engagement and during limited visibility. The unmarked aperture is used for normal firing situations, zeroing, and with the elevation knob for target distances up to 800 meters. The unmarked aperture is used to establish the battlesight zero. After the elevation knob is set, adjustments for elevation are made by moving the front sight post up or down to complete zeroing the rifle. Adjustments for windage are made by turning the windage knob. The rear windage knob start point is when the index mark on the 0-2 sight is aligned with the rear sight base index (Figure 3-26).
Front sight. The front sight is adjusted the same as the front sight of the M16Al. It consists of a square, rotating sight post with a four-position, spring-loaded detent (Figure 3-27). Adjustments are made by using a sharp instrument or the tip of a cartridge. To raise or lower the front sight post, the spring-loaded detent is depressed, and the post is rotated in the desired direction of change. (Figure 3-28).