Charging System Tests & Voltage information
210 likes | 452 Vues
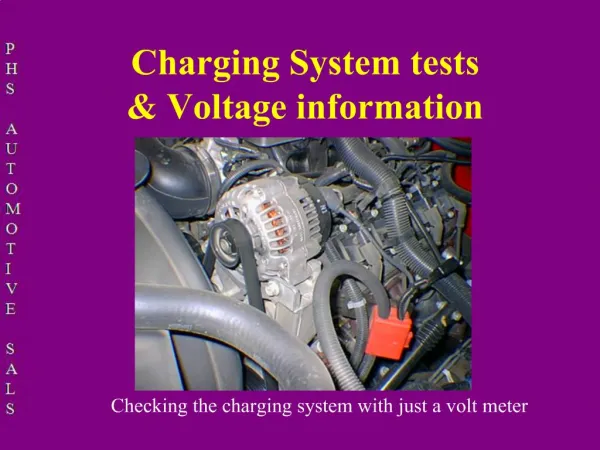
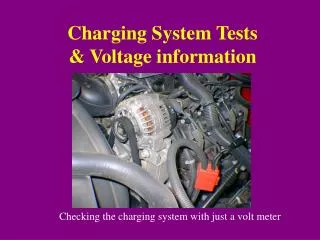
Charging System Tests & Voltage information. Checking the charging system with just a volt meter. First Step. Always check the battery first. A bad battery can affect the charging test.

Charging System Tests & Voltage information
E N D
Presentation Transcript
Charging System Tests& Voltage information Checking the charging system with just a volt meter
First Step Always check the battery first. A bad battery can affect the charging test. Battery Voltage should be 12.6 volts when car is off. If not we need to find out Why? If over it is probably because the car has been running and was just shut off. If under it is bad or not being charged. Battery state of Charge if below 12.45 charge before testing. Charging system must supply enough energy to run the demands of the car and charge the battery.
Turn off everything run at 2000-2500 for 2 minutes and check charging system voltage. The results should be some where around the following specs. Sealed Maintenance free battery above 15.5V overcharging 14.5V -15.4V normal 13.2V - 14.4V may be to low 12.6V - 13.1V too low 12.6V or less not charging
Low Maintenance battery above 14.8V overcharging 13.2V - 14.7V normal 12.6V - 13.1V too low 12.6V or less not charging New cars at 80 degrees Ford 14.4V- 14.8V Gm 14.5V - 15.1V Chrysler 13.3V - 13.9V
Generic Quick Specs • Battery Voltage should be 12.6 volts when car is off. • Voltage should be with car running at 2000 RPM about 13.8-14.8 Volts • Voltage should never fall below 13.2 Volts
Things to Remember • Temperature changes charging voltage • Higher in cold weather • Age of battery changes charging voltage • Older batteries have less charge acceptance, will elevate voltage faster
Things to Remember • State of charge, changes charging voltage • Low battery voltage, charging voltage will be lower • Impurities, If you have added tap water charging voltage will be lower
Check for overcharge • 1. Engine off - Write down voltage of Battery • 2. Turn all accessories off • 3. Run at idle - Write down voltage • 4. Run up to 2000 RPM - Write down voltage • Voltage should not go up 2.5 volts over battery voltage from step # 1
Check for undercharge • 1. Engine off - Write down voltage of Battery • 2. Run for 2 minutes at 2000 RPM • 3. Turn on all accessories • 4. Take voltage reading, Should go up at least .5 volts Minimum voltage is 13.2 But if charging system is working right I like to see it in-between 13.8-14.8 Volts (CDX says 13.7-14.4)
Tech Tips If voltage does not go up full field the Charging system. Put battery voltage into the coil windings to check the Alternator. (Cannot be done on some cars with internal voltage Regulators or cars that the regulation is controlled by the computer.) If diode trio burns out on GM products idiot light will be on but it will still charge. (might be dim)
Some Things You don’t want to do Never Ground the field coil wire. Never Arc across the Output Post. Never Disconnect the battery cable to see if the car still runs. Never try to charge a dead battery by using the alternator, you could burn up the alternator. Never allow the voltage to go over 16 volts Never work on electrical components without disconnecting the Battery (will the radio screen go blank if you take away the power and do you have the codes to fix it.)
Voltage drop • You always want to perform a voltage drop test when checking out a charging problem. Also can be called a circuit resistance test. • You need to check the ground side and the insulated side vehicle must be running and a load must be applied. You can add a load by just turning on the lights, heater and other accessories.
Voltage drop Insulated • Hook up Positive lead to the output of the alternator • Hook up Negative lead to the Positive terminal of the battery
Voltage drop Insulated • The reading should be less then .5 Volts This one is at .154 volts. Meter should be in the DC volt scale
Voltage drop ground side • Hook up Positive lead to the Negative side of the battery. • Hook up the negative lead to the frame of the alternator.
Voltage drop ground side • The reading should be less then .2 Volts This one is at .036 volts.
Lead hook up • Some times students look at lead hook up on charging systems and think that we have the wrong one on the wrong side. • Think about it what charges the battery so what is the most positive connection. • You can on a digital voltmeter hook up either way but what you will have is a negative sign on the reading.
Checking Ripple Voltage (AC voltage) Thanks for Picture from Fluke
Checking Ripple Voltage (AC voltage) • Checking Ripple Voltage Ripple voltage or (AC voltage) can be measured by switching your DMM to AC and connecting the black lead to a good ground and the red lead to the "BAT" terminal on the back of the alternator, (not at the battery). A good alternator should measure less than .5 VAC with the engine running. A higher reading indicates damaged alternator diodes. Thanks for Info from Fluke
The End for Now Get into the habit of checking the charging voltage on every car that comes into the shop. Not just when you have a problem. Then when a car comes into your shop you should know what the voltage is or should be before you even hook up a meter.