Download
1 / 24
270 likes | 375 Vues
CIVL 114 Civil Engineering Drawing. Topic 7 Concrete blocks Setting lineweight and printing. Outline. Seawall blocks drawing Front elevation Side elevation Before Printing Use a suitable linetype scale Assign appropriate lineweights Set up the plot details Reference reading

E N D
CIVL 114Civil Engineering Drawing Topic 7 Concrete blocks Setting lineweight and printing
Outline • Seawall blocks drawing • Front elevation • Side elevation • Before Printing • Use a suitable linetype scale • Assign appropriate lineweights • Set up the plot details • Reference reading • Homework
To draw the front elevation • Format – Layer – Layer properties manager • Prepare layers for center, hidden and dimension lines; use appropriatelinetypesand ltscale Details of the icon - refer to textbook
To draw the front elevation • Draw 2700 by 1350 rectangle; • OFFSET to inside by 40 (all chamfers: 40mm); (Modify – Offset) • Connect corners with lines
To draw the front elevation • EXPLODEand OFFSET the left edge by 100 for the hole; (Modify – Explode)
To draw the front elevation • Put it on the hidden line layer • Set the linetype and linetype scale as follows: • Format – Linetype – Global scale factor • LTSCALE (short cut : lts)
Shift + Right Click To draw the front elevation • To draw the (left) center line: • try LINE – (use FROM snap mode; by Shift+Right click) – • From Basepoint: (pick top left corner) • <Offset>: @ 800,0 • Specify next point: @ -300,-1350
To draw the front elevation • Put it on the center line layer • SCALE the center line by 1.2 (Modify – Scale)
To draw the front elevation • MIRROR everything on the left to the right
To draw the side elevation • Turn on both OSNAP and OTRACK for object tracking • RECTANG • Without clicking, touch the top right corner and move mouse to the right (dashed line appears; see below) • Enter 1000 (or other suitable separation) • Specify other corner point: @ 2025, -1350
To draw the side elevation • Modify - CHAMFER – specify both chamfer distances as 40 – enter P (polyline option) – pick the rectangle in side view **CHAMFER: similar to FILLET but bevels the edges rather than round them **
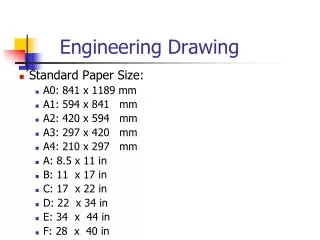
Before Printing Use a suitable linetype scale • Check your original drawing limits using the LIMITS command: they are from (0,0) to (a,b) (e.g. a = 12, b = 9) • Check the dimensions (AxB) of your paper, in mm (e.g. 297x210 for A4 or 420x297 for A3 paper) • What scale is to be used, 1:S (e.g. S = 50 for 1: 50 scale) • Approximately, the linetype scale should be (A/a)xS(e.g. 297/12x50). This is set in Format – Linetype Scale (for the Global Scale Factor)
Before PrintingUse appropriate lineweights • Choose File – Plot Style Manager (the following table appears)
Before PrintingUse appropriate lineweights • Double click “acad.ctb”(a file which stores the lineweight information by color) - click “Form View” tab and the menu appears:
Before PrintingUse appropriate lineweights • Select the color that you used for each line type when creating the drawing. e.g. you may have used red (color 1) for all center lines; purple (color 6) for hidden lines, blue (color 5) for steel bars, black (color 7) for solid lines (title block and concrete outline, etc.). • Assign the appropriate lineweight for each color (e.g. 1mm for blue, 0.5 mm for black, etc.) – Save & Close.
Set up the plot details File – Page Setup Manager(the Page Setup Manager menu appears)
Set up the plot details • Select “*Model*” and click “Modify…”, then the following menu appears:
Set up the plot details • For Plot style table, choose acad.ctb – Yes to use the lineweightes you assigned • Choose Printer/plotter (e.g. BarnCL5) and Paper size (usually A3) • In Plot Area, choose what to plot (e.g. by window & choose corners of title block) • Plot scale: • Check “Fit to paper” if scale is unimportant (e.g. just a rough draft) • If a scale is specified, then uncheck “Fit to paper” • Suppose scale is 1:50 (meaning: 1 mm on paper will represent 50 mm of actual object), while drawing dimensions are in mm. • Choose “1:50” directly or choose “Custom” and set 1 mm (on paper) = 50 units (on drawing) • In “Plot offset”, select “Center the plot” • Always Preview: change the orientation to Portrait or Landscape if needed (right-click - Exit to exit preview). Click “OK” – “Close” if all is OK.
Homework • Draw 1:1 (using the given dimensions in mm) on AutoCAD • Print at 1:50 scale on A3 paper (put both the two types of blocks on the same drawing) • Use proper lineweight as discussed in first lecture