Controller by:
Controller by:. Anthony Niemzak Elizabeth Littrell Elisabeth Chramer Stephen Mehi. Why a Guitar Hero Controller?. ‘Cause it’s awesome! It is interesting to our audience. It has a variety of shapes that would be challenging to model. It has enough parts for a group of four.


Controller by:
E N D
Presentation Transcript
Controllerby: Anthony Niemzak Elizabeth Littrell Elisabeth Chramer Stephen Mehi
Why a Guitar Hero Controller? • ‘Cause it’s awesome! • It is interesting to our audience. • It has a variety of shapes that would be challenging to model. • It has enough parts for a group of four.
The Shell • These parts of the controller fit together to create the shape of a guitar and house and protect the internal components.
The Strummer • This is used during game play to simulate strumming or picking.
The Fret Board Keys • These keys are what a person presses when playing the game to represent different musical notes.
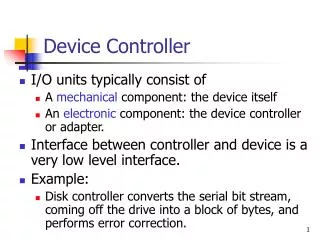
Fret Board Circuitry • These internal circuits register when a button is pressed or the guitar is strummed and send the information to the console.
Strap Holders • These attachments fit in place to secure a strap.
The Start & Select Keys • These buttons are used to perform basic functions of the game, such as starting and selecting.
The Whammy Bar Assembly • These parts of the guitar measure the amount of torque applied when using the whammy bar.
Strummer and Start / Select Circuitry • These internal circuits register when a button is pressed or the guitar is strummed and send the information to the console.
Screws • These internal circuits register when a button is pressed or the guitar is strummed and send the information to the console.
Anthony Guitar Face Top Guitar Face Bottom Fret Board Top Fret Board Bottom
Manufacturing Process • All plastic shell parts were injection molded.
Part Improvement • Lengthened fret board for comfort. After – 650mm Before – 450mm
Elisabeth Guitar Strap Holder Small Guitar Strap Holder Large Strummer Spring Clip
Manufacturing Process • The simple plastic pieces were injection molded.
Part Improvement • Wireless!
Steven Fret Button Start/Select Button Fret Button Circuit Board Screw Whammy Bar Holder
Manufacturing Process - Screw • Thread Rolling
Part Improvement • Rounded keys for lefties. Before After
Elizabeth Whammy Bar Potentiometer Strummer Circuit Board Start/Select Circuit Board
Manufacturing Process • The simple plastic pieces were injection molded.
The Whammy Bar • These parts of the guitar measure the amount of torque applied when using the whammy bar.
Part Improvement • Thicker whammy bar to prevent breakage. Before – diameter 3.5mm After –Diameter 5mm