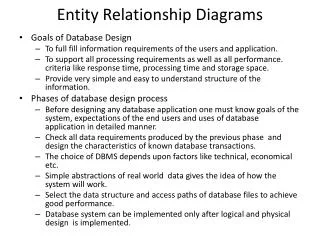
How to Draw Entity Relationship Diagrams using MS PowerPoint
110 likes | 431 Vues
How to Draw Entity Relationship Diagrams using MS PowerPoint. Richard Holowczak Computer Information Systems Zicklin School of Business Baruch College, CUNY Richard_Holowczak@baruch.cuny.edu. Step 1: Create a blank presentation Step 2: Insert a new, completely blank slide as below:.

How to Draw Entity Relationship Diagrams using MS PowerPoint
E N D
Presentation Transcript
How to Draw Entity Relationship Diagrams using MS PowerPoint Richard Holowczak Computer Information Systems Zicklin School of Business Baruch College, CUNY Richard_Holowczak@baruch.cuny.edu
Step 1: Create a blank presentation Step 2: Insert a new, completely blank slide as below:
Step 3: If you do not see the drawing tools on the tool bar, make certain they are displayed View -> Toolbars -> Drawing This toolbar is usually at the Bottom of the screen
Model: Salon – Core Business Creation Date/Time: August 30, 2002 8:01 PM Modified Date/Time: September 9, 2002 3:45 PM Last Modified by: R. Holowczak 12 pt. font Gray background Step 4: Create a legend on the diagram Use the Text Box drawing tool Include what the ER model represents, when it was Created and last modified and who modified the diagram
Model: Salon – Core Business Creation Date/Time: August 30, 2002 8:01 PM Modified Date/Time: September 9, 2002 3:45 PM Last Modified by: R. Holowczak • Step 5: Create an entity • Use the text box tool • Format the box with a solid border • Make the Entity name Bold • Use the space bar to center • Make dashes to indicate the attributes • Put (id) next to the identifier(s) • Customer • CustomerID (id) • FirstName • LastName • CustPhone • Street • City • State • Zip 14 pt. font size and 2 pt. sized black border
Model: Salon – Core Business Creation Date/Time: August 30, 2002 8:01 PM Modified Date/Time: September 9, 2002 3:45 PM Last Modified by: R. Holowczak Step 6: Once you have one nice entity, just copy and paste it to make more • SalonService • ServiceID (id) • ServiceName • ServiceDuration • ServicePrice • ServiceRendered • LineItemNumber (id) • ServiceExtendedPrice Note: Use a double border to indicate Id-dependent entities • Appointment • AppointmentID (id) • AppointmentDate • AppointmentTime • Employee • EmployeeID (id) • FirstName • LastName • PayRate • Customer • CustomerID (id) • FirstName • LastName • CustPhone • Street • City • State • Zip • Payment • PaymentID (id) • PaymentDate • PaymentAmount • PaymentMethod • ReferenceNumber
Model: Salon – Core Business Creation Date/Time: August 30, 2002 8:01 PM Modified Date/Time: September 9, 2002 3:45 PM Last Modified by: R. Holowczak Step 7: Add relationships Use the line drawing tools in 4 parts Dashed line (optional) Solid Line (mandatory) Crows foot (Many) two small lines Group these and copy/paste to make more Don’t forget to add relationship comments/titles dashed line, 2pt. weight solid line, 2pt. weight • Customer • CustomerID (id) • FirstName • LastName • CustPhone • Street • City • State • Zip Two small solid lines a payment submitted by • Payment • PaymentID (id) • PaymentDate • PaymentAmount • PaymentMethod • ReferenceNumber Hint: Try and make all relationships go in the same direction paying
Collection of pre-made relationships One to many Optional to Mandatory One to One Optional to Mandatory Many to Many Optional to Mandatory
Model: Salon – Core Business Creation Date/Time: August 30, 2002 8:01 PM Modified Date/Time: September 9, 2002 3:45 PM Last Modified by: R. Holowczak Step 8: Copy and paste relationships Make certain the relationships make sense! • SalonService • ServiceID (id) • ServiceName • ServiceDuration • ServicePrice a rendering of • ServiceRendered • LineItemNumber (id) • ServiceExtendedPrice a service rendered as a specific service rendered during rendered by a reservation to provide rendering • Appointment • AppointmentID (id) • AppointmentDate • AppointmentTime • Employee • EmployeeID (id) • FirstName • LastName • PayRate a reservation for • Customer • CustomerID (id) • FirstName • LastName • CustPhone • Street • City • State • Zip making Example: ONE Customer May Be making MANY Appointments ONE Appointment Must Be a reservation for ONE Customer
Conclusion • Once you’ve completed one, you’ll never have to do it again - just copy and paste