Download
1 / 17
170 likes | 331 Vues
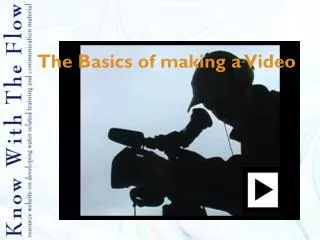
The Basics of making a Video. Contents. Why using videos The camera The main buttons on your video camera Camera angles Framing Audio Planning and preparing Interviews Tips Links (guidelines and instruction videos). 1. Why using videos. To tell a story

E N D
Contents • Why using videos • The camera • The main buttons on your video camera • Camera angles • Framing • Audio • Planning and preparing • Interviews • Tips • Links (guidelines and instruction videos)
1. Why using videos • To tell a story • To explain (local) situations visually • To clarify complex situations • To keep the attention of your audience • To transfer a message • To increase intercultural understanding
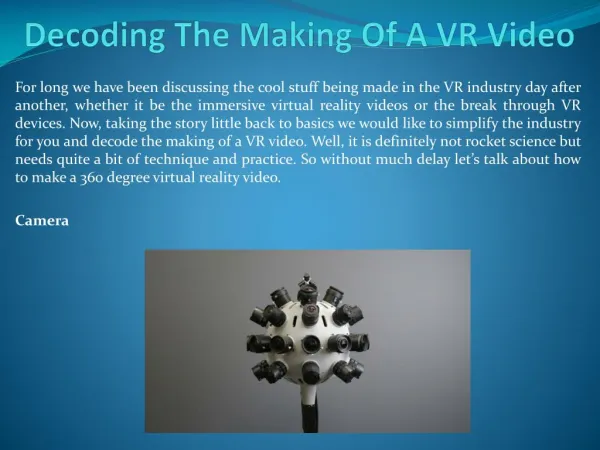
2. The Camera A digital video camera • You don’t have to be an expert or very technical person to make your own video. (Digital) video cameras are easy to handle. All you have to do is point your camera and push record. • Though, to illuminate how a digital camera works, here is some technical background information. The three main components within the camera are: • Lens (transmits light on the imager) • Imager (converts light into electric signal) • Recorder (converts the electric signal into a video signal and stores it on a recording medium)
3. The main buttons on your video camera The buttons and how they look (push, switch or scroll) may differ between different camera brands, but the main functions are: • Power on /off • Record: To start recording what you see on the LCD-screen or in the viewer. • Playback controls (located often on or near the LCD- screen) : After you have recorded something you can play back to watch the footage. • Automatic/manual: Auto-functions usually perform well enough for amateur filmmakers • Zoom in / out : This function moves your point of view closer, or further away. It is similar to moving your camera itself closer or further away from the object. • Menu : To adjust camera settings
4. Camera angles (1) The angle that a camera holds in position to the subject may have a psychological effect on the viewer. Bird’s eye view: Directly from above. Subjects may become unrecognizable, people may look like ants High-angle: The viewer looks down on the subject from an angle. Subjects become part of a wider setting Eye-level: As observed by humans, a quite neutral shot. Low-angle: Increases height of subjects, the viewer is being looked down upon by the subject. The setting becomes less obvious since only sky or ceiling are visible in the background. Canted (Dutch) angle: A tilted camera position to suggest imbalance and instability and a specific point of view.
5. Framing (1) • Everything in your frame is important. Not just your subject. • Be aware of what is visible in the background. Wilted plant are distract and might even cause a sad feeling. • Is there something that can distract people away from the subject? For example bright colors or movement. • How is the lightening? Look at shadows, especially in people’s faces. • Pay attention to the edges of your frame, don’t cut people off in weird proportions, for example half faces.
5. Framing (2) The frame of your shot has a relation to the meaning of your shot. What you make visible to the viewer tells a story. For example, this picture portrays a relation between the woman and the forest. A close-up of the woman would tell a totally different story. • Long shot: focus on setting and landscape • Establishing shot: overview of the situation • Medium shot: background detail is minimal, focus on 1-3 persons from waist height • Close up: very close by, a face covers the whole frame
5. Framing (3) • Lead room (also called nose, head or looking room) : If people speak, look or move into a certain direction, leave some room open in this part of the frame. This will look more natural Too little lead room Too much lead room
6. Audio (1) Videos are not only visual, sound is almost as important for the experience and understanding. • Tips: • Be aware of background noises; such as voices, music, air-conditioning, phones and wind. A little bit of wind can destroy your sound recordings! • Do a sound check • When conducting an interview it is better to use an external microphone, because the built-in microphones often pick up a lot of background noise. With most cameras the microphone can be plugged into the “mic input” or “AV input” socket of your camera.
6. Audio (2) Handheld microphone Lavalier (lapel) microphone with clip • With a hand mic it’s often better to hold the mic yourself, instead of giving it to the subject. But then you should put your camera on a tripod, because otherwise it is impossible to keep the image steady • Hold the mic at a constant distance and angle from the mouth (around 15-20cm).
7. Planning and Preparing • In order to make your video look more professional you need to plan before you start filming. Try to think of technical or practical problems you may encounter. • Imagine what the final product will look like. And try to think of the editing process. What kind of shots do you need? How can you tell a visual story? If your subject changes settings it might be an idea to include a shot of the person travelling or walking in or out a door. • It may help to draw a storyboard (like a comic book), it helps you visualize the story you want to tell. • Prepare your interview questions. Make a list of the issues you want the person to tell about. • Make a schedule of what, where and how you are going to film. • Think about the materials you need.
8. Interviews • Make people feel comfortable • Cover the red recording light with tape, the light switching on tends to make people nervous • Start with easy questions, about family and friends for example. This gives people the opportunity to get used to the setting and the camera • Ask them to look at a specific point; you, the camera or an object /person behind you. This gives people something to look at, but make sure they don’t stare.
9. Tips • Always bring the charger of your camera and an extra battery. Also, bring extra batteries for any device that uses batteries, like your microphone. • Keep recording. It is better to film a bit longer, because short recordings are more difficult to edit. • Use the zoom function sparsely, it is very tiring to watch and it doesn’t look professional. • Ask people that are being interviewed to repeat your question. • Use different compositions. Change the way people are proportioned in the frame. If all your interviews are close-ups it is very boring to watch. • Filming with your camera on a tripod gives a steady image, but may also bring stiffness to your image. Tripod
10. Links Video: • www.howcast.com/en/videos/383096-How-To-Shoot-a-Video How to shoot a video? • www.youtube.com/watch?v=gNs2iCHpOG0 Eight important tips for filming • www.youtube.com/watch?v=d1japIhKU9I&feature=fvw Filmmaking techniques: Camera shots, angles & movement, focus techniques, white balance, composition, lightning, etc. Guidelines/ tutorials: • www.mediacollege.com/ (see: video, audio, lighting) • www.aber.ac.uk/media/Documents/short/gramtv.html#Top
Want to share your water video?Upload it on www.thewaterchannel.tv