Electrophoresis
330 likes | 2.27k Vues
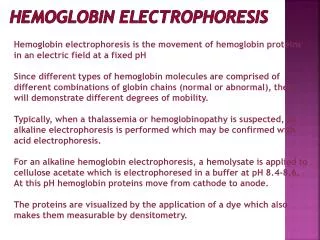
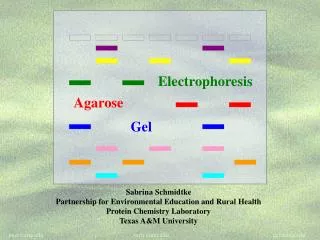
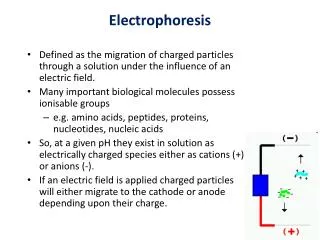
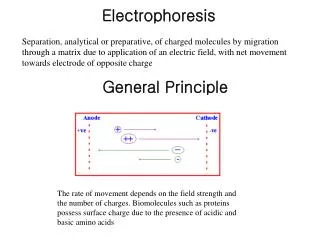
Electrophoresis. The purpose of electrophoresis is to separate molecules of DNA, RNA or protein. Separation can be based upon: Size Shape Isoelectric point (protein only). Separation is achieved by using a matrix (gel) and an electromotive force to propel the molecules through the gel .

Electrophoresis
E N D
Presentation Transcript
Electrophoresis • The purpose of electrophoresis is to separate molecules • of DNA, RNA or protein. • Separation can be based upon: • Size • Shape • Isoelectric point (protein only). • Separation is achieved by using a matrix (gel) and an electromotive • force to propel the molecules through the gel .
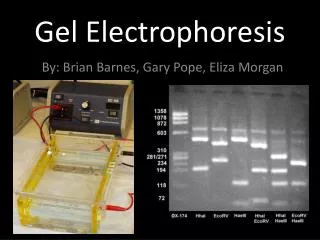
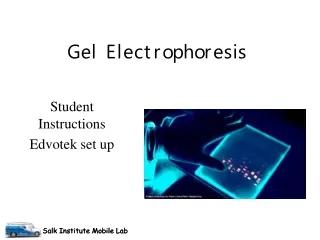
Setting Up an Electrophoresis Gel • To run a gel electrophoresis you will need • Gel tray • Gel comb • Electrophoretic gel box • Agarose powder • Buffer solution • Dye • Electric field
Electrophoresis involves: 1. Preparation of the gel tray 2. Melting the agarose in a buffer solution • Addition of dye to the molten agarose solution (optional) 4. Pouring the molten agarose into the casting tray with a comb 5. Letting the gel solidify 6. Submerging the solid gel in buffer solution in the gel box 7. Removing the comb to reveal the wells in the gel 8. Loading the samples into the wells 9. Applying the electric current and “running” the gel 10. Analyzing the samples separated in the gel
Determining the size of gel needed • One must first decide what size gel will be run. In general: • For a small gel tray, about 50 ml of gel is needed • For a medium gel tray, about 100 ml of gel is needed • For a large gel tray, about 200 ml of gel is needed (note: these are estimates, the volumes will vary with the apparatus used! small large medium
Preparing Your Gel Tray • To form a mold for the hot liquid gel, the tray must be taped on the open sides • To accomplish this pull one piece of masking tape over the open side leaving about 1 cm on the bottom to fold it over thus making a good seal • Pour the gel in and insert the gel comb • Let the gel cool • Remove the tape and the comb and the gel is ready for use Note: some electrophoresis apparatuses come with gel-casting boxes
Making the Gel Solution • Weigh out the appropriate amount of agarose powder • For example 100ml of a 1.6% Agarose solution will need 1.6 grams of agarose • Pour the agarose powder into a Erlenmeyer flask (the flask should be at least 2X the volume needed to avoid boiling over when the solution is heated) • For example 100 ml of gel solution will be made in a 250 ml Erlenmeyer flask
Making the Gel Solution Agarose Powder This is commercially available Has the consistency of fine sugar Non-toxic Weighing out the powder Use a weigh boat and scale Tare the scale with the empty container Add an appropriate amount of agarose
Making the Gel Solution • Add the appropriate volume of buffer to the agarose powder • Commonly TAE or TBE are used for buffers. • The buffer controls the pH of the solution and the salts in the buffer improve conduction of electricity TAE and TBE buffers are available commercially
Making the Gel Solution • Cover to prevent water loss and microwave initially at high power for 60 seconds per 100 ml of solution Remove and carefully stir by swishing the solution (the solution may be superheated so wear oven gloves!) Return solution to the microwave and keep heating and swishing for 30 second intervals until all the agarose powder has dissolved Note: this can also be done using a hot-plate!
Pouring the Gel • After the gel has cooled (to 60C) and before it starts setting, the gel solution must be poured into the prepared gel tray • Pour slowly to ensure no bubbles form • Pour until the comb teeth are at least 50% covered by the gel
Removing Bubbles that Form • If a few bubbles form, use a disposable pipette tip to move the bubbles to one side of the gel tray – keep the bubbles away from the middle of the gel and the comb. • Bubbles can interfere with DNA progressing evenly through the gel Let the gel set until it become opaque
Placing the Gel Tray into the Tray Box • Carefully remove the tape from your gel tray • Place the gel tray (with gel) in the tray box • Add the Tris buffer (same buffer that was used to form the gel) into the tray box until the level of buffer is 4 or 5 mm above the gel • Remove the comb carefully- the holes made by the comb will become the wells. This is where the DNA samples are placed
Remove the tape carefully from each end of the gel Carefully remove the comb.
Preparing the DNA Samples • To properly run a gel, one must add a loading buffer to the samples before they are placed into the wells. The purpose of the loading buffer is three-fold • To track the progress of the electrophoresis • To make it easier to load the wells • Add to the density of the DNA sample so the solution will sit in the well • Decide on the sample order (and take note of this in lab notebook!) • Put up to 20 µl of a DNA sample in a clean tube • Add 5 µl of loading buffer to the sample
Loading Your Gel (Part 1) • Place a piece of black paper under the tray box to help visualizing the wells. • Carefully withdraw the sample from the tube with a pipettor. • Gently pipette the sample into the well • Keep track of the order in a notebook!
Loading Your Gel (Part 2) • Remember to leave some wells free for the ladders • Ladders are size standards that assist in identifying the size of a sample after the gel has run • You should leave a space between your samples and the ladders • The last wells on either side of the gel are usually left empty as these lanes do not run properly
Attaching Your Tray Box to a Power Supply:Part 1 Place the cover on the tray box and attach the electrodes Remember “DNA runs to Red” The electrode near the wells attaches to the negative terminal (cathode) and the other electrode attaches to the positive terminal (anode). Once the wires are attached, turn on the voltage. As a general rule: 5 Volts per cm (distance between electrodes on the tank) Distance between electrodes
Attaching your Tank to a Power Supply:Part 2 • In general up to 100 Volts is used for a small gel and up to 200 Volts for a medium gel • If current is running from the cathode to the anode, tiny bubbles can be seen rising through the buffer solution from both the cathode and anode. • Never stick fingers into gel unless power source is off! Electrocution hazard!! • Run the gel until the loading dye has run at least halfway down the gel for good resolution of the samples
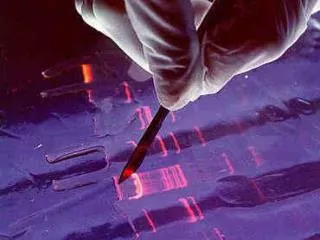
Analyzing Your Gel Ladder Ladder • Turn off the power supply • Disconnect the wires • Remove the gel tray with the gel from the tray box • Stain gel with a dye that will bind to DNA (we recommend using Fast Blast DNA stain from Biorad) • Size DNA fragments using your DNA ladder DNA samples
Where to Get More Information Electronic sources • Dolan DNA Learning Center Electrophoresis Animation • Colorado State: Agarose Gel Electrophoresis of DNA • Mama Ji's Molecular Kitchen • Molecular Biology Cyberlab • Genetic Science Learning Center