Intro to Pneumatics
Intro to Pneumatics. Presented by Jon Pannell. Lesson Breakdown:. Part One: Lecture covering: What are Pneumatics What is a “system” and what is it made of Applications Advantages and disadvantages Calculations with Pneumatics Part Two: Hands on lab and experimentation.

Intro to Pneumatics
E N D
Presentation Transcript
Intro to Pneumatics Presented by Jon Pannell
Lesson Breakdown: • Part One: Lecture covering: • What are Pneumatics • What is a “system” and what is it made of • Applications • Advantages and disadvantages • Calculations with Pneumatics • Part Two: Hands on lab and experimentation
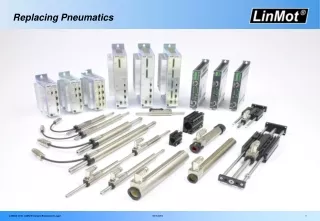
What are Pneumatics? • Pneumatics is a type of power transmission that uses a gas ( in our case, air) and pressure differential to create movement. • Akin to Hydraulics, hydraulics use oil, water, or other fluids instead of gases.
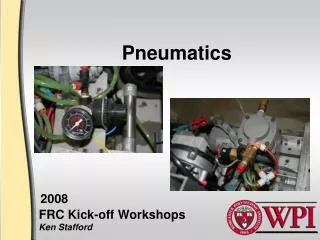
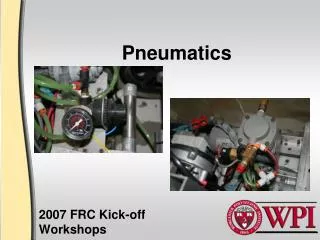
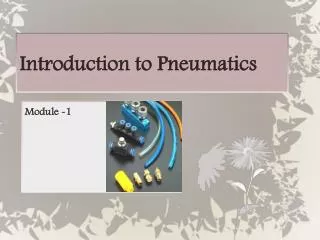
The Pneumatics System: • A “System” is a complete set of parts working together. • Our systems usually contain : • A compressor • Storage tanks • Regulators • Gauges • Valves and solenoids • Actuators • Fittings and tubing
Parts of the “System” Pt.1 The compressor: • Heart of the system. • Converts electrical energy to pneumatic potential. • Contains a relief valve protects compressor and system from overload • Controlled by a Spike relay
Parts of the “System”: Pt. 2 Air tanks: • Stores pressure to activate actuators • Our robots can have up to 2 (included in the KOP) Pressure Switch: • Used to signal Robot Controller when to turn on and off compressor
Parts of the “System”: Pt. 3 Regulators: • Adjust pressure output to working levels for actuators • 2 types : • Relieving and Non- Relieving Fittings: • Quick release and pipe thread. • Pipe thread requires Teflon tape
Parts of the “System”: Pt. 4 Valves and Solenoids: • Used to control actuators • Types: • Double Solenoid (detented) • Single Solenoid (spring offset)
Parts of the “System”: Pt. 5 • Actuators • Linear – Often called cylinders – can be made to perform complex motions by using mechanical components • Rotary • Limited Rotation • Self-contained • Rack and pinion or lever • Air Motors or turbines • Clamps
ActuatorsOperation with Flow Controls Typically Flow Controls are mounted between the valve and the cylinder as close to the cylinder as practical. The check valve permits free flow into the cylinder from the valve and metered flow from the cylinder to exhaust Operation
Complete kit Weightequal or lighter than comparable alternatives Simple Review the manual that comes with the pneumatic kit and you’re ready to go StrongForce from 9 lbs to 180 lbs – easily adjustable Adjustable Force Different bore cylinders change the available force and By adjusting the applied pressure you can instantly adjust the force DurableNo burned up motors – stall with no damage Easy to expand once installed Advantages of Pneumatics
Disadvantages for Pneumatics • Initial weight cost is high ~15lbs • Requires fine tuning for optimum use • Limited uses with larger actuators
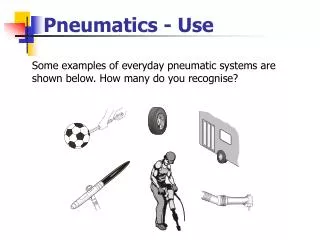
Applications • Pneumatics are good for straight movements, but, with the right linkage can be used for rotation or other movements.
Calculations: • Output force is determined by: • Bore or diameter • Pressure over ambient • Cylinder Force • Push Force = x cylinder radius2 x Pressure (psig) • Pull Force = Push Force - x rod radius2 x Pressure (psig)
Tips & Tricks • Minimize Leaks (better yet, remove them completely) by careful use of teflon tape and careful assembly of tubing and fittings. Teflon tape should start two threads back and wrap in the direction of the threads. • With no movement taking place the compressor should charge the tanks and then shut off. It should not restart until a valve and cylinder is operated • Use the Compressor Vibration Isolators. The Compressor is a reciprocating device and will cause sympathetic vibrations throughout your assembly unless they are used. • When ordering custom cylinders, use extreme care on the form,both on the address and models ordered
Tips & Tricks • Pressure Switch must be used as inputs to the controller. They cannot handle the amperage of the compressor. • The Norgren Regulator should be first with the Monnier unit used after that if needed. • Make sure you have adequate pilot pressure (30 psi) for the valves. • When using the double solenoid valve, energize only coil one at time. • Fittings are not required in the exhaust ports unless the circuit requires them. • Always stay clear of cylinders in motion. Until compressed air is being metered, flow controls do little to control speed. • Download additional copies of the pneumatic manual from www.PneumaticsFIRST.org
Resources: • First Pneumatic Presentation 2004 • http://www.bimba.com/products/prod7.htm • http://www.teamdavinci.com/understanding_pneumatics.htm