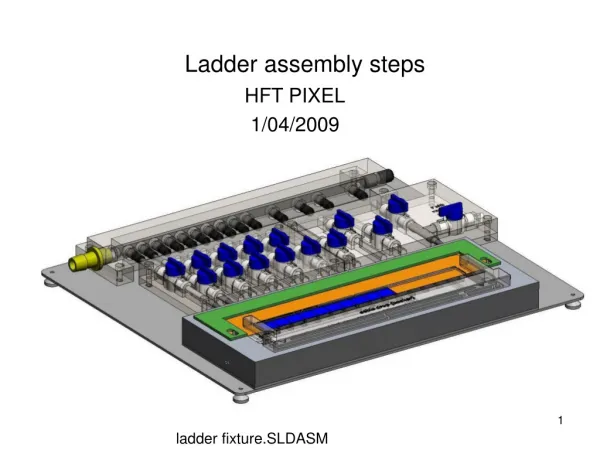
L6 Ladder assembly
L6 Ladder assembly. T. Tsuboyama 21 Sept. 2011. Motivation. The assembly of Origami needs repetition of gluing and wire bonding. If this is done in companies, we will occupy the production for much longer time than wire bonding.

L6 Ladder assembly
E N D
Presentation Transcript
L6 Ladder assembly T. Tsuboyama 21 Sept. 2011
Motivation • The assembly of Origami needs repetition of gluing and wire bonding. If this is done in companies, we will occupy the production for much longer time than wire bonding. • I summarize the necessary steps for the ladder assembly and estimate the necessary period. • These assumptions have not been confirmed by Onuki, Irmler and Gfall, who are designing the Origami ladder structure. • --------------------------------------------------------------------- • In the 14 Sept 2011 meeting, I was told the 13 Sept. version is completely wrong. I update this report according to the advices.
Origami module structure • A Origami module consists of DSSD, Airex sheet (heat insulator), Origami PCB and Pitch adapters. Pitch adapters are used to lead the signal in bottom (r-phi) side to the top (ORIGAMI) side. PAs are glued to DSSD and ORIGAMI. ORIGAMI PCB Airex sheet (1mm thick) DSSD PA (Pitch adapters for the bottom side strips) ORIGAMI PCB Airex sheet (1mm thick) DSSD
L6 Ladder assembly • Layer6 = 3 Origami modules + 2 Normal hybrid modules • Assembly is not done in sequence. • Four Barrel sensors are assembled first. • The slanted sensor is done later. • I do not count the time for the ORIGAMI/Hybrid assembly.
DSSD without ORIGAMI(Normal hybrid modules) • gluing • top side PA • bottom side PA Kapton flex Kapton flex Hybrid (double sided) DSSD Hybrid (double sided) DSSD • Wire bonding on both sides • top side • bottom side 3 working day will be necessary.
Origami module structure • Gluing: • DSSD and PA • DSSD and Airex • Airex and ORIGAMI • Origami and PA hybrid 4 barrel DSSDs The assembly is done in 7 steps. • Wire bonding • DSSD and PA (r-phi) • DSSD and Origami (Z) • PA and APV25
Origami module structure • Gluing: • DSSD and PA • DSSD and Airex • Airex and ORIGAMI • Origami and PA hybrid 4 barrel DSSDs The assembly is done in 7 steps. • Wire bonding • DSSD and PA (r-phi) • DSSD and Origami (Z) • PA and APV25
Origami module structure • Gluing: • DSSD and PA • DSSD and Airex • Airex and ORIGAMI • Origami and PA hybrid 4 barrel DSSDs The assembly is done in 7 steps. • Wire bonding • DSSD and PA (r-phi) • DSSD and Origami (Z) • PA and APV25
Origami module structure • Gluing: • DSSD and PA • DSSD and Airex • Airex and ORIGAMI • Origami and PA hybrid 4 barrel DSSDs The assembly is done in 7 steps. • Wire bonding • DSSD and PA (r-phi) • DSSD and Origami (Z) • PA and APV25
Origami module structure • Gluing: • DSSD and PA • DSSD and Airex • Airex and ORIGAMI • Origami and PA hybrid 4 barrel DSSDs The assembly is done in 7 steps. • Wire bonding • DSSD and PA (r-phi) • DSSD and Origami (Z) • PA and APV25
Origami module structure • Gluing: • DSSD and PA • DSSD and Airex • Airex and ORIGAMI • Origami and PA hybrid 4 barrel DSSDs The assembly is done in 7 steps. • Wire bonding • DSSD and PA (r-phi) • DSSD and Origami (Z) • PA and APV25
L6 Ladder assembly • We should shorten the time for ladder production. • What if we can prepare enough assembly jigs? • 3 Origami modules can be made in parallel. • 4 days for glue cure • 3 days for wire bonding. • Normal modules can also be assembled in parallel, we may reduce more. A ladder could be made in 15 days. • This will be about same for all ladders. • 10 months are necessary to produce 20 ladders. • If we can not shrink the ladder production period, we need to share a Layer by several groups.
Days necessary for L6 assembly (1) Sensors with normal hybrids: glue (PE1+PE2) and bond wires (both sides, 2 days) In parallel, PA1/PA2 are glued to 3 DSSDs and bond wires (p-side, 2 days). We need 3 sets of PA jig Here the alignment of sensors is done. (2) Barrel 4 sensors are aligned and ribs are glued. The precision of DSSD sensors are set here. We need more time for glue cure. (3 days) (3) The Airex sheet is glued on 4 barrel sensors. (1 day). (4) ORIGAMI PCBs are glued. (2 days). We assume ORIGAMI PCB are assembled somewhere else. (5) Z (n-side) wire bonding (0.5 days)
Days necessary for L6 assembly (6) PAs are folded and glued to ORIGAMI. Then wire bonding (1.5 days) (7) The slant sensor and hybrid is glued to the rib. (1 day) (8) After glue is cured. The connector part is completed. (1 day) • In total, 1 ladder requires 12 days. (2 weeks). • It will be efficient if glue curing is done in week ends.
Comments in the meeting • Coordinate measurement should be done after sensors are glued to ribs. • Glue cure can cause precision degradation. That should be taken into consideration. • Spare time is necessary for case of time consuming problems: wire bonding efficiency sometimes drops suddenly and needs some time to restore. • Some gluing step can be done before the previous glue curing is completely finished. • In total 2 weeks seem to be reasonable.