This Presentation Contains Narration and Notes
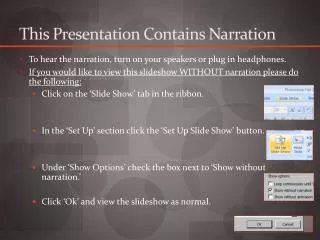
This Presentation Contains Narration and Notes. To hear the narration, turn on your speakers or plug in headphones. If you would like to view this slideshow WITHOUT narration please do the following: Click on the ‘Slide Show’ tab in the ribbon.


This Presentation Contains Narration and Notes
E N D
Presentation Transcript
This Presentation Contains Narration and Notes • To hear the narration, turn on your speakers or plug in headphones. • If you would like to view this slideshow WITHOUT narration please do the following: • Click on the ‘Slide Show’ tab in the ribbon. • In the ‘Set Up’ section click the ‘Set Up Slide Show’ button. • Under ‘Show Options’ check the box next to ‘Show without narration.’ • Click ‘Ok’ and view the slideshow as normal. • The notes at the bottom are a transcription of the narration or extra information.
Microsoft Office Excel 2010 short course SECTION I OFFERED BY INSTRUCTIONAL COMPUTING UNIVERSITY OF MISSOURI – ST.LOUIS Fall 2011
Accessibility • Start button Microsoft Excel • Or Start button All Programs Office Applications Microsoft Excel 2010
Entering and Formatting your data • Move the cell pointer to the cell you want to insert data, type data, and press enter. • To format the cell, right click on the cell you wish to format, then click on “Format Cells...”
Working with rows and columns [1] • Inserting rows and columns: • Click on Home Tab • Open Insert box in the Top, Right hand corner. • Or Right click at the cell and then click insert
Working with rows and columns [2] • Deleting rows and columns by right click at the row/column then click at “Delete..”
Example: = SQRT(225) + B2 Creating and Using Formulas • Operator such as + (for addition) and * (for multiplication) • Cell references • Values or text • Worksheet function (such as SUM or AVERAGE) A formula entered into a cell can consist of any of these elements: Operator Cell reference Value Worksheet function
Entering Formulas • In order to enter a formula, simply choose the cell and click • on the Formula tab on top • At the cell, simply type an equal sign (=) followed by a formula. E.g. A6 = A1 + A5. • Different formulae can be entered depending on the operation. Sum (under AutoSum) Rate (under Financial) Search (under Text) And / Or (under Logical) OR
Inserting a function into a formula • Similar to creating a formula, to insert a Function, click on Formulas, and then on Function Categories Function Description
Using References in Formulas [1] • Relative: The row and column references can change when you copy the formula to another cell because the references are actually offsets from the current row and column. • Absolute: The row and column references do not change when you copy the formula because the reference is to an actual cell address. • Mixed: Ether the row or column reference is relative or absolute There are 3 types of references you can use:
Using References in Formulas [2] Example Relative Reference: =(A17+A18)/A19 Absolute Reference: =($A$17+$A$18)/A19 Mixed Reference: =(A$17+$A18)/A19 $ ARE IMPORTANT
Referencing cells outside the worksheets [1] • To use a reference to a cell in another worksheet in the same workbook, use this format: SheetName!CellAddress Example: =A1 * Sheet2!A1 • To use a reference to a cell in a worksheet in a different workbook, simply insert its file name: [WorkbookName]SheetName!CellAddress Example: =[Budget.xls]Sheet1!A1
Referencing cells outside the worksheets [2] • If the workbook name in the reference includes one or more spaces, you must enclose it (and the sheet name) in single quotation marks. Here is a formula that refers to a cell on Sheet1 in a workbook name Budget for 2003 = A1 * ‘[Budget For 2003]Sheet1’!A1
Making Charts [1] • In order to insert a chart, simply click on Insert, and then choose which chart to be utilized. • Depending on how the graph should look like, different graph icons can be used. 1. 2. 3. 4. 5. 6. 7. Column Graph Line Graph Pie Graph Bar Graph Area Graph Scatter Graph Other Graphs
Making Charts [2] • In the second step, the data that is to be used has to be specified. • In order to do that, click on Design after inserting the chart, and then on the Select data icon.
Making Charts [2 cont’] • Once the below window opens up, • New series can be added. • Existing series can be deleted or edited. • Graphs can be switched from Rows to Columns. Switches between Rows and Columns Adds New Series to the Graph Edits existing Series Removes Series
Making Charts [3] • The last step of creating a chart is filling the graph with labels such as Chart title, Axes titles, Legend, Data labels etc. • To do that, click on Layout under Chart Tools. From there, each icon represents a different title or label. To Insert a Chart Title To Show or Hide Data Table To Insert Axes Title To Create Data Labels To Modify Location of Legend
Making Charts [4] • It can be specified where to place the New Created Chart, by clicking on Design under Chart Tools, and then by clicking on Move Chart Location. • The Chart can be either saved • Onto a New sheet • OR • Onto an existing Sheet
Saving • Click on File tab. • Click Save or Save As > Excel Workbook (.xlsx) or other types.
Printing (1) • Select the area you would like to print • Go to the File tab located on the top – right hand corner. And then go to Print.
Printing (2) • If you would like to fit all the worksheet into one page (in the case that the worksheet is bigger than A1 paper), simply go to Page Layout, and change the Width and the Height to 1 page rather than Automatic, under Scale to Fit. Change both the Width and the Height to 1 page
Printing (3) • Formulas • Hold CTRL + ~
Questions? If any further questions arise, please contact a lab consultant in any of the following Instructional Computing Labs. SSB 103 SSB 452 Benton Hall 232 Math TLC (UC 050) Ward E. Barnes Library Thomas Jefferson Research Commons
Additional Information • http://www.cetc.umsl.edu • The Microcomputer Program at the University of Missouri-St. Louis offers day and evening computer courses as part of the Chancellor's Certificate series. • http://www.umsl.edu/stg • The Online Student Technology Guide has answers to many computing questions. • http://help.umsl.edu • Online self-service solutions for UMSL Technology Issues