Fashion and Style Reference Guide
620 likes | 699 Vues
Fashion and Style Reference Guide

Fashion and Style Reference Guide
E N D
Presentation Transcript
4-H MOTTO Learn to do by doing. 4-H PLEDGE I pledge My HEAD to clearer thinking, My HEART to greater loyalty, My HANDS to larger service, My HEALTH to better living, For my club, my community and my country. 4-H GRACE (Tune of Auld Lang Syne) We thank thee, Lord, for blessings great On this, our own fair land. Teach us to serve thee joyfully, With head, heart, health and hand. This project was developed through funds provided by the Canadian Agricultural Adaptation Program (CAAP). No portion of this manual may be reproduced without written permission from the Saskatchewan 4-H Council, phone 306-933-7727, email: info@4-h.sk.ca. Developed: September 2013. Writer: Elya Lam
Table of Contents Table of Contents Unit 1: Fashion and Style What is “style”? ............................................................................................................... 1 What is “fashion”? ........................................................................................................... 1 The History of Fashion Design ......................................................................................... 1 Famous Fashion Design Companies and Designers ........................................................ 2 Developing Your Personal Style ...................................................................................... 3 Unit 2: The Design Process The Design Process .......................................................................................................... 7 Sketching ......................................................................................................................... 8 Design Technology .......................................................................................................... 9 Single Pieces and Fashion Collections ............................................................................. 9 Mood and Colour Boards ................................................................................................ 10 Unit 3: Textiles Types of Fabric ................................................................................................................ 11 Parts of Fabric .................................................................................................................. 15 Sewing with Specific Fabric Types ................................................................................... 16 Non-Fabric Textiles .......................................................................................................... 17 Traditional Textiles and Non-Traditional Uses ................................................................ 17 Unit 4: Clothing Creation Sewing Basics ................................................................................................................... 18 Sewing Machines ............................................................................................................. 20 Sergers ............................................................................................................................. 21 Body Measurements and Parts of the Body ................................................................... 22 Parts of a Garment .......................................................................................................... 25
Do You Need a Pattern? .................................................................................................. 34 Parts of a Pattern ............................................................................................................ 34 Making a Pattern ............................................................................................................ 35 Altering a Pattern ............................................................................................................ 36 Clothing Alterations ........................................................................................................ 36 Sewing without a Pattern ............................................................................................... 37 Using Dressmaker’s Forms .............................................................................................. 38 Accessorizing ................................................................................................................... 38 Unit 5: Fashion Marketing Creating a Clothing Line .................................................................................................. 40 Creating a Costume Scheme ........................................................................................... 41 Fashion Retail .................................................................................................................. 43 Fashion Marketing .......................................................................................................... 43 Runway Shows ................................................................................................................ 44 Unit 6: Careers in Fashion ................................................................................................... 46 Glossary ............................................................................................................................... 48 References ........................................................................................................................... 55 * This 4-H project was designed for youth with basic sewing skills and knowledge. If you are a beginner sewer, please take the sewing project first.
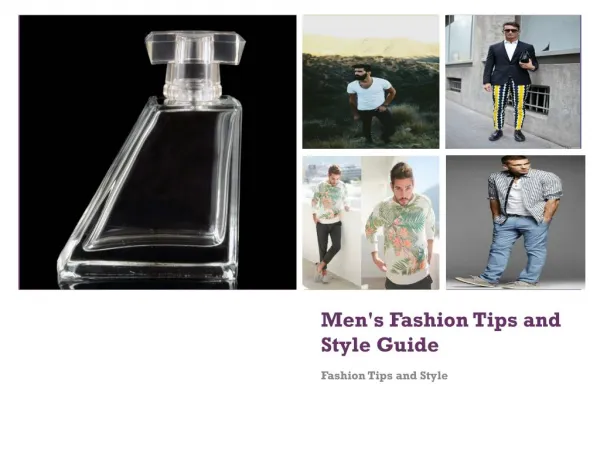
Unit 1: Unit 1: Fashion Fashion and and Style Style What is “style”? Your personal style is a combination of the clothes and colors you like to wear and the way you style your hair or apply makeup. An individual’s personal style is often quite fluid, and can change from day to day. Other people adopt a style as a type of “uniform”, and wear the same style every day for weeks, months, or even years. What is “fashion”? Fashion is a hard word to describe, but it generally refers to clothing and clothing trends. When people think about fashion, they generally think about high fashion – items of clothing that are unique, trend setting, and not readily available. High fashion clothing can often be seen on the red carpet being worn by celebrities. Custom, one-of-a-kind high fashion garments are referred to as haute couture. To be couture, a fashion house must be a member of the Syndical Chamber of Haute Couture of Paris, an honour that only 16 fashion houses currently have. Yet high fashion is not the only aspect of fashion. Fashion includes all aspects and styles of clothing, although it is usually used when referring to items that are trendy or popular with a large group of people. Affordable pieces (or individual items of clothing) that are worn by a large number of people are referred to as street-style, or street-fashion. Any garments purchased in a store or online (that are not custom-made), are known as ready-to-wear fashion. The History of Fashion Design Both men and women place great value on clothing and appearance – and have since the beginning of recorded history. Millions of books about the history of fashion and fashion design have been written, and there is far too much information to cover in this reference book. Up until the late 1800’s, all clothing was custom made for individuals. If you wanted a new dress or suit, you had to have it made by a tailor or seamstress (or make it yourself) based on a pattern that you chose. The trend of ready-to-wear clothing in North America is generally understood to have begun during the American civil war, as soldiers needed matching uniforms, coats and undergarments available in a variety of sizes. After the war Fashion and Style Reference Guide 1
ended, many of the factories that created these uniforms began mass-producing ready-to- wear men’s garments such as denim jeans and shirts. Women’s ready-to-wear clothing was not widely available, however, until the early 1900’s. It took many years for clothing sizing to become (generally) standardized throughout the industry, although you may have noticed that there are still significant sizing differences that exist between clothing companies! If you are interested in learning about the history of fashion design and the fashion industry, some valuable resources are: Websites •A History of Fashion – http://www.designcouncil.org.uk/about-design/types-of -design/fashion-and-textile-design/a-history-of-fashion/ •A Timeline of Modern Fashion – http://www.infoplease.com/spot/fashiontime1.html Books •Costume and Fashion: A Concise History by James Laver •The Complete Costume History by Auguste Racinet •20,000 Years of Fashion by Francois Boucher Famous Fashion Design Companies and Designers There are hundreds of thousands of fashion design companies and designers – some famous and some not. The following are some of the most famous fashion designers and companies today: Armani – An Italian design house noted for their menswear lines. Christian Dior – Christian Dior created an entirely new look for women’s clothing after the World War II. The Dior fashion house continues to create couture ball gowns and luxury accessories. CoCo Chanel – This founder of the famous Chanel brand is considered to be one of the most influential female designers of all times. She made popular a style that became known as “expensive simplicity”. The Chanel brand continues to be one of the most popular design houses in the world. Dolce & Gabbana – A high-fashion design house known for their luxury, hippie inspired pieces. Louboutin – A high-end footwear designer, Christian Louboutin is best known for the signature shiny red soles on each of his shoes. Louis Vuitton – Often called “LV”, is a French fashion house that was founded in the late 1800’s. Considered to be the world’s most valuable luxury brand, its clothing and handbags are often forged. 2 Fashion and Style Reference Guide
Philip Treacy – A European milliner who has famously designed headwear for royalty, celebrities, and films. Ralph Lauren – Ralph Lauren is one of the most famous American fashion designers, who has specialized in upscale casual clothing since the 1970’s. Tiffany & Co. – An American jewellery design house that is considered to be one of the most famous and well recognized in the world. Vera Wang – An American bridal and bridesmaid gown designer who also designs haute couture. Versace – This family run design house has expanded from the fashion industry to include accessories, home furnishings, and fragrances. Yves Saint Laurent – Yves Saint Laurent became famous for turning traditionally masculine clothes, such as suits and ties, into garments for women in the mid 1900’s. He also pioneered the “ready-to-wear” fashion industry. Even after his death, YSL lives on as one of the world’s most prominent design houses. Developing Your Personal Style Think about the types, colors, and styles of clothing that you wore when you were younger. Maybe you refused to leave the house without your superhero costume, or maybe you wore only the color yellow. There’s a good chance, though, that your fashion preferences have changed since then. That’s one of the fun and exciting things about fashion and style – with some creativity, you can create a whole new look and persona for yourself as often as you want. If you look through your closet and dresser drawers, you should begin to get a sense of your personal style. As you examine the clothes you wear on a regular basis, ask yourself the following questions: •Is there a color (or group of colors) that you wear regularly? •What types of clothing do you wear most often (shirts, skirts, jeans, sweaters, etc.)? •Is there a specific silhouette that you wear? •Is there a person, celebrity, or group that you look to for style advice and inspiration? Another important part of personal style is knowing what looks good on you. There are three things to consider when assessing what clothes look best on you: body shape; skin, eyes and hair; and what makes you feel good. Fashion and Style Reference Guide 3
Body Shape Body shape plays a large role in how clothes fit, and which clothes look good on you. Knowing how to identify your body type will help you choose clothing items and silhouettes that highlight your best features. If you are a girl (or are designing for girls) read this section: There are four basic body shapes for women. Take a look at your body in the mirror (while wearing tight-fitting clothing), and try to identify your own body shape. The Banana: You are thin (and possibly tall), with few curves. Try to choose clothes that highlight your waist to help break up the length of your body (and give you the illusion of curves if you are female). The Pear: Your waist and hips are wider than your shoulders. Use clothing that creates a stronger shoulder, and try belts that give the illusion of a waist. Avoid clothing that hits you on the widest part of your hips. The Apple: Your shoulders and breasts are wider than your hips, and you likely have slim legs. You’ve got great legs, so show them off with skirts or well-fitting pants. Wide or deep-V necklines will help visually narrow and lighten your shoulders and breasts. The Hourglass: Your hips and breasts are fairly similar in width, and you have a narrow curved waist. Your extended hourglass shape can look good in almost any clothing. If you are short, make sure that your pants and skirts are tailored so they aren’t too long. *For more information on women’s body shapes, and what clothes look best on them, visit the SheKnows Dressing for Your Body Type website http://www.sheknows.com/beauty-and-style/articles/826747/dressing-for-your-body-type 4 Fashion and Style Reference Guide
If you are a boy (or are designing for boys), read this section: There are five basic body shapes for men. Take a look at your body in the mirror (while wearing tight-fitting clothing), and try to identify your own body shape. The Trapezoid: You have a broad chest and shoulders, and a somewhat narrow waist and hips. As your upper and lower body are in balance, you can wear nearly any style of clothing. The Inverted Triangle: You have a broad chest and shoulders, and a very narrow waist and hips. Wearing straight cut pants (rather than skinny styles) will help create balance between your top and bottom halves. Avoid wearing jackets with shoulder pads or wide necklines, as it will make your upper half seem even broader. The Rectangle: Your shoulders are the same width as your waist and hips. Structured blazers and jackets will help create a wider upper body, while narrowing your waist. Avoid wearing sleeveless shirts, as they will emphasize the rectangular shape of your body. The Triangle: Your chest and shoulders are narrower than your waist and hips, so your lower half appears wider than your upper body. Try to wear fitted clothing – baggy outfits will make you appear larger than you are. Create a strong shoulder with structured jackets. Avoid wearing skinny pants, as they will make your hips appear wider. The Oval: The widest part of your body is your stomach. Wear vertical stripes to help you appear taller and thinner. Avoid wearing bright colored belts, as they will draw attention to your stomach. If you are short, make sure that your pants are tailored so they aren’t too long. *For more information on men’s body shapes, and what clothes look best on them, visit the Fashion Bean’s Guide to Dressing for your Body Type http://www.fashionbeans.com/2013/introduction-to-dressing-for-your-body-type/ Skin, Eyes and Hair The color of your skin, eyes and hair can be affected very dramatically by the color of clothing that you wear – the right colors can make your skin glow, and help you seem bright Fashion and Style Reference Guide 5
and alert, while the wrong colors can make your skin, hair and eyes appear dull and even give the illusion that you are sick or have dark circles under your eyes. Skin, eye, and hair tones are usually divided into four “seasons”. Before you can find out what season you are, you’ll need to identify whether you have warm or cool toned skin. Take a look at the inside of your forearm (right above your wrist) in natural daylight, and try to identify the undertones of your skin. If you have bluish veins and your undertones seem pink or blue you have cool skin. If your veins appear green and your skin has yellow undertones, you have warm skin. Use that information (and your natural hair color) to help you determine what season you are: Spring: You have warm skin, and light colored hair. You look best in pale, soft colors such as pastels and ivory. Avoid wearing dark or dull colors. Summer: You have cool skin, with light coloured hair. You look best in pale, cool colors such as light blue and white. Avoid wearing dark or bright colors, such as black and red. Fall: You have warm skin, and dark coloured hair. You look best in warm, rich colors such as browns, oranges, and greens. Avoid wearing pastel colors. Winter: You have cool skin, and dark coloured hair. You look best in rich colors such as blue, red, and hot pink. Avoid wearing earth tones and pastels. *For more information on what colors look best on each skin tone, visit the “Seasonal Skin Tone” article at Discovery Health http://health.howstuffworks.com/skin-care/beauty/seasonal-skin-tone.htm What Makes You Feel Good? Every fashion rule is meant to be broken. If a color or item of clothing makes you feel good about yourself, wear it! Don’t try to copy someone else’s personal style, or follow their fashion rules just because you think you should. 6 Fashion and Style Reference Guide
Unit 2: The Design Process Unit 2: The Design Process The Design Process Most fashion designers, whether they are famous or up-and-coming, follow the same general steps when they design a garment. Designers may follow these steps for each piece, or single clothing item, that they create, or they may use them to design an entire collection (a collection of multiple garments, usually centered on a theme, color scheme, fabric, or style). 1.Determine the Client: Who are you designing this piece or collection for? What will their budget be? Writing down this client information will help you decide what style of clothing to design, as well as what types of fabric to use. If you are designing for a specific person, you will need to get their body measurements to ensure a proper fit. 2.Sketches: Begin drawing sketches – LOTS of sketches! Each sketch will give you ideas for new sketches, and inspire new pieces. Don’t worry if your sketches aren’t exactly right, as you will be perfecting your designs as you continue on the design process. Look for inspiration in the world around you, in your own closet, and from other designers. 3.Mood and Color Boards: Now that you have some basic sketches outlining the shape and fit of your piece(s), you’ll need to create a mood and color board. This is a piece of paper or cardboard that you can glue fabric samples, sketches, and color ideas to. The purpose of a mood and color board is to help you get a feel for how each piece will look and feel when it is completed. 4.Pattern Making: When you have made a comprehensive plan of how each piece will look and what materials you will use, you can begin making a pattern. Your pattern will allow you to make multiple copies of a garment if you desire. Experienced designers will often use an adjustable dressmaker’s form to help them lie out and size pattern pieces. For more information, see Unit 4. 5.Muslin Fit: Although making a pattern is a great place to start clothing construction, you never truly know how a garment will look or fit until it is made and sewn out of fabric. That’s why most designers choose to do a muslin fit, where they follow the pattern and sew together a garment using an inexpensive material called muslin, or unbleached cotton. This allows designers to see if any alterations or changes need to be made to the pattern without wasting valuable fabric. Some designers choose to Fashion and Style Reference Guide 7
ignore steps 4 and 5; instead, they will do what is called draping, where fabric is laid over a dressmakers form and a muslin fit piece is created without a paper pattern. 6.Spec Sheets: A spec sheet lists important information and instructions for the creation of each garment. It may specify what types of stitches are used (and where), what fabric is best suited for the garment, and specific measurements. A spec sheet is written mainly as a reference for yourself, and so that other people can create garments using your patterns. 7.Final Garment Creation: Once a muslin-fit has been done and any necessary changes have been made to a pattern, you can begin constructing the final version of your garment. Following the steps in the design process will help reduce the risk of making errors and wasting valuable fabric, materials, or time. 8.Exhibition/Delivery to Client: Depending on your design(s), you may be ready to deliver your garment(s) to a specific client, or to begin exhibiting the garment(s) online, in a store, or at a fashion show. Don’t forget to add the final touches to your garment by accessorizing! Sketching As you begin thinking about what your garment(s) will look like, you will need to create some sketches. Some designers choose to use pre-drawn human figures (called croquis) to help them begin the sketching process. Others choose to draw their figures free hand. You can decide which method works best for you, or consider using some form of design technology (as outlined below). You’ll need paper, a pencil and eraser, and a collection of colored markers or pencils. Consider sketching what a garment will look like from the front, back, and sides. Sketches are not meant to be perfect. Write notes to yourself around the edges and erase or cross-out mistakes – but don’t throw your sketches away! What you believe is imperfect today may look very different to you in a week or two. Even if the design never becomes a completed garment, it may eventually inspire an entirely different design! Keep a large scrapbook of all of your sketches to refer back to. For pre-drawn human figures to help you sketch see the Fashion and Style Activity Guide. 8 Fashion and Style Reference Guide
Design Technology Up until only a few decades ago, when designers wanted to sketch a garment or collection, they had to do it by hand with paper and a pencil. Today, you have access to technology that will allow you to practice your design, accessorizing and sketching skills on your computer. Blank Label – www.blanklabel.com This website allows you to create custom-designed men’s dress shirts. Designers Nexus – www.designersnexus.com This website offers thousands of croquis for you to print and use for your sketches. Design Your Own Clothes – http://mashable.com/2011/01/16/design-your-own-clothes/ A helpful blog with information on multiple online design technologies. Fashionary – http://fashionary.org/ This website provides hundreds of sketching templates and important garment construction information. (**Costs money**) Fashion Playtes – www.fashionplaytes.com This website (aimed at teen and preteen girls) allows you to design your own clothing online using a variety of templates, and purchase your custom clothing. Fashion Sketching – http://www.abeautifulmess.com/2013/02/fashion-sketching-for -beginners.html This blog post gives many helpful sketching suggestions for beginning fashion designers. How to Draw Fashion Step-by-Step – http://www.dragoart.com/fashion-c375-1.htm A step-by-step instructional on how to sketch different garments. Polyvore – www.polyvore.com This website allows you to put together and accessorize outfits using found images. There is also an option to share your outfits with other Polyvore users for feedback. Single Pieces and Fashion Collections Depending on what your design goals are, you may be working on designing a single garment, or an entire collection. A single garment or outfit is usually referred to as a piece (as in, “I’m working on a piece for my celebrity client”). If you are just getting started as a designer, you will likely begin by creating individual pieces that you or your friends can wear. Fashion and Style Reference Guide 9
Most experienced fashion designers create one or two collections each year. A collection is a group of multiple garments or outfits; usually centered on a theme, color scheme, fabric, or style. Commonly, designers create a fall and a spring collection and host runways shows for each. Mood and Colour Boards The creation of mood and color boards is an important step in the design process. Sketches are good for showing the finished silhouette of a piece, but it is difficult to translate fabric color, texture and weight with a drawing. Sketches, fabrics, buttons, images of accessories or inspiration photos can all be placed onto a mood and color board. Mood and color boards are especially important when designing an entire collection; they will help create a cohesive feel for each piece, even if they don’t match perfectly. A fabric that you love may not match with other fabrics or colors that you have chosen, or may not be a suitable texture or weight to sew with. 10 Fashion and Style Reference Guide
Unit 3: Unit 3: Textiles Textiles Types of Fabric The type of fabric that you use to make your garments will have a large impact on how they look, feel, and behave. It will also affect how easily you are able to cut and sew the garment. When purchasing fabric, there are three factors to take into consideration: Fibre: Fabrics can be made from natural fibres (cotton, wool, flax, hemp, silk) or manufactured fibres (polyester, spandex, nylon, rayon). Most fabrics are made from a mixture of two or more fibre sources. The fabrics in the following chart are commonly used in garment creation. Construction: There are three basic types of fabric construction: knit, woven, and non- woven. Knit fabrics are made in a way similar to the way your grandmother might knit a scarf – yarns are looped in various ways, usually resulting in a fabric that stretches. Knit fabrics will not fray when cut. Woven fabrics are made by weaving yarns into a pattern, which results in a fabric with little or no stretch. Woven fabrics will fray when cut if the edges are not finished. Non-woven fabrics are any fabrics that are not created by knitting or weaving (such as felt). Weight: When purchasing fabric for sewing garments, be aware of the fabric weight. You can identify fabric weight by reading the label on a bolt of fabric – very light fabric will be labeled as less than 1 ounce/yard, and heavy fabric will be more than 7 ounces/yard. You can also determine weight by feeling the fabric between your fingers. Heavy-weight fabrics will feel thicker and heavier than light-weight fabrics. Lighter fabrics are fine for shirts and dresses, but heavy fabrics are better for pants, skirts and jackets. The chart on the following pages shows the fabrics commonly used in garment construction. Fashion and Style Reference Guide 11
Type of Fibre Cotton Fabric Description Usual Uses Fabric Construction Woven •Inexpensive •Usually 100% cotton, so will shrink •Easy to sew •Casual appearance •Edges will fray •Heavyweight •Elaborate designs are woven in •Can be expensive •Formal appearance •Edges will fray •Heavyweight •Rough and scratchy •Not suitable for clothes that will touch the skin, but can be used for patches •Casual appearance •Edges will fray •Very lightweight •Sheer (see-through) •Difficult to sew •Formal appearance •Edges will fray •Usually heavyweight, but can sometimes be lightweight •Has pile (like velvet) •Must be careful to cut all pattern pieces in the same direction •Not suitable for shirts •Can be difficult to sew because of weight •Casual or dressy appearance •Edges will fray •Usually heavyweight •Has parallel ridges that run diagonally •Only suitable for shirts if a very lightweight denim is used •Can be difficult to sew because of weight •Casual appearance •Edges will fray Broadcloth Skirts Blouses Dresses Summer Clothing Brocade Silk or Manufactured Fibres Woven Formal clothing Canvas Cotton or Linen Woven Coveralls Outerwear Chiffon Cotton, Silk or Manufactured Fibres Woven Scarves Evening Gowns Blouses Corduroy Cotton or Manufactured Fibres Woven Pants Skirts Jackets Denim Cotton or Mixed Fibre Woven Pants Skirts Jackets 12 Fashion and Style Reference Guide
•Back and front look identical •Very stretchy •Medium weight •Cut edges will not fray •Absorbent •Casual appearance •Medium to heavyweight •Made of many fibres fused together •Is often poor quality •Cut edges will not fray •Can be difficult to sew because of weight •Casual or formal appearance •Medium weight •Has one relatively smooth side, and one side that is soft and fuzzy •Inexpensive •Edges will fray •Casual appearance •Very fuzzy and soft •Cut edges will not fray •Absorbent •Casual appearance •Stiff fabric used to give strength to parts of clothing such as collars and pocket flaps •Not suitable to use for an entire garment •Smooth surface •Very Stretchy •Will curl rather than fray on cut edges •Absorbent •Casual appearance •Delicate •Usually layered over a solid fabric •Very delicate, and can be difficult to sew •Decorative or formal appearance •Edges may fray Double-Knit Mixed Fibre Knit T-shirts Skirts Felt Wool or other Hair Fibres Felted Coats Hats Patches Flannel Cotton Woven Pajamas Shirts Fleece Manufactured Fibres Knit or Woven Jackets Warm Clothing Work-out/ Exercise wear Interfacing Manufactured Fibres Knit or Woven Add crispness and strength to collars, jacket openings, pocket flaps, etc. Jersey Mixed Fibres Knit T-shirts Skirts Dresses Lace Cotton, Mixed Fibres or Manufactured Fibres Knit or Woven Overlay on bridal gowns Sleeves Collars Necklines Fashion and Style Reference Guide 13
•Lightweight •Wrinkles easily •Smooth •Very durable •Very cool to wear •Medium to heavyweight •Can be difficult to sew •Expensive •Casual or dressy appearance •Light to medium weight •Easier to sew than real leather •Expensive •Casual or dressy appearance •Inexpensive •Medium weight •Drapes nicely •Casual appearance •Edges will fray •One-side glossy surface •Comes in different weights •Can be difficult to sew because of smooth texture •Formal Appearance •Edges will fray •Lightweight •Very stretchy •Casual appearance Linen Flax Woven Pants Jackets Skirts Leather Animal Hide None Jackets Purses Shoes Hats Man-Made Leather (Faux Leather/Ultra -Suede) Manufactured Fibres None Jackets Purses Shoes Hats Muslin (Unbleached Cotton) Cotton Woven Used for mock-ups and muslin fits Satin Manufactured Fibres Woven Dresses Formalwear Linings Jackets Spandex Manufactured Fibres Knit Leggings Workout wear Fibres are added to jeans and shirts for a bit of stretch Formalwear Dresses Blouses Ribbons •Medium weight •Smooth, shiny and stiff •Cut edges will fray •Can be difficult to sew •Formal appearance •Medium weight •Looped pile •Very absorbent •Cut edges will fray •Very lightweight, so may be difficult to sew •Thin •Smooth Taffeta Silk or Manufactured Fibres Woven Terry Cotton or Mixed Fibres Woven Towels Bathrobes Shorts Tricot Mixed Fibres Knit Lingerie Underwear 14 Fashion and Style Reference Guide
•Net-like in appearance •Very lightweight •Thin, so is difficult to sew •Stiff Tulle Silk or Manufactured Fibres Woven Used to add volume to dresses and skirts Bridal Veils Dance wear Bathrobes Lounge wear Exercise wear •Similar to velvet in appearance •Stretchy •Inexpensive •Very heavyweight •Quite stiff •Expensive •Formal appearance Velour Cotton or Manufactured Fibres Knit or Woven Velvet Silk or Manufactured Fibres Woven Formalwear Dresses Parts of Fabric When you are sewing garments it is important to be able to identify the different parts of a piece of fabric. Selvage is the factory-finished edge of a fabric. It should be a perfectly straight line. Fashion and Style Reference Guide 15
The lengthwise grain of the fabric runs parallel to the selvage edge, and has very little stretch. Also called the warp. The crosswise grain of the fabric runs perpendicular to the selvage edge, and has some stretch. Also called the weft or straight of grain. The bias runs at a 45 angle to the selvage edge, and has the most amount of stretch. Weave refers to how tightly the threads that make up the fabric are held together. Check the density of a fabric’s weave by holding it up to the light. You should select fabric with a medium density weave, as it will hold your padding in place while still being easy to sew. When you hold medium density weave fabric up to a light, you should be able to see light, but not shapes through the fabric. Sewing with Specific Fabric Types Knit Fabrics: Knit fabrics are stretchy, and notoriously difficult to sew at home. If you have a serger, you will find it much easier to use on knits than a traditional sewing machine. If you are using a sewing machine, consider using a ballpoint needle and a walking foot. The ballpoint needle has a slightly rounded tip that will slip through the fabric more easily than a regular needle. A walking foot moves both the top and bottom layers of fabric, which will help you avoid stretching out the fabric and creating puckers as you sew. Your sewing machine should have a stretch stitch setting (it looks like a crooked zigzag), which will allow the seam to stretch with your fabric. Remember to always to a few test stitches on scraps of your fabric before you begin! Woven Fabrics: Woven fabrics do not normally have any stretch, and often fray easily. Leave yourself some extra seam allowance to account for the fraying that will occur. You may want to use a serger to finish the edges of your woven fabric to prevent fraying from occurring before you begin to sew. Regular sewing machine needles can be used on woven fabrics. Leather: Sewing leather with a machine requires a special leather-sewing needle and thread made of non-natural fibres. A walking foot will also help keep the leather moving smoothly through your sewing machine. Remember that leather and suede (or man-made leather alternatives) are not machine washable! Faux-leather may also require a leather-sewing needle and walking foot, depending on the weight of the fabric. 16 Fashion and Style Reference Guide
Non-Fabric Textiles Many cutting-edge fashion designers choose to use non-fabric materials that are not generally considered when making garments. Some of these textiles include: •Balloons •Aluminum Cans •Paper •Duct Tape •Garbage bags Can you think of any other non-fabric materials that you could use to make garments out of? Traditional Textiles and Non-Traditional Uses To add interest to a garment that you are creating, consider using traditional textiles in non- traditional ways: •Zippers: Instead of using a zipper solely to fasten a garment closed, use it as a neckline, or as a decorative addition. •Buttons: Create designs with buttons, or use them to add interest to a hemline. •Seams: Add seams to sections of a garment to create a patchwork effect. Fashion and Style Reference Guide 17
Unit 4: Clothing Creation Unit 4: Clothing Creation Sewing Basics To begin constructing your own garments, you will need some basic sewing supplies. The items you should have in your sewing kit are: •Sewing Machine: Although it is possible to sew clothing by hand, today nearly all clothing is made using a sewing machine. •Assorted Sewing Machine Needles: Although “Universal” needles will be suitable for most sewing projects, you may need different types of needles for sewing thick, heavy fabrics or very delicate fabrics. •Extra Bobbins for Sewing Machine: Having extra bobbins means that you won’t have to re-wind your bobbin each time you switch thread colors. •Regular Presser Foot: A regular presser foot is suitable for most sewing projects. •Walking Foot: A walking foot is needed when sewing heavy, thick or stretchy fabrics. •Zipper Foot: A zipper foot will make attaching zippers much easier. •Fabric Scissors: Fabric shears are used to cut fabric ONLY. Using them to cut paper will dull them and make them unusable. •Embroidery Scissors: Embroidery scissors are handy to have close by when sewing. Their small size makes it easy to trim loose threads. •Paper Scissors: Paper scissors should only be used for cutting paper (such as patterns). They are usually too dull to cut fabric. •Marking Pencils: Fabric marking pencils are made of a special lead that will disappear after being washed. You can also use a special type of tailor’s chalk. •Straight Pins: Straight pins are used to hold two or more pieces of fabric together as you sew. •Needle Threader: A needle threader can help you put thread through the eye of a hand sewing or machine needle. •Seam Ripper: A seam ripper is every sewer’s best friend! It is used to carefully take out stitching errors. •Seam Gauge Ruler: Also called sliding gauges, they are used to accurately mark seam widths, or other short measurements. •Measuring Tape: Use your tape measure to take body measurements, and measure lengths of fabric. 18 Fashion and Style Reference Guide
•Assorted Hand Sewing Needles: Hand sewing needles come in many different lengths and thicknesses. The size you use will depend on your project and preferences. •Iron & Ironing Board: An iron uses very high temperatures (and sometimes steam) to press fabrics flat and remove wrinkles. An ironing board provides a safe surface to iron on. •Ruler: A ruler is often easier to use than a measuring tape for small measurements. It also can help you draw a straight line if needed. •Thread to match your fabric: Different fabric types and weights require different types of thread. •Pencil & Paper: Used for making notes, and creating patterns. •Pincushion: Many tailors find it easier to keep their pins in a pincushion, rather than a box, as they can be grabbed quickly and easily. Pincushions come in many shapes and sizes. Tabletop pincushions sit on your table, while wrist pincushions are attached to your wrist like a watch. Optional supplies include: •Dressmakers Form: A dummy human form (usually adjustable in height, bust, waist and hip size) used to help fit garments such as blouses, skirts, and dresses. They are very useful, but very expensive. •Pressing Cloth: A thin, light colored cloth that is used between an iron and fabric to prevent damage to the fabric. •Tailor’s Ham: A tightly stuffed, round pillow that is used to help press or iron curved parts of a garment (such as sleeves and shoulder areas). •Sleeve Board: A small ironing board over which a sleeve is pulled. •French or Bendy Curves: Special rulers used to help alter and draw curves (such as armholes) on a pattern. •Pinking Shears: Scissors that cut fabric into a zigzag pattern. Useful for finishing the edges of non-fraying fabrics, such as fleece. •Point Turner: A wood or plastic stick (most are similar in appearance to a chopstick) that is used to press out sharp corners. •Serger: A type of sewing machine that uses 3 or more spools of thread, and cuts off excess fabric as you sew. Fashion and Style Reference Guide 19
Sewing Machines Every brand and style of sewing machine is different – the only way to truly get to know your personal machine is to read the instruction manual. However, each sewing machine has similar components (although they may be in different locations on each machine). These are the basic parts of a sewing machine that you will need to know as you begin sewing garments. 1.Thread Take-Up Lever 9.Stitch Guidelines 2.Thread Direction Pin 10. Needle Screw 3.Bobbin Winding Spool 11. Needle 4.Tension & Stitch Length Dials 12.Feed Dogs 5.Reverse Stitch Control 13.Presser Foot 6.Thread Guide 14.Presser Foot Screw 7.Take-Up Lever 15.Hand Wheel 8.Throat Plate 16.Foot Pedal 20 Fashion and Style Reference Guide
For most sewing projects, you can use a regular presser foot on your sewing machine. When sewing stretchy knits or leathers, a walking presser foot can make the job much easier. It has extra teeth to help the feed dogs move thick layers of fabric through the machine. A zipper foot is much narrower than a regular presser foot. This allows you to sew very close to the teeth of a zipper. A button presser foot is used to sew buttonholes that are the perfect size for the buttons that you are using on a garment. Each sewing machine has a specific buttonhole setting – see your manual for details. When sewing garments, you will need to use the stitch guidelines (located on the throat plate) to help you sew in a straight line. Most sewing projects follow the 5/8” stitch guideline. However, if you would like a wider or narrower seam, use a different stitch guideline. Sergers A serger, sometimes referred to as an overlock machine, is a type of sewing machine that allows you to sew, stitch and cut fabric in a single step. There are four types of sergers available: 2-thread, 3-thread, 4-thread, and 5-thread, although many sergers allow you to switch between 2, 3 and 4 threads. Unlike a sewing machine, you can’t change the type of stitch on your serger by simply pressing a button. The number of threads and needles you use will allow you to create different types of stitches with your machine. •2-thread stitches are used to finish the edges of very light-weight fabrics, and to create decorative edging. 2-thread stitches use one needle. •3-thread stitches are used to finish fabric edges, create narrowly rolled hems, and create decorative edging. This is the most common type of overlock stitch, and uses one needle. •4-thread stitches are used for decorative edges or on the seams of high-stress areas. 4-thread stitches use two needles. •5-thread stitches are used mainly in garment manufacturing to create very strong seams (called safety stitches). 5-thread stitches use a lot of thread - almost 20 cm of thread per 1 cm long stitch. 5-thread stitches use two needles. Like sewing machines, every brand and style of serger is different – the only way to truly get to know your personal machine is to read the instruction manual. However, each serger has Fashion and Style Reference Guide 21
similar components (although they may be in different locations on each machine). These are the basic parts of a serger that you will need to know as you begin sewing garments: 1.Telescoping Thread Guide 2.Needle Thread Tensions 3.Spool Rod 4.Upper Looper Tension 5.Lower Looper Tension 6.Needles 7.Feed Dogs 8.Upper Knife 9.Upper Looper 10.Lower Looper 11.Lower Knife 12.Hand Wheel 13.Throat Plate Sergers can be fairly expensive, running from $500 to $5000, but are worth the expense if you plan on doing a lot of garment construction. Using a serger to finish interior seams will give a professionally manufactured look to garments. Sergers cannot be used in place of sewing machines, but they will make your garments stronger, give a professional look. However, sergers are notoriously difficult to thread; if you are planning on purchasing one, spend some time using different machines to see which one works best for you. Body Measurements and Parts of the Body Taking accurate measurements of your body is a two-person job: one person to measure, and one to be measured. It’s important that your measurements are exact, as adding or subtracting an extra quarter of an inch to one measurement could result in a pair of pants that are one full inch too wide or too small! The following are general body measurements that should be taken before you begin making a pattern. However, for more complex garments you may need to take more 22 Fashion and Style Reference Guide
measurements as required. The following measurements are the same for boys and girls, other than the bust measurements. Boys should follow the instructions for bust measurements – this is referred to as a “chest” measurement in men’s patterns. Fashion and Style Reference Guide 23
Body Circumference 1.Bust – The fullest part of the bust or chest (make sure you keep your measuring tape level). 2.Waist – 1 inch above the navel, or the narrowest part of your upper body. 3.Hip – The fullest part of the lower body. For an adult, the hip is usually 9 inches below the waistline. Front Bodice 4.Centre Front (CF) Neck – The length from the base of the neck to the waist. 5.Centre Front Shoulder – From the base of the neck at shoulder point to the waist, over bust/chest. 6.Shoulder – From the base of the neck to the tip of the shoulder. 7.Neck – Around the base of the neck. 8.Centre Shoulder to Bust – The centre of the shoulder to the middle of the breast/chest. Back Bodice 9.Centre Back Neck – Neck to waist (find the large bone at the base of your neck to start your measurement from). 10.Centre Back Shoulder – From the base of the neck at shoulder point to the waist. Lower Torso 11.Hip Depth – From the centre front waist point to the fullest part of the lower body. 12.Centre Front Waist to Floor – From the centre front waist to the floor. 13.Centre Front Waist to Knee – From the centre front waist to the center of the knee. 14.Back – From bust line to waist. 15.Centre Back Waist to Floor – From the centre back waist to the floor. Arm 16. Upper Arm – The circumference of the upper arm. 17. Arm Length – From shoulder to wrist, measured with arm slightly bent. 24 Fashion and Style Reference Guide
Parts of a Garment Basque Waistline Bell-Bottom Bell Sleeve Boat Neckline Bodice Boot-Leg Pant Leg Fashion and Style Reference Guide 25
Button Cap Sleeve Clasp Collar Cuff Diagonal Waistline Drawstring Dropped Waistline Elastic 26 Fashion and Style Reference Guide
Empire Waistline Formal Skirt Length Gusset Halter Neckline Hemline Inverted-U Waistline Inverted-V Waistline Jewel Neckline Juliet Sleeve Fashion and Style Reference Guide 27
Lapel Legs Maxi Skirt Length Micro-Mini Skirt Length Midi Skirt Length Mini Skirt Length Natural Waistline No Waistline Off-the-Shoulder Sleeve 28 Fashion and Style Reference Guide
One-Shoulder Sleeve Placket Plunging Neckline Polo Neckline Raglan Sleeve Raised Waistline Scoop Neckline Seat Shoulder Pad Fashion and Style Reference Guide 29
Skinny Pant Leg Snaps Spaghetti Strap Sleeve Square Neckline Straight Pant Leg Surplice Neckline Sweetheart Neckline Tea Skirt Length Train 30 Fashion and Style Reference Guide
U-Shaped Waistline V Neckline Zipper Bodice: A blouse, or the upper part of a dress. Collar: A piece of fabric surrounding the neck opening of a shirt, dress, or coat. There are many different types and styles of collars Crotch: The point at which two pant legs meet. Cuff: The wristband on a sleeve: a rolled up bottom hem of a pant leg. Facing: An interior lining used to add strength or shape to a piece of a garment. Fasteners: Any method of keeping a garment on the body. Buttons, clasps, drawstrings, elastics, snaps and zippers are all fasteners. Button: A solid object (often circular) attached to one side of a garment, and inserted through a buttonhole on the other side. Clasp: A device with interlocking parts. Drawstring: A string or tie that tightens to close an opening. Elastic: A stretchy piece of fabric. Snaps: Two interlocking pieces of metal or plastic that snap together. Fashion and Style Reference Guide 31
Zipper: A metal or plastic series of interlocking teeth that open and close using a zipper pull. Fly: The cloth overlaps at the crotch front of a pair of pants; usually covers a zipper or buttons. Gusset: A triangular expansion piece inserted into a crotch, shoulder or underarm seam. Hemline: The bottom of a skirt, pants, jacket, or shirt. Lapel: A turned back fold on the front of a shirt or jacket; attached to collar. Legs: A tube of material that runs from hip to ankle. •Bell-bottom: A pant leg that widens at the bottom. •Skinny/Peg-leg: A pant leg that narrows to ankle-width at the bottom. •Boot cut: A pant leg that gets slightly narrower at the bottom. •Straight leg: A pant leg that remains the same width from hips to hemline. Neckline: The style of opening at the top or neck of a garment. •Boat: A wide neckline that stretches across the collarbone. •Halter: A piece of fabric wraps from the top of the bust to the back of the neck. •Jewel: A round neckline that sits at the base of the throat (also called a crew-neck). •Keyhole: Similar to a halter neckline, but with a small opening or keyhole right above the bust. •Off-the-shoulder: A wide neckline that stretches from below the shoulder on one arm to below the shoulder on the other arm. •One-shoulder: An asymmetrical neckline that cuts from one shoulder to underneath the other arm. •Plunging: A low neckline that reveals cleavage. •Polo: A high, close-fitting collar; also called a turtleneck. •Scoop: A U-shaped neckline; the shoulders of the garment hang on to the outer edges of the U. •Square: A neckline with three straight lines (like the bottom of a square). •Surplice: A neckline made of two overlapping layers, similar to how a bathrobe’s neckline looks when it is tied. •Sweetheart: A neckline with a curved bottom edge. •V-neck: Neckline cut into a V shape. Placket: A slit at the top of a garment (such as pants, skirt or shirt) that helps you to get the garment on and off. Pocket: A small pouch sewn into or onto a garment. Seat: The material across the buttocks. 32 Fashion and Style Reference Guide
Shoulder Pad: A cushion in the shoulder of a garment to add shape and structure. Skirt Lengths: •Formal length: The skirt reaches to the ground. •Maxi: The skirt length reaches to the top of the feet. •Micro-mini: The skirt length is just below crotch level. •Midi: The skirt reaches to mid-calf length. •Mini: The skirt length is halfway between the knees and crotch, at the upper thighs. •Tea length: The skirt length reaches to just above the ankles. A flared version of a tea-length skirt is often called ballerina length. Sleeve: Part of a garment covering all or a portion of the arm from wrist to shoulder. •Bell: A long sleeve fitted from the shoulder to the elbow, and then gently flaring from elbow to wrist. •Cap: A short sleeve that extends from the bodice and covers only the top of the shoulder. •Juliet: A long, tight sleeve with a puff at the top. •Peasant: A loose, full sleeve gathered at the elbow or wrist. •Puff: A short, full sleeve. •Raglan: A sleeve that is set in to the shoulder of garment. •Spaghetti Strap: A narrow band of fabric that extends over the shoulders. Tail: The bottom of a man’s dress shirt. Tails: The split bottom of a man’s formal jacket. Train: Material trailing behind the bottom of a gown. Waistline: •Basque: A waistline that is higher on the sides than the center. Also called the V- shape waistline. •Diagonal: An asymmetrical waistline that runs across the body (usually from below the natural waistline to just below the hips). •Drop waist: A waistline set below the natural waist. •Empire: A high, fitted waistline that sits right under the bust. •Inverted U-shape: Starts high in the center, and gently drops down to the sides. •Inverted V-shape: Starts high in the center, and sharply drops down to the sides. •Natural: A waistline that falls at the natural waist. •None: A dress with no waistline often forms an A-line shape. •Raised: A waistline that is above the natural waistline. •U-shaped: A softer version of the Basque waistline. Fashion and Style Reference Guide 33
Do You Need A Pattern? The purpose of a pattern is to ensure that a garment fits and is sewn correctly. As a relatively new clothing designer and creator, most garments that you sew will require a pattern. However, not all patterns must be made of paper. If there is an item of clothing that you love but it is worn out, consider ripping it apart at the seams and using the pieces as a pattern! Parts of a Pattern Patterns may have as few as two pieces (a simple skirt), or many pieces (a dress with a fitted bodice). Depending on the garment that you are creating, there may be several pattern pieces which make up the bodice, the sleeves, the skirt and/or the pants. Despite many differences, there is information that is common amongst all patterns: Identifying Information – Each pattern piece should have information about the style of garment, a pattern piece name, and information on how many of each piece to cut. Notches (1) – These triangle shapes along the edges of patterns indicate you need to cut out a notch (or small triangle) to help you match seams as you start to sew. Grain Line Arrow(2) – This arrow indicates which way your pattern piece should face as you lay it out on your fabric. Length Line (3) – Double lines indicate where a pattern can be lengthened or shortened to get a custom fit. Fold (4) – This symbol indicates that you need to place the edge of your pattern along a fold in the fabric (do not cut along this fold!). Each pattern will also contain detailed, step-by-step instructions on a separate information sheet. 34 Fashion and Style Reference Guide
Making a Pattern When making a pattern, you must consider wearing ease, or how clothing will move as it is worn. This usually involves adding several inches to your original body measurements. If you are using woven fabrics with little to no stretch, use the following guidelines as you create your pattern pieces: •Full bust measurement PLUS 2-3 inches •Waist measurement PLUS 1 ½ inches •Hip measurement PLUS 2-3 inches If you are using a knit fabric with some stretch, use the following guidelines as you create your pattern pieces: •Full bust measurement PLUS 1-2 inches •Waist measurement PLUS 1 inches •Hip measurement PLUS 1-2 inches Regardless of fabric, always add at least 1 inch to your crotch depth measurement to allow for natural movement and comfort. When making your own patterns, you must first think about your body as a three- dimensional object (not two-dimensional, like a pattern piece). Take a look in the mirror – where are all the lumps and bumps in your body? How could you create a pattern piece that left space for these curves, such as your buttocks or breasts? How many pieces would you need to put together to make a bodice? Visualizing these details will make sketching a pattern much easier. You can also purchase computer programs (such as Fashion CAD and Gemini Pattern Editor) that will allow you to digitally create, alter and print garment patterns. Be aware, though, that these programs cost upwards of $1,000. For detailed information about how to make your own patterns, consider the following resources: Websites The best websites for pattern making instructions are often personal blogs. Do an Internet search for “how to make clothing patterns”, and see what information you can find. Books •How to Use, Adapt, and Design Sewing Patterns by Lee Hollahan •The Pattern Making Primer by Jo Barnfield & Andrew Richards Fashion and Style Reference Guide 35
Altering a Pattern Altering a pattern for a perfect fit should only be done when you have enough sewing experience to have an understanding of how pattern pieces fit together into a garment. Only then should you attempt to make alterations to a pattern. The only alteration you may need to make to a pattern is to shorten or lengthen the hem – an easy alteration that can be done at any sewing skill level! Most patterns have a line to indicate where to make any length modifications. It may be helpful to make your garment slightly longer than you would like the finished product to be – it is easy to make a garment shorter, but nearly impossible to make it longer! You may find it easier to adapt a pattern after you have done a muslin fit. This will allow you to see how the pattern pieces fit together, and determine where (if any) changes need to be made. Most pattern alterations are too complex to explain in this Reference Book. For more information on how to alter commercial patterns, consider the following resources: Websites •Burda Style Resources: Making a Pattern Larger or Smaller ™ http://www.burdastyle.com/techniques/make-a-pattern-larger-or-smaller •Threads Magazine: The Seam Method of Pattern Alteration – http://www.threadsmagazine.com/item/5053/the-seam-method-of-pattern -alteration Books •How to Use, Adapt and Design Sewing Patterns by Lee Hollahan Clothing Alterations Being a fashion designer does not always mean constructing brand new garments – you can also use your creativity to alter and repurpose clothes you already own! Consider using one or more of the following on a garment: Dye It: Dye a shirt or pants a new color with fabric dye. You can use multiple colors to add patterns, or use a bleach pen to remove the color from certain areas. 36 Fashion and Style Reference Guide
Change the Neckline: Changing the neckline on a shirt or dress can have a huge impact on its overall appearance. If you own a turtleneck that you never wear, consider turning it into a V or boat neck shirt. Change the Sleeves: Cut the sleeves off of a t-shirt to change it into a tank top, turn a long sleeved shirt into a short sleeve shirt, or cut the sleeves off of two shirts and switch them around! Add Visual Interest: Use fabric paint, zippers, buttons, appliqués, patches, lace, or other add-ons to change the look of a garment and add visual interest. Change Pants to a Skirt: By ripping out the inner seams on both legs and sewing them together in the front and back, you can change a pair of pants into a skirt. Cut it to the length that you desire, hem, and you’re done! Change Pants to Shorts: Grab some fabric shears, and cut your pants into shorts. Depending on the fabric your pants are made of, you may not even need to hem them. Make a Cutout: Cut a hole in the back of a shirt, or in your jeans. You can leave it as a cutout, or fill the space with lace, or a contrasting fabric color. If you have clothes that you love that do not fit you, you may be able to alter them so they are wearable: Too big: Follow the existing seams, and sew a little closer to the inside of the garment. Too small: If the existing seams are quite large, you may be able to rip them out and re- sew the garment with a smaller seam to increase the size. If the existing seam is small, consider adding in a panel of a different fabric on each side to make the garment fit. Too long: Mark the length that you would like your pants, skirt, or shorts to be, and then re-hem them to that length. Too short: If the existing hem is quite large, you may be able to rip it out and re-sew the garment with a smaller hem to increase the length. If the existing hem is small, consider adding a panel of a different fabric along the bottom to increase the length. Sewing without a Pattern Sewing without a pattern is not necessarily difficult, but requires a great amount of creativity. The easiest way to sew without a pattern is to copy a garment that you already love and know fits you well. Examine the pieces of the garment, and how they fit together. Sketch or trace each garment piece onto your new fabric (adding at least ½” for a seam allowance). Then, sew them together in the order that makes the most sense to you, making sure to follow the same general form as the original garment. Fashion and Style Reference Guide 37
Using Dressmaker’s Forms Dressmaker’s forms come in a variety of styles, sizes and prices. Some are made of Styrofoam or plastic, and are available in a variety of sizes. Others, called dial dressmaker’s forms have an adjustable waist, hip and bust/chest. They are very useful as a visual tool, as they will allow you to see the silhouette of the garment you are creating. A skirt or a neckline will look very different on a dress form than when it is lying flat on a table. While dressmaker’s forms are a useful tool in garment construction, they cannot take the place of a fitting on a real person. It is impossible to purchase a dressmaker’s form that will match the size and shape of your body exactly. There are some people who have tried to create their own dressmaker’s form to match their body shape; however, these rarely turn out perfectly. Accessorizing Accessories are the non-clothing pieces that you add to an outfit to complete it. These can include shoes, jewellery, belts, watches, scarves, headbands, gloves and tights. Adding these finishing touches can often be the most challenging part of preparing an outfit. Consider the following guidelines when choosing accessories: Highlight Your Best Features: If you love your neck, wear a short necklace that will draw attention to it. If you’ve got great legs, wear a pair of statement heels to show them off. On the flip side, you can also use accessories to hide problem areas – a bad hair day can be covered up with a stylish hat! Body Balance: In identifying your body shape, you should have already determined what clothes to wear to help create balance between the upper and lower halves of your body. The accessories you wear can add to that sense of balance. Simple, monotone accessories will not draw attention to areas you don’t want to accentuate. Bright or bold statement pieces will bring focus to the areas you want to show off. If you have a large bust, try wearing a bright colored belt around your hips to create some visual balance. Conversely, if you have wide hips and a small chest, consider a full rather than skinny scarf around your neck. 38 Fashion and Style Reference Guide
Harmony: Harmony refers to how accessories and garments look together. There should be some type of unifying element, such as color, texture, weight, or theme. It can be hard to decide what pieces go together until you see them on a person – don’t worry if your first few attempts at accessorizing are not perfect! Don’t be Matchy: While you always want your clothes and accessories to look good together, avoid wearing multiple matching accessories. A plaid scarf can be a great statement piece, but when paired with plaid shoes and a plaid bag it begins to look like a costume. Don’t Overdo It: It can be tempting to add many accessories to an outfit, but you run the risk of ruining an outfit. Try to wear only one statement piece at a time. In fact, a bold garment may need almost no accessories, other than shoes and simple jewellery. Fashion and Style Reference Guide 39
Unit 5: Fashion Marketing Unit 5: Fashion Marketing Creating a Clothing Line If you are passionate about fashion, it can be tempting to want to jump right in and start your own clothing line. However, taking the time to create a plan will increase your chances of being a successful fashion designer. 1.Do your research. If you are hoping to start a clothing line that creates graphic t- shirts, find out how many other similar companies are in your area. How did they get started? What are their prices? Do they sell online or in stores? Learning about other clothing companies will help you understand how the industry works, as well as give you information about your potential competitors. If you take the time to speak to business owners and fashion designers personally, you may even find yourself a mentor! 2.Increase your skills and knowledge. Unless you have a quality clothing product, people will not be interested in buying it. Therefore, it’s important that you improve your sewing skills and increase your knowledge of the fashion industry. Practice making garments in your spare time. Take a class at a local sewing store, or a sketching class at the local college. Read fashion magazines! The more information and skills you have, the more likely you are to be a successful designer and clothing line owner. 3.Make a plan. Successful fashion designers and business owners have a plan. Decide what types of garments you will be making, and who your target clients will be. What will you call your company? Will you sell your garments online, in a store, or both? Will you make garments in a variety of sizes, or do custom orders? How will you advertise? How much will you charge? Answer these questions, and write your business plan down on paper – it will help you stay focused! 4.Start small. Although you’ll likely want to begin creating each of the pieces that you’ve been designing, you risk losing money (and likely becoming frustrated), it is a better idea to choose a few garments that you know have a great design and that you know people will buy. Once you have established your clothing line and began making a profit, you can consider adding additional pieces to your line. 5.Find out if you’ll need a business license. If you plan on selling your garments commercially (to people other than your friends and family), you may need a 40 Fashion and Style Reference Guide
business license. Talk to a parent or guardian, and ask them to speak to a town or city representative on your behalf. 6.Promote your product! If people don’t know about your clothing line, they won’t purchase any garments. Consider using a variety of advertising mediums to promote your product: print (posters, flyers, signs), media (a website, television ads), or word of mouth (telling your friends). One of the best methods of advertising is to wear your garments in public – consider giving pieces to a few close friends for free, in exchange for them mentioning your business each time someone comments on their outfit. 7.Set a goal. How many garments do you want to sell this year? How much money will you spend on each garment? Successful businesses set goals, and then work to achieve them. 8.Don’t give up! Being a successful fashion designer and clothing company owner does not happen overnight. It takes a lot of time, money, and hard work. You will not experience success immediately, but have fun, and enjoy knowing that you are working towards your goals. The success will come with time and effort! Creating a Costume Scheme If you are interested in designing costumes, rather than high fashion or street-style garments, the best way to get started is to volunteer with your school’s theatre department or a local theatre company. Even if you are working as an assistant or a tailor, take the time to create your own costume designs. You never know when you may have the opportunity to use them. Design costumes for shows that are currently in production, for shows you know are upcoming, or for shows that you would like to someday see. The following steps will help you as you create a costume scheme. 1.Do your research. Read the script that you are designing costumes for, and familiarize yourself with the time period, characters, and make not of any specific costume pieces that are mentioned. Look to other productions of the same show for inspiration. If you are working with a specific director, get as much information as possible about their vision for the show. 2.Increase your skills and knowledge. Unless you demonstrate that you have skill at designing and creating costumes, the chances of you being a successful costume designer are slim. Therefore, it’s important that you improve your sewing skills and increase your knowledge of the film, TV, and theater industry. Practice making garments in your spare time. Take a class at a local sewing store, or a sketching class at the local Fashion and Style Reference Guide 41
college. Watch as many films, TV shows and plays as you can! The more information and skills you have, the more likely you are to be a successful costume designer. 3.Sketch. Creating a variety of costume sketch options for each character in the play you are designing for will give you a chance to improve your skills, and give the director some costume options. Keep in mind how much movement each character is required to make. If you design a gorgeous ball gown for the heroine, make sure she can sword fight and complete her stunts while wearing it. 4.Create mood & color boards. Mood and color boards are especially important for a costume designer, as each of your designs will likely have to be approved by a director and his/her creative team. Mood and color boards will help you share your vision of each costume in more detail than with just a sketch. 5.Create a budget. As a costume designer, you may be working with a limited (or nonexistent) budget. As you prepare your sketches and mood and color boards to present to the director, make estimates about how much each costume will cost to make. You may need to be creative – repurpose old costumes, or use found materials. 6.Present and modify your designs. After you present a variety of costume sketches, mood and color boards, and a budget to the director and creative team, you will likely have to make modifications to your designs. Don’t take it personally – you and the director are both working towards the same goal of making your production the best it can be. He or she may have different ideas about how a character should look, how practical a costume design is, or how a specific actor would look in an outfit. Explain why you made the choices that you did, and take time to listen to their ideas and suggestions. You will eventually come to an agreement that everyone is happy with. 7.Measure, create and fit costumes. Once you have measured each of the actors for their costumes, you can begin construction. Taking time to do costume fittings throughout the process will eliminate the risk of making a large fitting error. 8.Enjoy the show! Once your costume construction is complete, it’s time for you to sit back and watch your creations in action. Depending on the production, you may need to be available to help actors get in and out of costumes, or to make emergency costume repairs. 42 Fashion and Style Reference Guide
Fashion Retail If you are interested in selling the garments that you create, there are several questions to ask yourself: 1.What will I make? Would you like to have a business that sells only interesting hats or toques? Or will you make a variety of clothing items to sell? 2.How much time/money am I willing to spend? Designing and constructing garments takes not only a lot of time, but a fair amount of money as well. If you are hoping to sell the clothes that you make, how will you find the money to purchase fabric? How much money are you willing to invest in this project? Will the time required get in the way of other commitments that you have, such as 4-H Clubs, school, sports teams, or family time? 3.How much will I charge? The amount of money you charge for each of your pieces should be enough to cover the cost of material PLUS a profit. 4.Who will I sell to? Will you sell your garments to your friends and family? Or will you try to reach a larger market? 5.How will I sell my garments? There are three general places to sell garments: home, a storefront, and the Internet. Where you choose to sell your clothing is up to you, as each has its own pros and cons. It is easiest (and least expensive) for you to begin by selling your garments out of your home. You can begin selling in stores or on the Internet when you have established your business. 6.How will I market my garments? For more information on fashion marketing, see below. Fashion Marketing Remember – if people don’t know about your clothing line, they won’t purchase any garments! Consider coming up with a logo for your fashion line or company, as it will help make your brand and advertisements more recognizable. Before you begin any marketing campaign, you will need to have high quality photographs taken of your garments. Clothes always look better on a three-dimensional form rather than lying flat on a table. You may want to display the garments on a mannequin, or get a model. Consider asking a friend to model while you take photos, or vice-versa! There are four commonly used advertising mediums used in the fashion industry: Print: (Posters, flyers, signs, billboards, magazine or newspaper ads) Print advertisements can be easily made if you have access to paper, art supplies and/or a Fashion and Style Reference Guide 43
computer and printer. Distribute them to local businesses or display them at your school. Make sure you ask permission before posting any flyers or signs. Media: (Television ads, website, online ads, Facebook group, Twitter feed). Using media can be an inexpensive and efficient way of marketing your garments. Always talk with a parent or guardian before posting anything on the Internet. Consider creating a Facebook group, or a Twitter feed just for your clothing. If you are willing to invest some time and money, you could hire someone to create a website for you. Word-of-Mouth: (Wearing garments in public, telling your friends and family) Word of mouth is the least expensive (and often most effective) way of marketing your brand. Every time you wear a garment that you made, take time to talk to people about your product and your garments that are for sale. Consider asking one or two friends to act as “spokespeople” – in exchange for a free garment, they will wear that garment on a regular basis and talk to people about your fashion line. Runway Show: A runway show is the traditional way of marketing for high fashion and haute couture lines. For more information, see below. Runway Shows Runway shows are a lot of work to put together, but are one of the most valuable ways to promote your clothing line. The following steps will help you plan your runway show from start to finish: 1.Setup and Planning: When will your runway show be held? Where will it be located? Will you need to rent chairs for guests to sit on? Will you need to create a runway or catwalk? 2.Clothing: If you have already designed and created a collection of garments, this should be the easiest part for you. Which items will you showcase at your runway show? Do you need to obtain any additional accessories or footwear? 3.Models: A runway show is not possible without models to wear your clothes. Consider asking friends and family members to model for you. Make sure that you have garments that will fit their body type. You may also want to ask someone to do hair and makeup for your models on the day of your show. 4.Advertising: How will you let people know about your upcoming runway show? Consider the advertising mediums described in the section on Fashion Marketing (above). If you have a limited amount of space in your venue, will you give away or sell tickets or allow guests in on a first-come, first-served basis? 5.Atmosphere: The atmosphere of your runway show will do a lot to increase interest in your clothing line. Do you want to decorate the venue so that it matches the 44 Fashion and Style Reference Guide
theme of your garments? Will you have music playing before or during the show? Will there be a program or paper to hand out to guests with information about your clothing line? 6.Rehearsal & Fittings: Just like with a theatre production, you will need to have a rehearsal and fitting. This will allow you to ensure that all garments fit your models, and add any accessories that their outfits need. You will also need to determine an order in which models will walk down the runway, and how they will pose or turn. 7.Runway Show: On the day of your runway show, try to relax. You’ll need to be backstage to solve any last minute problems, but you may want to have a partner in the audience who can give you feedback after the show. 8.Follow-Up: The goal of a runway show is to increase interest in and sales of your garments. Consider allowing guests to sign up for a newsletter, or giving away coupons for a discount on garments to encourage them to purchase a garment. You may even want to have garments available for sale immediately after the show. Fashion and Style Reference Guide 45
Unit 6: Careers in Fashion Unit 6: Careers in Fashion If you are interested in a career in the fashion industry, there are many options available to you. You may want to consider on the following careers. For more information on these and other careers in the fashion industry, visit http://www.creativeskillset.org. Costume Designer: A costume designer works in the TV, film, and theatre industries. They are in charge of designing, creating, and finding costume pieces for all of the actors in a production. They work closely with other members of the creative team to ensure that their costume design fits the director’s vision for the production. To become a costume designer, you will need to gain experience in the TV, film or theatre industry by working as a Costume Assistant or Wardrobe Trainee. Fashion Designer: A fashion designer can design clothing items for a wide range of customers and retailers, from haute couture and high fashion to everyday street-style retailers. They may specialize in men’s, women’s, or children’s clothing. To obtain the skills you need to become a successful fashion designer, you will need to gain skills and experience in the fashion industry, likely through post-secondary fashion design courses and a fashion internship. Milliner: A milliner works to design and create hats, for haute couture, high fashion, or street-style clients/retailers. Milliners often work alone, or with few employees, and therefore are responsible for all aspects of hat creation from sourcing materials to actually sewing or assembling the hat. Career opportunities may be limited, as there are very few people working as milliners. Buyer/Fashion Merchandiser: Buyers work closely with designers to purchase the textiles and equipment needed for garment creation. They must follow and forecast clothing trends, find and negotiate prices on supplies, as well as ensuring that all products purchased meet the company’s and designer’s standards. To obtain a position as a buyer, you will need to begin work as a Buyer Marketing Manager: Marketing managers are responsible for all of the publicity a fashion company receives. They will design, create, and assess advertising campaigns, websites, and signage. They work to ensure that a brand or company is well-known and easily recognizable. No formal schooling is required to become a marketing manager, but many companies prefer applicants who have some marketing training. Fashion Photographer: Fashion photographers work to photograph images of models or garments for magazines, websites, advertisements, and catalogues. Most fashion photographers do freelance work, meaning that they are not employed by a single 46 Fashion and Style Reference Guide