Download
1 / 20
200 likes | 331 Vues
Glogster EDU is a Web 2.0 tool designed for students to create interactive projects that help them express what they have learned in engaging ways. Unlike the standard Glogster, Glogster EDU provides educators with control over student accounts, enhancing classroom management. This guide explains how to sign up for Glogster EDU, set up student accounts, and navigate the dashboard. Discover how to create Glogs for projects, enhance learning experiences, and enable students to showcase their understanding in creative formats.

E N D
EDU Glogster and You Presentations that work! Created by Beth van Kan April 2, 2010
What is Glogster EDU? • Glogster EDU is a Web 2.0 tool that allows students to create an interactive project to display what they have learned or want to communicate – think of it as a super poster • Glogster vs Glogster EDU • HCPSS does not allow access to Glogster • You must have a Glogster EDU account, which allows teachers to control student accounts, and for students to access this tool
Glogster Examples Student Glogs These Glogs were used for Science and Reading class projects. How could your students use Glogs?
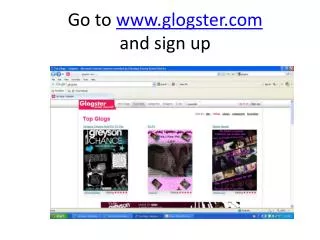
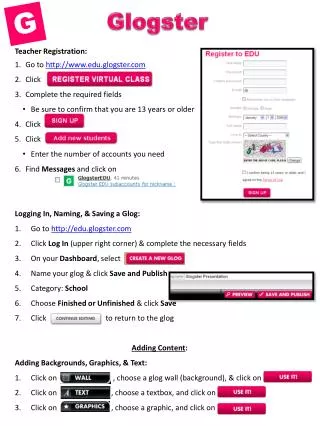
How do I get started using Glogster EDU? • Step 1: Go to the website http://edu.glogster.com/ • Step 2: Click on • Step 3: Complete the information requested • NOT REQUIRED: Birth date • Location beyond state • Step 4: You now have access to your Glog Dashboard and are ready to set-up student accounts -- up to 100 student accounts can be created
The first screen is the “Dashboard”, this is the home page • An alert to verify the new account via email will be on the page, do this step later • Edit “My profile” • a picture or image can be uploaded • the speech bubble text can be changed, students will see what it says • consider what students will see when filling in the information • A Glog can now be created – create a Glog that explains a project, a Glog about yourself to embed in your class wiki, or a Glog to teach students how to use Glogster EDU • Glogster EDU will send emails to this account • Students can ONLY email their teacher Where Do I Start?
Setting up Student Accounts • Step 1: Click on the “Add Student Accounts” and indicate the number of accounts to add – choose 100 now, or choose to add only what you need and add more accounts later • Step 2: EDU Glogster accounts will now appear in the “Classmates” area • Step 3: EDU Glogster will automatically email the account names and passwords • Step 4: Assign each student an account using the following method:
Setting up Student Accounts 1. Open an EXCEL document, label the first three columns as: “Login”, “Student”, and “Acct Name” 2. Open your EDU Glog email and copy all of the student account information 3. Select the first cell in the column labeled “Login” of the EXCEL spreadsheet 4. Go to “Edit” > “Paste Special” > “Text” – your student account information is now in the spreadsheet – go to “File” > “SAVE AS” i.e., student Glog accounts 5. Select & copy the roster of the students you want to have these accounts from any of your class lists 6. In your EXCEL worksheet, select the first cell in the column labeled “Student” and then choose “Edit” > “Paste Special” > “Text” 7. Arrange this column so that each student name is on a line with one account 8. For the column labeled “Account Name”, assign each student a name based on the class period you see him or her, i.e., 1John 9. Print out the list, cut and paste the information onto index cards to distribute to students – have them copy the information into their planners 10. Students will need this information to login to their Glogs 11. Once the students have logged in, have them click “Edit My Profile” and enter the “Account Name” you have specified as their first name They should not change any other information
Assigning Student AccountsIf you are unable to view the screen cast, use this link to view it on the Internet:Setting Up Student Accounts: View on ScreenToaster
It Is Time To Start Creating Glogsters! 1. Select “Create Glog” from the menu bar 2. Name the Glog; the name will become part of the Glog’s URL 3. A Glog with some basic elements will open 4. Click on the existing elements and select the trash can icon to delete 5. Use the magnet tool to create the Glog 6. Choose “WALL” and click on “Gallery” to open categories with many image options to choose from 7. It is also possible to select from pictures on the computer or a solid color to use as a wall It is a good idea to have a folder with all of the information you want to include in your Glog: images, videos, audio, word documents (copy and paste the information into your Glog), and hyperlinks
8. Add “Graphics” next • Tip: All of the graphics can be added at one time and arranged or deleted as the Glog develops • 9. Select “Text” from the magnet tool to add elements onto which text can be typed or copied and pasted • 10. Move, angle, and resize the elements anyway that suits the Glog information • 11. Select an element to bring forward, send back, clone, or delete it • 12. Choose “Edit” to change colors of the elements, add hyperlinks, add and edit text, and add effects • 13. Images, videos, and sounds can be uploaded from your computer • Upload these elements by selecting “Upload” from the top of the page • Your uploads will be stored in the appropriate category: “Images”, “Videos” or Sound”
Alternatively, choose from the “Image”, “Video”, or “Sound” to upload media • Videos can also be uploaded from Teacher Tube using the “Video” option • 14. “Frame” options are offered for images • 15. “Player” options are offered for other media • 16. Links can be added by selecting an element or text and choosing “Edit”, select the hyperlink icon and paste the URL where requested • Tip: The hyperlink will only work when the Glog is being viewed – not in “Preview” mode • 17. Choose “Publish and Save” when finished working on the Glog • Choose “Unfinished” to prevent classmates from viewing the Glog • Choose “Finished” to allow classmates to view and comment on the Glog
Happy Glogging! The hand outs for this presentation include a “Glogster Tips” sheet that contains information on downloading audio and video files that work well with Glogster.
Created by Beth van Kan April 2, 2010 Resource Links Glogster EDU Frequently Asked Questions http://edu.glogster.com/faq/ Glogster Tutorial, How-to Directions and Samples from Traci Blazosky http://ktitraci.wikispaces.com/Glogster Glogster Videos from YouTube http://www.youtube.com/user/glogster Glogster EDU Educator Resource Library (pdf) http://edu.glogster.com/download/glogster-edu-educator-resource-library.pdf Glogster EDU Ning Network http://educationglogster.ning.com/