Can You Isolate the Uranium?
Engage 8th grade students in a lab simulation to isolate uranium, exploring energy equivalence with coal. Understand uranium's role in electricity production and the challenges of mining. Enhance lab techniques and analytical skills.


Can You Isolate the Uranium?
E N D
Presentation Transcript
Can You Isolate the Uranium? Martha Muir Mill Springs Academy Alpharetta, GA
Summary • This lesson will guide students through a simulation of some of the steps and challenges in isolating this valuable fuel and then compare the quantity of energy obtained from uranium to the amount of energy obtained from coal.
Energy Context • The steps involved in isolating uranium are challenging and expensive. Is it worth it? Students will conclude this activity with a comparison between the fuel equivalence between uranium and coal.
Anticipated Time Required Two hours, divided (plus teacher prep time) This project will require: • TEACHERS: Lab prep time: 30 to 60 minutes (students can be used to decrease teacher lab prep time) Lab clean time: 30 to 60 minutes (students can be used to decrease lab clean time) • STUDENTS (class time) Introduction of lesson on day 1 and the assigning of article with worksheet homework – 20 minutes Introduction of lab – Time for students to read over lab – 10 minutes - Time for teacher review of procedure – 10 minutes Conduct experiment - Part 1: Isolation lab – 30 to 40 minutes Part II: Uranium vs. coal comparison activities – 20 minutes Summarize and discuss results – 10 - 20 minutes
Intended Student Level • Grade 8 • This lesson is designed for 8th grade students taking Physical Science.
Assumed Prior Knowledge • This project will assume that students have prior knowledge of: • Basics of chemical reactions including precipitation reactions • Basics of Acid/Base chemistry, including pH scale • Proper and safe lab techniques
Learning Objectives • State the role uranium plays in production of electricity. • Describe some of the challenges involved in the mining and processing of uranium • Use standard and safe lab techniques in a simulation of the isolation and identification of a specified substance. • Discuss the relative energy equivalence of uranium versus coal.
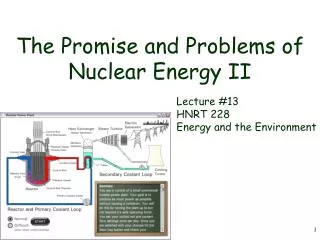
Introduction/Motivation for Students • Twenty percent of the electricity generated in Georgia comes from nuclear energy. More is promised in the future as two new nuclear generators finish construction and come online. These power plants rely on uranium as their fuel. In this lesson, you will get a simulated experience in the process of harvesting uranium from the rocks and dirt that contain it.
Uranium is a metallic element found in the Actinide series of the Rare Earth elements on the Periodic Chart. Though it is a metal, it is not found in that state in nature. Uranium is found reacted into compounds such as uranium phosphates, uranium sulfates, uranium fluorides, and uranium oxides. To process uranium into fuel, mining and processing companies need to isolate uranium compounds from the other minerals brought up from the mine and then convert it to triuraniumoctoxide (U3O8). It is the U3O8 that is the most safely transported and then easily converted to enriched fuel grade uranium hexafluoride (UF6). The processing of the ores that contain uranium compounds involves a series of chemical reactions that identifies which compounds contain uranium, separating them from the other compounds, and then converting the various uranium compounds to the U3O8. The finished product, U3O8, is commonly called “yellow cake.” Though the steps involved in mining and processing the uranium ores to the yellow cake state are challenging, it makes financial sense to the companies involved. As of June 2012, a 55 gallon barrel of yellow cake sells for over $30,000.
In this lab, you will not be working with uranium compounds. This lab involves a series of reactions designed to simulate some of the steps uranium processing companies have to go through to get their desired final product and to know that they have it. You will begin with nine substances that look very similar to each other. Along the way, you will add substances that will cause precipitation, to raise the pH or lower the pH, and to identify the substance present in a particular portion of the sample. Hopefully, at the end, you will be able to state which sample contains the mock uranium and give evidence to support your identification.
Uranium is just one fuel used to supply our country with electricity. The mining and processing of uranium can be challenging. At the conclusion of this activity, you will predict and investigate a comparison between uranium as a source of fuel and another commonly used mineral.
Procedure • Note to Teachers: This activity is designed to be done as a culminating activity at the end of the chemistry portion of a physical science course. In addition to reviewing many concepts in chemistry, the energy concepts and investigations provide a transition to the physics portion of the course. This project was written with an emphasis on Georgia. Teachers may adjust it to reflect different states.
Procedure • During the class before the lab is to be done, introduce the topic of uranium as a source of fuel for the production of electricity. Give the students a copy of the “Reversing Mother Nature” article along with the worksheet. Have the students complete the worksheet as they read the first five pages of the article. This assignment could occur during class or be given as a homework assignment. • On the day of the lab, talk to the students about the challenges and methods of mining and isolating uranium as discussed in the article. • Pass out a copy of the lab sheets. Allow time for students to read over the lab to become familiar with what they are to be doing. • Go over the procedures with the students, pointing out safety concerns, where materials are located, how to dispose of used materials, and clean up materials. • Allow the students to perform the lab, supervising them for proper and safe techniques. Some of the color changes may be slight; encourage students to take the time necessary to make proper observations.
At the conclusion of the lab, the students should make a prediction about the energy equivalence of uranium and coal. (How much coal would produce an equal amount of energy as this small amount of uranium did?) Students should create a physical model of this predicted ratio using toothpicks. 1 uranium toothpick contains the same amount of energy as how many coal toothpicks? Students should show this model to the teacher and record the prediction on the lab sheet. (Though you will supply many toothpicks, it is unlikely you will have enough to accurately display this ratio but it is also unlikely that the students will notice this.)
As a homework assignment, students should use appropriate websites on a computer to look up the actual ratio of energy from uranium versus coal. This true ratio along with website used for the information should also be recorded on the half page homework sheet. (If time and resources permit, this could be done in class.) • At the conclusion of this activity, the teacher should lead the class in a discussion of the techniques used in the lab as well as the difference between the energy released from uranium and coal. • This lesson could lead to further investigations into the pros and cons of different fuels used for the generation of electricity.
Safety Issues • Students should wear proper lab attire including closed toe shoes, lab apron, and lab goggles. Sodium hydroxide is corrosive both as the solid and in solution; skin burns are possible; avoid all body tissue contact. Iodine tincture, phenolphthalein solution, and isopropyl alcohol solution are flammable liquids and are toxic by ingestion and inhalation. All other reagents and unknowns are considered non-hazardous; however, all may cause slight irritation to the skin, eyes, or respiratory tract; avoid all body tissue contact.
Troubleshooting Tips • The reading level of the “Reversing Mother Nature” article is advanced. The worksheet is designed to help students work through the text however having an audio recording of the article available to students who need such assistance would be a good idea. • Teachers should work through the lab before the students attempt it to become familiar with the procedure and results.
Assessment Pre-Activity Assessment • Students will complete the worksheet that guides the reading the first five pages of the “Reversing Mother Nature” article. Mid-Activity Assessment • Lab: Students will complete the identification chart as they work through sorting out the 9 white powders. • Students will make a prediction and use quantities of toothpicks to illustrate the relative energy equivalence of uranium and coal. • Students will use reliable internet sites to find and record the actual ratio of energy equivalence of uranium and coal. Post-Activity Assessment • Question/Answer: Ask the students and discuss as a class the challenges of producing uranium and why or why not it might be worth it.
Suggested Extensions • Uranium and coal are just two of the fuels used to generate electricity in Georgia and in other parts of the world. Have students investigate other fuels and evaluate them as better (or worse) alternatives to coal and uranium. • More advanced students should read the complete “Reversing Mother Nature” article to learn about the clean up procedures and requirements for an ISR uranium mine and compare that to similar needs at other fuel mining sites.
Documents “Reversing Mother Nature” (available at http://uraniumenergy.com/_resources /stockinterview_isr.pdf?phpMyAdmin=781 d5a28f54f6d83b0f050f5abd2038f) Websites that are useful for Isolating Uranium lessons http://uraniumenergy.com/uranium/in_situ_leach/ http://uraniumenergy.com/_resources/stockinterview_isr.pdf?phpMyAdmin=781d5a28f54f6d83b0f050f5abd2038f
The Lab: Qualitative Analysis of 9 Unknowns: In Search of Uranium Introductions: • In this lab we will simulate the isolation and identification of uranium from a group of 9 mystery substances that all white solids. We will use a variety of chemical and physical tests to identify these 9 substances that came up when we were mining for uranium. Though the compounds being tested are actually common household substances, in this lab they are being identified as a component that could be found in the rocks and soil where uranium is mined. Background: • The process of determining the identities of unknown substances is called qualitative analysis. A qualitative analysis scheme using simple chemical and physical tests is designed, in this laboratory experiment, for the identification of 9 common household white solids. Qualitative analysis procedures include physical tests as well as chemical tests. The physical tests in this lab are melting point determination and solubility in water or in alcohol. The chemical reactions or tests in this lab are with iodine, vinegar, sodium hydroxide, and phenolphthalein. All of the chemical tests involve either formation of a precipitate, a color change, or evolution of gas bubbles.
Procedure 1. Pick up one of each of the test tubes labeled A – I. Put them in the beakers provided. Notice the stoppers have the same letter on them. Make sure no other stopper goes in or near that test tube! 2. Add approximately 5 mL of distilled water to each tube. (To do this easily and quickly, put about an inch and a half of water in each tube.) 3. a. Put the cap back on each tube (A on A, B on B, etc.) and shake each tube about 10 seconds. b. Two of the substances in the tubes will NOT dissolve. They are the amylose and the limestone. The next step will be done on those two tubes only. For the rest of the tubes, go to step 5. 4. To the two tubes that did not dissolve, add 2 drops of iodine tincture to each tube. The tube that stays or turns orange-brown contains the limestone. Put the name limestone in the box next to this test tube letter in the chart on the previous page. The other tube should turn a deep blue color. That color change is a positive test for the presence of amylose. Put this name next to the letter of the test tube on the chart on the previous page.. Drain the contents of these two tubes into the sink. Tap the solids out of the tubes into the trash can. Rinse out those tubes and put the dirty but empty tubes in the dirty test tube container along with their caps.
5. The other test tubes contained solids that are water soluble. To each of the tubes left over from step 3, add 3-4 drops of phenolphthalein solution. Two of the unknowns, caustic sodaand natron, dissolve in water to produce alkaline solutions basic enough to give a bright pink color upon addition of phenolphthalein. Do not be concerned with precipitate (solid) formation or a faint pink color at this point. 6. Dispose of the contents of the two tubes that gave a positive (fuchsia) test by draining the liquid into the sink, rinse out those tubes, and put the dirty tubes and caps in the dirty test tube container. Get a fresh tube that has the same letters as those two tubes. Add approximately 10 drops of vinegar to each tube and check to see whether gas bubbles are produced. The evolution of carbon dioxide gas positively identifies natron. The remaining solid must be the caustic soda. Put the names of these two compounds in the appropriate boxes on the identification chart. Drain and rinse those tubes and caps. Put them in the dirty tube container. 7. Get a fresh tube of the 5 remaining substances. Drain and rinse the dirty tubes and put them in the dirty tube container. 8. Add 5 mL of distilled water to the five tubes. Put the caps on and shake to dissolve. Add 3 drops of 0.2 M NaOH to each tube. All of the tubes should remain clear except one tube which gives a white precipitate. This white precipitate positively identifies the presence ofepsomite. Put this identification on your chart.
9. Drain and rinse all five tubes and caps. Add them to the dirty tube container. 10. Get a fresh tube of the four remaining unidentified solids. Do not add water this time. Add approximately 10 drops of vinegar to each tube and note whether gas bubbles are produced. The evolution of carbon dioxide gas at this point positively identifies trona. Label this on your identification chart. 11. Drain and rinse all four tubes. Add them to the dirty tube container. Get a fresh tube of the three remaining unknowns. Do not add water. Add approximately 5 mL of isopropyl alcohol to each tube. Put the cap on each tube and shake to dissolve. Of the three remaining solids, only the sassolite dissolves readily in alcohol; thus, this test is a positive identification for sassolite. Label this on your identification chart. Dispose of all three tubes and caps as you did before. 12. Get a fresh tube of the two remaining unknowns. Using a test tube clamp, hold each tube horizontally over the flame of a candle. Make sure the open end of the tube is not pointing towards anyone. The contents of one of the tubes will turn brown, smell sweet, and begin to melt in 1-2 minutes. DO NOT CONTINUE HEATING ONCE YOU HAVE DETERMINED THE CONTENTS ARE CHANGING!. This change is an indication that the material has a low melting point and that it is saccharose. The other solid will not change as it is heated. This indicates that the solid has a high melting point and is what we have been lookingfor triuraniumoctaoxide! Label these on your identification chart. Dump and rinse out the tubes and caps. Add them to the dirty tube collection.
Part II: Were all those steps worth it? • So only a small portion of all those solids contained our imitation uranium compound. Coal is another fuel used to generate electricity in Georgia and around the world. Which fuel gives you more energy per kilogram of substance? • If one toothpick represents the energy released from one kilogram of uranium fuel, how many toothpicks would you need to represent the number of kilograms of coal needed to release as much energy? • Write your prediction here and then use the provided toothpicks to create a model showing 1 toothpick for uranium to however many you predict for coal. Show this to your teacher. • I predict that 1 toothpick’s worth of uranium provided energy would be equal to • ____________ toothpicks of coal provided energy.
Homework Use an appropriate website to find the actual ratio of energy released per kilogram of uranium fuel to the energy released per kilogram of coal. Report the answer and the website you used to find this information on the supplied half sheet.
Lab Answer Sheet Part 1: Identification Chart: When you identify the substance in each tube, write the name next to the test tube letter.
Part II: Were all those steps worth it? Prediction of ratio of energy equivalence of uranium to coal: I predict that 1 toothpick’s worth of uranium provided energy would be equal to ____________ toothpicks of coal provided energy.
Homework answer page Use an appropriate website to find the actual ratio of energy released per kilogram of uranium fuel to the average energy released per kilogram of coal. Report the answer and the website you used to find this information. Actual ratio: Website used:
Also included • Teacher version of lab • Teacher answer key to worksheet
Martha Muir • Mill Springs Academy • 13660 New Providence Road • Alpharetta, GA 30004 • mmuir@millsprings.org • 678-893-7860