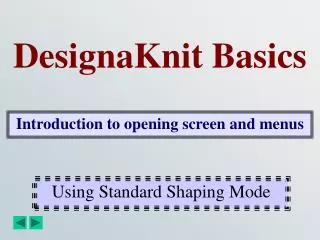
DesignaKnit Basics
DesignaKnit Basics. Introduction to opening screen and menus. Using Standard Shaping Mode. A Knitcraft Presentation. http://www.designaknit.com. Knitcraft Inc. C. 2002. 500 N Dodgion. Independence MO 64050. For assistance contact: knitcraft@knitcraft.com. 816 461 4912.

DesignaKnit Basics
E N D
Presentation Transcript
DesignaKnitBasics Introduction to opening screen and menus Using Standard Shaping Mode
A Knitcraft Presentation http://www.designaknit.com Knitcraft Inc. C 2002 500 N Dodgion Independence MO 64050 For assistance contact: knitcraft@knitcraft.com 816 461 4912
Now that you have DesignaKnit Installed! Lets take a look at Menu options throughout the program.
Standard Styling Mode will be used to introduce you to the concepts needed to work effectively with DesignaKnit. DesignaKnit contains many tools to help you in the design process. I hope to give you a good base to understand the names and actions of the tools offered.
As we proceed through I will cover creating a garment in Standard Styling as well as Entering your own Measurements for quick easy custom fitting. Lets get started!
DesignaKnit 7 opening screen Mode menu This is the Access point to DesignaKnit program modes.
Mode Menu Drop Down Menu choices Standard Garment Styling Mode Original Pattern Drafting Mode Stitch Designer Mode Interactive Knitting Mode Graphic Studio Mode
The Mode is a specific segment of DesignaKnit. Each mode has it’s own specialty but completely integrates with all the other modes.
There are 2 ways to enter the mode you wish to use. 1: Left Click on Mode, thenLeft click on the Mode you wish to use. 2: Left Click on the Icon bar symbolizing the Mode choice. OR
Standard Garment Styling Mode • Used to create a basic garment shape from existing templates. • Create personalized measurement charts and apply to template shapes. • Create a basic garment to move into Original Drafting Mode.
Original Pattern Drafting Mode • Create your own unique garment styles. • Import patterns from Standard Shaping and modify them. • Input patterns shapes from charts or sewing patterns.
Stitch Designer Mode • Create Stitch patterns using the handy drawing tools. • Edit existing designs. • Layout individual stitch patterns on the garment shape. • Integrate stitch design with garment shape. • Set Cut and Sew outline for easy assembly of finished garment. • Prepare color settings and pattern separation settings for download. • Download patterns to the Knitting Machine.
Interactive Knitting Mode • Receive pattern shaping instructions. • Receive color change instructions. • Receive marker setting instructions. • Easy to follow chart for Intarsia Knitting.
Graphic Studio Mode • Use clip art to create stitch designs. • Turn Photos into stitch patterns. • Convert scanned images into stitch designs. • Import digital camera images to create stitch designs.
Standard Styling Mode Icon We will travel through the menu options to give you a good base for all the DesignaKnit modes as we create a garment .
Getting Started With Standard Styling. Click on the Standard Styling Icon
The dialogue box automatically appears. A dialogue box is used to give instructions, warning messages or choices for you to make. The Dialogue Box is your way to answer the questions necessary for the program to do what you want.
Once a selection is made this button activates the choice. On some selections this button is not necessary on others you push the selection then push Ok. If you find yourself viewing the wrong screen because of an incorrect choice cancel will return you to the previous screen. This button will close the dialogue box. It has the same affect as Cancel. This button accesses the online help menu in DesignaKnit. File Path File path is a very important concept to understand. When you save a file you must know where you saved it. That is called the file path.
Create a new garment. Use this option when creating a new shape file. Open an existing garment Use this option when you want to use an existing garment to do layout work, to modify tension settings or styling options. Use this option to enter your personal measurements. These measurements will remain on file until you delete them and you can use them to apply to any template garment shape. List of recently used files. If the file you want to reopen is on this list a single left click will quickly reopen it.
Click New Garment Grayed out options indicates they are not applicable to the garment type you have chosen. If skirt were selected this box would be in black print and the options usable. Click on the options you want to apply in each section. Click OK.
Tensions Dialogue Box Enter measurement in stitches per 4” or Enter measurement of Width and Height of 40 stitches and 60 rows. Do Not attempt to fill in both.DesignaKnit will automatically calculate the settings of the opposite box set using your entered measurements.
These segments are optional. These option lines are for personal use only. DesignaKnit does not use them in any way. When you enter information in this area it will print out on your printed pattern. Click Set as default and the tension settings will automatically be applied every time DesignaKnit is opened. The same rules apply as for main tension. Fill in one or the other but not both. Rib tensions must be set. Click OK
Choose from a standard chart of sizes in the range you selected. Adult Child or Baby. Standard Size Or from a set of measurements entered by you. Custom Size Click on the button next to the option you wish to select. We will choose Standard Size as we have no custom measurements yet.
Click on the size you wish to apply. Click OK.
Measurements Chart You can change any of the measurements by clicking on the box and typing in the new numbers. You may not leave a box blank but you can put in a 0. When you click in the measurement box the picture changes to indicate where the measurement should be taken.
Tensions 7.6 10.2 8.4 11.2 Options 23131441013 Chest 32.3 5.5 Waist 24.4 0.8 Waist or hip 34.3 3.5 Nape to garment length 23.4 Hip depth 8.1 0.0 Arm length 22.6 0.0 Arm hole (scye) 14.9 6.0 Upper arm 10.4 5.5 Wrist 6.1 3.1 Shoulder to shoulder 13.0 0.4 Hip 34.3 3.5 Arm hole depth 8.1 1.0 Body Rib 2.0 Body Blousing 0.0 Body Straight 1.2 Overlap 0.0 Shoulder width 0.0 Shoulder drop 0.0 Armpit seam 0.8 Neck Rib 1.3 Width 6.6 Neck depth 3.0 V neck depth 7.5 V Straight 1.0 Back width 6.6 Back depth 0.8 Back straight 1.0 Sleeve Rib 2.0 Sleeve Blousing 0.0 Sleeve Straight 0.9 Neck edge 1.1 At shoulder 1.9 Before gathers 4.2 After gathers 4.2 Overall extra 1.0 Raglan slope 0.1 Hem depth 2.0 Total length 23.6 Circumference 47.2 Straight 0.0 Curve 3.0 Waistband 2.0 You can copy the measurements from this screen and paste them into any word processing program Sample information Press copy, open notepad or any other word processor and press Edit Paste.
File name Box Type in the file name. The * must be removed or the file will not be saved. File type box Adds the 3 letter extension to the end of the file name you give. This allows a program to filter files it can open. File Path Box Indicates where the file is to be saved. You must know where you save your files to be able to open them latter.
The file will be saved in your Dk7 directory under the shapes folder unless you specify differently. To save the pattern file to a different location Click the down arrow under Drives. Click on the drive you want to save to.
Our Basic Garment is now finished and saved. There are several styling options you can choose from in Standard Styling Mode that allow you to modify rib widths and lengths. This allows you to add your own specifications to the template garment.
Throughout DesignaKnit these two icons remain constant and do the same function. Will always undo the last action. The ? Will always take you to the help in the specific area you are working with. Return to Select Garment Type Box. Return to size charts. Return to Measurements Box. Styling Options Icons.
The Styling Option Icons allow you to change things about the shape.
When you click on a box to change the numbers DesignaKnit will draw a circle and line in red to show what is affected by this change.
When changes are made click File/Save because the file already has been named earlier and we just want to save the changes. Drop Down Menus reflect the icon choices. Many are the same as clicking on the icon however you can find added features under the drop down menus that are not represented by Icons. I will cover the options that do not have icons.
File Options
File Drop Down Menu Options Create a New Shape File Pattern. Open an Existing Shape File only if it was created in Standard Mode. Save changes to a Shape File. Save a new file that has not been named. Delete a file from the hard drive. Print a paper copy of the Pattern Shape. Choose the printer options and printer to use. Close the Mode you are using and return to opening screen.
Create a New Shape File Pattern. Use this option when you want to start a completely new garment. File New instructions are the same choices you have when you first open Standard Styling Mode.
Use this option when you want to open an existing File. Caution: A Pattern File that has been created in Original Mode or aFile that has been taken to Original Mode from Standard Styling mode can not be reopened in Standard Mode.
This is a quick way to save a file once the name has been given. • This option should be used when you are making modifications to an existing pattern and wish to keep the changes. • If you click on Save when the pattern has not been saved it will automatically open the Save As box allowing you to name the file.
This option allows you to specify the location a file is to be saved and gives you the opportunity to name it. • You should use Save As when you want to save a file for the first time and when you want a duplicate of the same file. • You can use this option to give the pattern a new name and have a duplicate copy for latter modification or just security.
Deleteremoves the file from your hard drive. Use this option only when you want to permanently remove a file. You will not be able to undo this action.
Print Setup is the option that allows you to select your printer. The choices you will find under this option will vary according to the printer you have. The print option allows you to create a hard copy (Paper Print Out) of your pattern file. Press the Print Button and a Dialogue opens with all the pattern pieces listed.
Type the 2 letter code in this bar for each piece you want to print. Printing Formats Printing Choices
Formats available when any shape file is open to be printed. Formats available only when integrated shape is open to be printed.
For each format there is an option screen to further refine your final print out. Click the Options button.