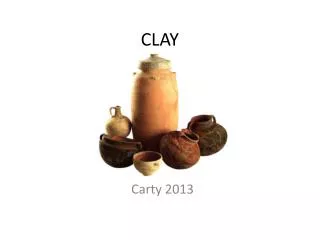
Essential Guidelines for Clay Work: Techniques and Amulet Creation
200 likes | 340 Vues
This guide covers essential clay work techniques including wheel-throwing, handbuilding, and amulet creation. It emphasizes the importance of professionalism, proper disposal of materials, and maintaining clay in optimal conditions. Additionally, step-by-step instructions detail each technique—such as wedging, coiling, and pinching—along with procedures for mixing slip and scoring. Safety is highlighted through strict rules about food, drink, and cleanliness, ensuring a productive and respectful creative environment. Get ready to enhance your skills while creating unique clay pieces!

Essential Guidelines for Clay Work: Techniques and Amulet Creation
E N D
Presentation Transcript
Keys to Clay • Put everything in the cubby • Grab a notes sheet • Put your name on it • On a ticket: What is an amulet?
Keys to Clay • Pay attention to the videos • Do not throw or misuse – Many Professionalism Points will be deducted. • DO NOT DUMP SLIP OR CLAY DOWN THE DRAINS!!!!!!! Dispose of your slip in the garbage can. Scrape excess slip and clay from tools, slip cup and table into the trash! • Keep your clay wrapped in plastic every time you’re not using it. Don’t leave it unwrapped for more than 15 minutes • ABSOLUTELY NO FOOD OR DRINK DURING CLAY UNIT. You’ll be asked to toss it in the trash immediately.
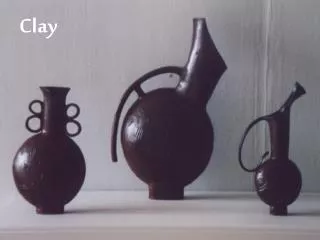
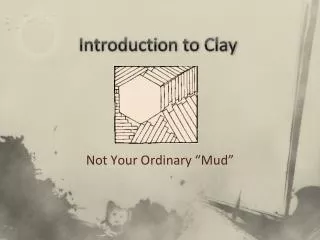
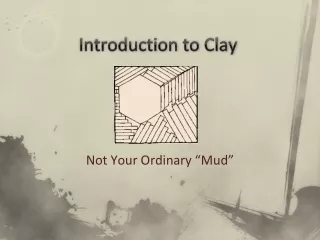
Clay Techniques • Wheel-Throwing(Sculpture I and II) • Handbuilding • Slab Technique • Coiling • Pinching
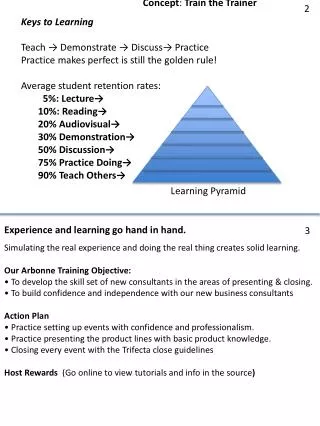
Wedging Preparing the clay for use by kneading or cutting a chunk to work with. This removes air bubbles, and aligns the clay particles, which increases plasticity. Plasticity is the property of clay that allows it to be worked and reshaped. If your clay is cracking and too hard, it means you haven’t wedged it enough!
Slab Technique First technique of handbuilding. Making a flat, thick, rectangular sheet of clay that you can use to cut out shapes to piece together.
Cutting with a Pattern Cut a shape out of a piece of paper that you can use as a pattern. Place your pattern flat onto your slab. Make sure your slab is of a uniform thickness - otherwise your piece will be structural unsound in some spaces, too thick in others, too thin in others and will bake unevenly in the kiln.
Slip A very wet form of clay, used as an adhesive between two pieces of clay to join them to one another. Make slip by adding tiny bits of unbaked clay into a little bit of warm water. Stir together until it has the consistency of yogurt.
Score and Slip This is what you do to connect two pieces of clay together. It is done by scratching the two surfaces that are to be connected with a fork, applying slip to both with your fingers, and then pressing the two together to adhere them.
Coiling 2nd handbuilding technique. Create large thin snakes of clay then wrap them atop one another to create a bowl form. Slip and score in between rows to keep them together. Smooth the coils with your fingers to make a smooth looking outside edge.
Coiling Use very thin coils to reinforce edges that you’ve slipped and scored together. Roll a thin coil, wrap it around the seam and smooth it until it disappears from sight. If you’ve slipped and scored a large attachment, slip and score your reinforced coil onto the seam.
Pinching 3rd technique of hand-building. Roll your clay into a sphere. When you have a smooth ball, push your thumb into the center of the ball. Then, pinch the clay gently between your thumb and forefinger as you rotate the ball in the palm of your hand, pinching and pulling your piece clay into a bowl form.
Smoothing and Scraping To smooth away any uneven areas and scrape off excess clay. Also used for cleanup of your work area. Many different tools scrape and smooth. Experiment with a wide variety to find which ones you like!
Carving Designs, Piercing, Incising, Applique and Impressing Add visual interest and variety to your piece with these techniques: Experiment with different tools, types of cloth, foliage, objects, etc. to create different looks Use knives and needle tools to pierce and incise (create holes and cutouts) in your clay structures Add small details to your pieces with applique(cutting and adding new objects to your clay piece.) Be sure to slip and score these on! Add texture by impressing objects into your clay. The possibilities are endless. Bring in your own objects to try!
With the person next to you… • 1 person from your table, grab: • 2 chunks of clay • Other partner, grab: • 4 cardboards • 2 small • 2 large • A fettling knife • 2 forks • A rolling pin
For the rest of the Day: Amulet Prep • Before the end of class please prepare: • Label 2 pieces of cardboard with your name • 1 small cardboard • 1 large cardboard • 1 slab to be cut down to amulet size next class DO NOT SMACK IT ON THE TABLE • Work on the large cardboard • When you are finished transfer the clay to the smaller piece of cardboard • Wrap with plastic very tightly! • Put your cardboard(2x) and clay in the designated Cabinet • Put all other tools away
Create an Amulet Create an Amulet • Before you begin, please prepare: • 1 container of slip per table • Little bit of clay • A lot of warm water • Mix until a yogurt consistency • Retrieve your • 1 small cardboard with clay slab • 1 large cardboard • Clay tools • Use a cutting tool to cut the SHAPE of your amulet • Use a paper template – Do not free hand it • Use the highly ornate design that you created for homework to create an extremely detailed amulet. • Work your fresh clay on the large cardboard • Cut carve and shape clay pieces (appliqué) to attach the slab • Remember to slip and score • Carve detailed designs into slab and/or appliqué pieces. • When you are finished • Wrap with plastic very tightly! • Put all materials in their designated homes.