Download
1 / 43
430 likes | 564 Vues
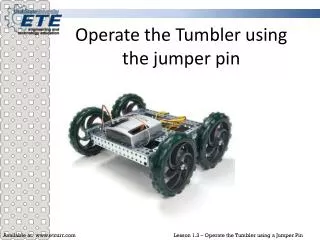
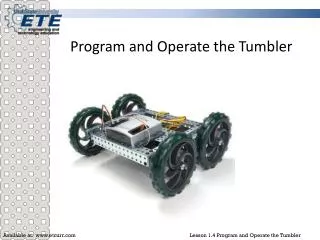
Program and Operate the Tumbler. Program and Operate the Tumbler. Performance Objective: Program and operate the Tumbler in Tank (stick), Arcade, and Tank (button) modes, navigate the obstacle course in each mode in less than 80 seconds . Enabling Objectives:

E N D
Program and Operate the Tumbler • Performance Objective: Program and operate the Tumbler in Tank (stick), Arcade, and Tank (button) modes, navigate the obstacle course in each mode in less than 80 seconds. • Enabling Objectives: • describe the following items: Tank (stick) mode, Tank (button) mode, Arcade mode, function block tree, main code window, while loop • describe the purpose of a while loop • explain the method for setting the configuration of the motor ports • explain the steps to program the Tumbler in Tank (stick) mode • explain the steps to program the Tumbler in Arcade mode • explain the steps to program the Tumbler in Tank (button) mode
Tank Mode In tank mode the Tumbler acts like a tank The left side motors operate together using one joystick The right side motors operate together using the other joystick
Start a new program Open the easyC V4 Cortex software for the start menu or desktop icon Begin a New Standalone Project Select Joystick Project (WiFi) Click OK
Tree of Function Blocks This will be referred to as the function blocks tree You will use this to add functions to your code
Main Code Window This will be referred to as the Main Code Window You will drag items from the functions block into the Code Window
Defining Motor Ports First you want to remind yourself which motors are plugged into which ports Double click on the “Config” block in the main code window
Defining Motor Ports Label the motor ports according to where the motors are located on the robot and to which port they are connected to This will make programming the motor ports easier later in this stage Click ok
While Loop A while loop is a function that performs a task while something else is true For your program, you want the Joystick to control your robot while 1==1 Unless you state otherwise in your code, 1 will always be 1, therefore your remote will always control your robot with this particular code
While Loop In order to use the remote, we need to create a while loop where 1==1 Drag a while loop from the program flow section of the functions tree into the code between begin and end
While loop A window will pop up, type in the expression while box “1==1”. Click ok
Joystick 4-Motor From the functions tree under Joystick, drag Tank 4–motor into the while loop
Joystick 4-Motor Make sure the left channel (which will control the left side motors) is set to 3 and the right (which will control the right side motors) channel is set to 2 Select the appropriate motor port for the left front, left rear, right front, and right rear motors, Click ok
Download Code Be sure the orange USB-to-serial cable is plugged in to both the computer and remote Turn on the microcontroller and remote, allow to sync Click Build and Download from the Build and Download Tab
Download Code Click Yes that you are sure Close the reminder about the master code Allow file to download Click ok to confirm the download is complete Close the IFI/intelitek loader window
Try it! Your Tumbler should now operate with the joysticks in tank mode If it runs properly, show your instructor! If you see that your motors are turning the wrong direction, proceed to the next slide
Invert direction Double click on the tank function
Invert direction Invert the motors that are turning in the wrong direction Invert by changing the invert direction from 0 to 1
Download Code Once you have inverted the direction of the necessary motors download your new code through “build and download”
Success! You are now finished programming in Tank (stick) mode. Now you can go complete the obstacle course!
Arcade Mode Start new program Configure motor ports Insert While loop
Arcade – 4 motor From the functions tree, drag Arcade – 4 motor into the while loop
Arcade – 4 motor Make sure the Forward/Reverse Channel is set to 2 and the Rotate Channel is set to 1 Select the appropriate motor port for the left front, left rear, right front, and right rear motors, Click ok
Download Code Be sure the orange USB to serial cable is plugged in to both the computer and remote Turn on the microcontroller and remote, allow to sync Click Build and Download from the Build and Download Tab
Download Code Click Yes that you are sure Close the reminder about the master code Allow file to download Click ok to confirm the download is complete Close the IFI/intelitek loader window
Try it! Your Tumbler should now operate with the one joystick in arcade mode If it runs properly, show your instructor! If you see that your motors are turning the wrong direction, proceed to the next slide and invert the direction of the necessary motors
Invert direction Double click on the arcade function
Invert direction Invert the motors that are turning in the wrong direction Invert by changing the invert direction from 0 to 1
Download Code Once you have inverted the direction of the necessary motors download your new code through build and download
Success! You are now finished programming in Arcade mode. Now you can go complete the obstacle course!
Tank (button) Mode Start new program Configure motor ports Insert While loop
Joystick Digital to Motor Because a button is used to control the motors, a digital output is needed From the functions tree under Joystick, drag Joystick Digital to Motor into the while loop
Joystick Digital to Motor • Set the following for the left front motor: • Joystick # = 1 • Channel # = 5 • Forward Direction • Button # = 1 • Motor Value = 127 • Reverse Direction • Button # = 2 • Motor Value = -127 • Motor # = Appropriate
Why these settings Joystick 1 will perform this function The left side buttons are channel 5 (controls left motors) Button 1 is the top button (top = forward in this case) 127 = full speed forward Button 2 is the bottom button (bottom = reverse in this case) -127 = full speed reverse
Joystick to Digital Unlike when programming tank (stick) and arcade, this one function block only controls one motor Therefore, three more function blocks will need to be created to control the other three motors
Creating additional blocks Try and program the other three blocks Remember to use a Joystick Digital to Motor function Pay attention to the channel, buttons, and motor numbers Proceed to the next slide once you have attempted the three function blocks
Download Code Download the code to the microcontroller
Try it! Your Tumbler should now operate with the buttons in tank mode If it runs properly, show your instructor! If you see that your motors are turning the wrong direction, you may need to invert the direction of the motor
Download Code You may have to invert the motor value (switch 127 with -127) depending on how the motors are installed Once you have inverted the direction of the necessary motors download your new code
Success! You are now finished programming in Tank (button) mode. Now you can go complete the obstacle course!