Download
1 / 57
580 likes | 784 Vues
Building a Watershed Model. Bob Broz and Dan Downing University Missouri Extension Water Quality Program (573) 882-0085. What is a Watershed?. From the Missouri Watershed Information Network Water Glossary: http://www.mowin.org/

E N D
Building a Watershed Model Bob Broz and Dan Downing University Missouri Extension Water Quality Program (573) 882-0085
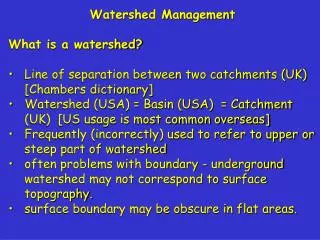
What is a Watershed? From the Missouri Watershed Information Network Water Glossary: http://www.mowin.org/ WATERSHED - (1) All lands enclosed by a continuous hydrologic drainage divide and lying upslope from a specified point on a stream. Also referred to as Water Basin or Drainage Basin. (2) A ridge of relatively high land dividing two areas that are drained by different river systems. Also referred to as Water Parting. (3) All of the land that water flows over or through before reaching a lake or river. The term watershed and basin are often used synonymously.
A watershed can be large, as the Mississippi River watershed : How did Lewis and Clark know where to find the western boundary of the Louisiana Purchase? - All the waters that flow to the Mississippi River.
Or one of my favorites, Tavern Creek This graphic is really only about half of the Tavern Creek watershed, as it is a USGS Hydrologic Unit, which is not always exactly the same as a watershed.
Map resources on the internet: Geographic Information Systems, or GIS A good starting place: The Missouri Watershed Information Network (MoWIN) http://mowin.org and CARES - http://www.cares.missouri.edu
The Learning Web from the U.S. Geological Survey: http://www.usgs.gov/education/ Learn all about maps and topography here.
Maps generated on the internet: National Atlas from USGS http://nationalatlas.gov/printable.html#reference Examples of printable maps on this website: • Congressional Districts for the 110th Congress • Federal Lands and Indian Reservations • Precipitation of the Individual States and of the Conterminous States (left) • Reference and Outline Maps of the United States • Satellite View • Time Zones
This map had only two options of many chosen – Land cover and HUAs (watersheds)
Environmental Protection Agency features the following: Envirofacts Data Warehouse for Water - http://oaspub.epa.gov/enviro/ef_home2.water The EnviroMapper - http://www.epa.gov/enviro/html/em/index.html And the ‘Surf Your State’ interactive map (below) - http://cfpub.epa.gov/surf/locate/index.cfm Missouri - Use the state map or Places Involving this State watershed links below to zoom in to find more information about your watershed. State ProfileFind general information integrated for this specific state
Building a Model Many different strategies and materials • Styrofoam • Concrete • Paper-maché • Starch • Drywall compound
Using a commercially built watershed model such as the EnviroScape model to show how water flows in a watershed environment. Commercially available models may be cost prohibitive. Building your own may be fun and educational.
Carving a watershed model from Styrofoam. You can use a copier with enlarging capability or plot on graph paper. The scale can be chosen to match commercially available toys.
Draw out the water features that would be the lowest part of your topographical map. Use a plastic knife or hacksaw blade to cut the Styrofoam when possible.
Start adding the next layer of topographical levels by cutting the shape. Wood glue, contact cement, or other adhesives may be used to attach features. Some glues contain solvents that may react with the Styro-foam.
Add some color to represent water, soil, and other different parts of the landscape When complete the model maybe sealed with polyurethane, lacquer or others coatings to make it water proof & prolong the life of the model.
Some were done to scale and represented specific areas that people knew.
Some showed point source pollution issues that were associated with things in the community.
Some tried to show the diversity that you would find in a watershed by including agriculture, urban building, and community infra-structure.
Some were a little harder to understand but were a good learning experience.
This was designed using the topographic features and shoreline of a community area. The scale (or relief) of the vertical mountains was changed to demonstrate water movement and flow. The concrete can be stained to different colors to represent land cover and land use.
The watershed model does have a drain area and different things can be used to represent possible contaminants. Here a student is teaching others about watersheds and personal watershed responsibility.
SLO permanent model link • http://www.slocounty4h.org/r2rwe/pdf/conman.pdf
Other forms of watershed model making – Use paper-maché, starch, modeling clays, or other materials. One of the least expensive? Rocks-in-a-box. To be functional as a demonstration model, it is helpful if the model is sealed and waterproof.
Rocks-in-a-box Form landforms with rocks, gravel, and sand. Cover with plastic. Form a basin in one corner or end of the box. Spray with water; discuss what happens. Instant Watershed!
Put gravel and rocks in container and shape as hills and valleys then cover with plastic (plastic is optional). Spray colored water on the plastic and watch where and how it runs to the same location. Explain the definition of a watershed, pervious and impervious areas, etc.
The Drywall Mud Model Use Setting-Type USG Joint Compound. You can purchase joint compound that will set in 20, 45, or 90 minutes.
Joint compound is composed mostly plaster of paris and finely ground limestone. It will create dust as it is being mixed and when it is sanded. There are warnings about dust and, you will also note, a hazard warning if it is molded around the human body. Because the chemical reactions that allow it to harden generate heat, burns can result if it is molded on the body.
Choose a watershed that has meaning to your students. We have chosen the “Anderson Hollow” watershed because it is entirely contained on the topographical maps that we used for programs with children at Camp Cloverpoint 4-H Camp.
Use the zoom on a copy machine to scale-up (or down) the topographic map. This is definitely a math exercise.
Use markers to trace the watercourses within the targeted watershed. This should form something like the veins of a leaf.
Use your knowledge of topographic maps to draw the outline of the watershed. You might have to look at an original to see the blue. This should basically follow the ridges.
Station 2 Determine the vertical exaggeration you will use to show Missouri’s relief effectively. In our watershed, it flows to the Lake of the Ozarks, elevation 201 meters. Tracing the hilltops, we find the highest elevation to be around 300 meters. So we have an elevation differential of around 100 meters within the watershed. Let’s make the total height of our watershed 10 cm. Our math: 10cm (map) = 100m (actual elevation). So for every 10 meters of elevation, we can represent it with 1 cm of model height.
Mark strategic points in watercourses and on hills and ridges.
Ways to represent height before we goop it – you can use straws or wooden rods
Locate ridges, use filler, newspapers, etc. if desired. Keep track of where you are; use a reference map.