Using a Map and Compass
Using a Map and Compass. Know your stuff and stay found. Edited 3/31/14 **These are only the basics of using a map and compass. Much practice and maybe even taking a class or two are strongly recommended before hiking in back country with a chance of needing these skills for survival.

Using a Map and Compass
E N D
Presentation Transcript
Using a Map and Compass Know your stuff and stay found. Edited 3/31/14 **These are only the basics of using a map and compass. Much practice and maybe even taking a class or two are strongly recommended before hiking in back country with a chance of needing these skills for survival.
Topographical Maps • This is a topographical map (often called a topo map). • A topo map is very useful for outdoor recreation because it not only shows the trails, but it also shows the shape of the land. • If you know how to read a topo map you can have a pretty good idea of where you are based on the landforms and bodies of water around you.
Parts of a Topo Map • Contour lines show you the shape of the land by running along a specific elevation. • An index contour shows you the elevation (feet above sea level). • The contour interval is the change in elevation from one line to the next.
Reading the Shape of the Land • When the lines are farther apart it shows a slope that is not as steep. • When the lines are closer together it shows a slope that is very steep. • This knowledge can help you pick the best way to go. Not Steep Very Steep
PLMS Topo Map PLMS • Topo maps also can show: • Forests • Buildings • Wetlands • Bodies of Water • Roads • Rail Road Tracks • And More Upper Woods Forest Issaquah-Pine Lake Rd Wetlands Lake
Matching Game • Match up the topo map on the left with the correct land form on the left. • How did you do? • 1=B • 2=E • 3=D • 4=C • 5=F • 6=A
What does it all mean? Don’t you feel smart? You are!Topo Smart!
Topo Map to 3D Model • If you are going to have enough foam you need to make your first 3 cuts as shown on the right. • You can work together with 2 or 3 others to mix and match colors for the different layers.
Using a Compass • First things first; North is not North . . . what? • There are two Norths • True North (This is the North Pole and almost always the top of our maps.) • Magnetic North (This is where the red compass needle points to.)
Magnetic North • Magnetic North is in Northern Canada and moves around, but is not at the North Pole. • If you were standing at the north pole your compass would point South to Magnetic North. • (Confusing huh?)
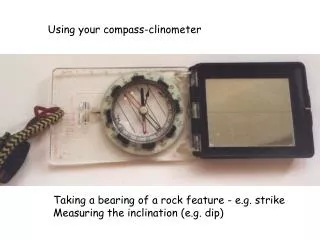
Parts of a Compass • The Magnetic Needlepoints to Magnetic North. • The Magnetic Needle is sometimes called “Red Fred”. • The Compass Housing spins so you can keep the Orienting Arrow facing the top of the map (North). • The Orienting Arrow is sometimes called “the shed”. “Go Arrow” (Mr. Abe’s Name) “Red Fred” “The Shed” Bezel
Setting Declination • The first step is to find the declination. (This is the difference between True North and Magnetic North and can often be found on the map). • For this area the declination is about 16° to the East as of Sept. 2013. (NOAA) True North Magnetic North Declination is about 12°East on this map.
Declination Continued • The map below shows the variation or the declination for the U.S. in 2010.
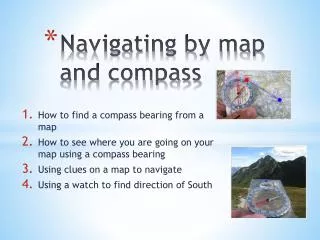
Compass to Map • Point the Direction of Travel arrow at the object. Spin the housing to put “Red Fred in the Shed”. • Place your compass flat on the map and rotate the entire compass until the “shed” points to the top of the map. Place the bottom corner of the compass on your location and the destination will be somewhere along the line created by the edge of the compass.
Keeping a Bearing • Once you know your heading (degree) you can spot a far away object using the map to compass instructions and then make that your target. • Once you reach your target simply use your compass again to find another target and walk to the second target. • This gets tough if you are going through woods or over a lot of mountains.
Triangulation • To figure out where you are on a map you can use the compass to map instructions to make 2 lines on your map. • The two objects should be easily identifiable on the map and be at least 60° apart. • The place where the two lines cross should be your location.
Which way do I go? Compass Game • Person 1 – Walk 10 paces with a bearing of 290°. • Person 2 – Walk 5 paces with a bearing of 340°. • Person 3 – Walk 15 paces with a bearing of 110°. • Person 4 – Walk 5 paces with a bearing of 240°. • (If you don’t have 4 people place a marker to hold the spot.) • What shape did you make? Tell your teacher and then try to make other shapes. Write down the bearings and paces. • Turn the housing (bezel) so the bearing is lined up with the direction of travel arrow. • Hold the compass flat and turn your body until the needle is in the orienting arrow. (Put “Red Fred” in the “Shed”). • Walk in the direction of the direction of travel arrow.