Download

1 / 7
70 likes | 191 Vues
This project showcases the evolution of a photo taken at Epcot, Walt Disney World, using a 35mm disposable camera. After developing the original image, I experimented with various techniques, including scanning, editing in Photoshop, and employing effects like "firelight" and "stained glass." The final product is a vibrant collage made from cut pieces of the original print, reassembled and digitized. The vibrant blue and indigo hues transform the green tree into a mesmerizing artwork, illustrating the beauty of creative photography and digital manipulation.

E N D
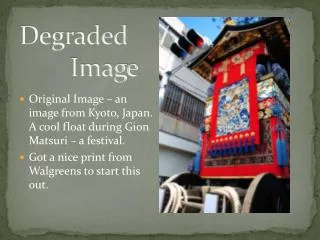
Here is my original photo. This photo was taken in the Mexico area of Epcot, at Walt Disney World. This photo was taken with a 35mm disposable camera, and then developed onto a CD-ROM.
For this slide, I decided to print the original photo out (1), then take a picture of the printed photo onto a digital camera (2). I then downloaded the photo back onto the computer from the digital camera. Printed version of original photo. Basically a picture of a picture!
For this shot, I photocopied the printed image from the previous slide (3), then scanned it back onto the computer (4). There is a large amount of blue in the picture now. The green color from this tree, now has a mix of blue and indigo colors. The building that once looked orange and yellow, now looks lavender.
I scanned the photo into the computer, then edited this image in Photoshop with a technique called “firelight” (5). I then took a picture of the edited picture with a digital camera located inside a digital cellular phone(6). I took the photo while it was still on the computer screen. This is the computer the photo was on when I took the picture with the digital cellular camera phone
While still on the computer screen, and after scanning the photo, I edited it in Photoshop with a technique called “firelight”. I then printed out the photo and cut the image and re-scanned it back onto the computer (7). Image has been cut into seven separate pieces, then placed in order, back together.
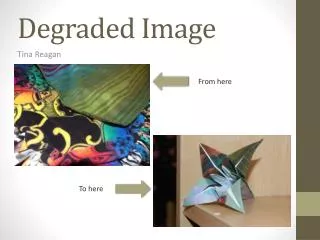
For this photo, I took the “firelight” image and opened it in Microsoft Photo Editor (8), and then applied a technique called “stained glass effect” (9). Amazing how a photo can go from this-----------------------------------------------to this!