Download
1 / 11
110 likes | 270 Vues
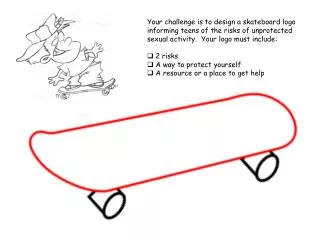
By:Danielle Orender. Skateboard Flex Hands-on Activity. Goal : Students will learn how flex can be measure through this skateboard activity. Objectives : The students will describe a real world situation in terms of ratios. The student will perform operations with decimal numbers.

E N D
By:Danielle Orender Skateboard FlexHands-on Activity
Goal: Students will learn how flex can be measure through this skateboard activity. Objectives: • The students will describe a real world situation in terms of ratios. • The student will perform operations with decimal numbers. • The student will discover the mean of a set of data. • The student will plot a point in a two-dimensional coordinate system, given the coordinates. • The student will relate aspects of a graphical model to the real world situation which is being modeled. Goal and Objectives
Two different rulers (wooden, plastic, rubber) with a hole in the center (per group) • One ruler with millimeter markings (per group) • One heavy duty paper clip (per group) • A plastic cup ( the type with a rolled rim) with a hole punch just underneath the rim(per group) • 200 pennies (per group) • Two stacks of textbooks/board games each at least one foot high • Graph paper • Pencil Materials
(Split the class up into teams of two to four. Distribute the Skateboard Flex handout and review with students the description of “flex” on the first page. Ask students who have experience with skateboards to explain why flex, and bounce, are important qualities of a deck. Along with the Skateboard flex handout, I may also show a movie clip: Designing Stronger Skateboards byTim Piumarta. He took his love for the sport of skateboarding, combined it with his skills in mathematics and design and became one the world's most influential skateboard designers.) • Get three different rulers (wooden, thicker plastic, thinner plastic, or rubber). One should have millimeters measurement. • Lay one ruler across the two stacks of books at least one foot high. There should be exactly 1 inch of each end of the ruler on the books. • Measure the height of the ruler before hooking the cup on the ruler. • Take the plastic cup with a rolled rim, with the small hole punch and put one end of a paper clip through the hole. Hook the other end of the paperclip through the center hole in the ruler, so that the cup is hanging between the stacks of books. Procedure
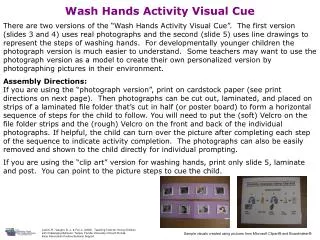
Measuring “ruler flex” Thin Plastic Ruler Adding 25 more pennies
Add 25 pennies to the cup, and measure using the milliliter ruler how far the center of the ruler is bent. Record in the data table the measurement. Then add another 25 pennies, and measure again. • Make at least three or more measurements with different amounts of pennies. And record your data in the table below. Procedure
For each measurement you made, divide the amount of ruler flex by the number of pennies in order to find the ratio of “flex per penny,” as a decimal. Record the “flex per penny” in the data table. • Find the mean of these ratios for all measurements. Round to the nearest hundredth. (.12 + .16 + .1733333333 +.17)/4 is about .16 Procedure
Repeat the measurements with another ruler, one different from the first (for example, a wooden ruler, or a thicker plastic ruler). The mean of these ratios for all measurements. (0+.04+.04+.02)/4 is about .03 Procedure
Adding Pennies Ruler Flex Wooden Ruler
On the space provided below, independently write your conclusions. Describe your results. Did you see a pattern in your ruler flex results? Explain what the ratio of “flex per penny” tells you about the two rulers. Conclusions “My results from the project showed a steady increase in the flex of each ruler when the pennies were added. The plastic ruler had a higher “flex per penny” rate than the wooden ruler. This result tells us that the wooden ruler is stronger and does not flex as much as the plastic ruler.”
Ask students, working in groups, to graph the ordered pairs of data that they have collected (number of pennies, flex), for each of the two rulers tested, on the same sheet of graph paper, and to explain what the graphs show. Have them discuss: • Whether the amount of flex seems to depend on the number of pennies. • How that dependence could be described. • In what ways that dependence is different for the two rulers tested. Optional Extension