Download
1 / 12
120 likes | 277 Vues
RGS-IBG Online CPD course in GIS Exploring Google Earth. Session 4.

E N D
RGS-IBG Online CPD course in GIS Exploring Google Earth Session 4
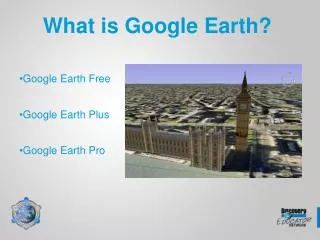
Google Earth is a popular geobrowser that provides an exploratory interface to a rich series of spatial data sets. Some of these may be considered 'formal' - as they are collected centrally and distributed in a top-down manner. Examples include the high resolution air photography and the terrain, road and government layers. Others are less formally produced in a 'bottom up' manner as individuals across the World contribute information to what may be considered the 'Geographic Web' through sites such as Wikipedia and Panaramio. Both the kinds of data and content of individual data sets provided through Google Earth changes with some frequency. What is a geobrowser? The best analogy to make would be that of Internet Explorer but for geographic information. Like the internet it allows the combination of many types of geographic data from many different sources. The biggest difference between the World Wide Web and the geographic web however is that everything within the latter is spatially referenced. Is a geobrowser a GIS? This has caused and is still causing some debate. We will not enter this however as you will see from using Google Earth it has some very similar functionality.
Objectives In this short practical session you will become familiar with Google Earth. The objectives of this session are to understand the software’s interface and briefly explore some data. Objectives • Learn how to open Google Earth • Understand Google Earth’s interface • Become familiar with exploring data in Google Earth • Learn how to add your own data
Exercise • Open Google Earth. If it is not on the desktop then it should be under the start menu. You should see a screen something similar to the picture below once it has opened. Notice the similarity to other GIS software. There is a map view where the globe is. On the left is a table of contents where layers can be turned on and off. At the top there are some function buttons which you will explore later. And finally at the top right of the screen there are the zooming and map navigation tools.
Zooming and Navigation • Zooming and map navigation is performed using the controls at the top right of the screen. The following diagram shows the controls and explains their functions. Click the north-up button to reset the view so that north is at the top of the screen. Click and drag the ring to rotate your view. Use the Look joystick to look around from a single vantage point, as if you were turning your head. Click an arrow to look in that direction or continue to press down on the mouse button to change your view. After clicking an arrow, move the mouse around on the joystick to change the direction of motion. Use the Move joystick to move your position from one place to another. Click an arrow to look in that direction or continue to press down on the mouse button to change your view. After clicking an arrow, move the mouse around on the joystick to change the direction of motion. Use the zoom slider to zoom in or out (+ to zoom in, - to zoom out) or click the icons at the end of the slider. As you move closer to the ground, Google Earth swoops (tilts) to change your viewing angle to be parallel to the Earth's surface. You can turn off this automatic tilt (Tools > Options > Navigation > Navigation controls; Mac: Google Earth > Preferences > Navigation > Navigation controls). Source: Google These controls can also be performed using the mouse. Hold the right button down and pull backwards and forwards and you can zoom in and out, or double click the left button to zoom in incrementally and double click the right mouse button to zoom out incrementally. Pressing the left button enables you to pan the map. Get a feel for these controls.
Next, find a particular location using Google Earth’s search feature. At the top left of the screen you will see ‘Fly to’. In the box below type ‘London, UK’. The map should zoom into England, and then to London. • Now type ‘SW7 2AR’ into the ‘Fly to’ box. You may recognise the buildings, most obvious is the Royal Albert Hall, to the east of this (to the west of the red bus) is the Royal Geographical Society. Using the navigation controls explore the area. Google Earth streams the data it needs, the data itself is not on your computer, therefore be patient if at first it appears at a poor resolution. You can also get a feel for the data behind Google Earth. You can see aerial images and you have searched Google Earth using place names as well as postcodes.
Some Simple Functions • Google Earth has some simple functionality. Experiment with the Measurement tool (the button with the picture of the ruler). Tip: Use the ‘Line’ tab to measure a single distance (press left mouse button once to start and then again to finish), use the ‘Path’ tab to measure cumulative distances (press left mouse button once to start and then again at each change of direction and double click to finish). If you make a mistake or wish to take another measurement press ‘Clear’. • Experiment with the buttons with a sun behind a cloud and a clock on them. Once you have pressed the former use the slider to investigate what time the sun sets and rises. The button with the clock on it allows you to look at old Google Earth data. Again, this is controlled with the use of a slider.
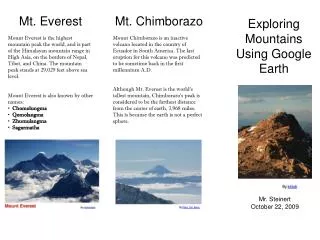
Google Earth in 3D • Again, using the ‘Fly to’ function type in ‘Snowdon’. Once the data has loaded you may need to zoom out a little to see Snowdon properly. Now explore the 3D functionality of Google Earth. Using the scroll wheel in the middle of your mouse press it down and roll it backwards. Make sure the ‘Terrain’ layer is switch on. You now see Snowdon in 3D. Again explore the navigation controls allowing you to zoom in and out and ‘fly’ around Snowdon in this 3D view.
The Geographic Web • You will have noticed different markers and symbols dotted around, especially if the Geographic Web layer is turned on. Press on some of these. These are the ‘less formal, bottom-up’ types of data comprising the Geographic Web which have been uploaded by individuals. Some are photos, others are descriptions of places of interest and so on. You will learn to create these at a later.
As well as viewing published information it is also possible to load your own data into Google Earth. Having watched the video you will now look at John Snow’s map. In Google Earth go to File > Open. Navigate to your personal folder and select ‘snow’. This is John Snow’s famous cholera map. This file has been georeferenced meaning it will overlay Google Earth in the correct position. • Finally, using the horizontal bar under ‘Places’ on the left of the screen, move the slider to the left. This allows you to alter the map’s transparency.
Summary You should now know; • How to find places and navigate within Google Earth • How to measure distances in Google Earth • That Google Earth not only has a large amount of integrated data behind it but that it also allows people to add their own Further Exercise Think about all the types of data that is used within Google Earth. What sort of spatial problems can Google Earth help us understand. Remember, Google Earth does not have the functionality of other GIS software.