Download

1 / 26
260 likes | 321 Vues
Learn how to manage database in Word, sort records, create labels, and perform mail merge for printing labels using step-by-step slideshow instructions.

E N D
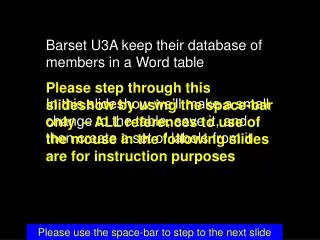
Barset U3A keep their database of members in a Word table Please step through this slideshow by using the space-bar only – ALL references to use of the mouse in the following slides are for instruction purposes In this slideshow we’ll make a small change to the table, save it, and then create a set of labels from it Please use the space-bar to step to the next slide
The database is laid out as a standard table in WORD. The first row is a ‘header row’ (in brown) and it has ten columns for each name or record The entry for ‘Brockbank’ is out of sequence, so before we start on our labels our first task is to sort the records by surname Please use the space-bar to step to the next slide
To select the column to use for a sort you would click your mouse pointer just above it (but don’t do that now – instead use the space bar for the next slide) Please use the space-bar to step to the next slide
The column you want to sort by is selected – now select the ‘table’ menu and then the ‘sort’ option Please use the space-bar to step to the next slide
It knows which column to sort by We don’t want it to sort the header row too – so click on OK Please use the space-bar to step to the next slide
Sorted – and the whole address row is kept together (as you would expect) Now we can save this WORD table as a normal document back onto our hard disk and start on our set of labels Just click anywhere on the table to ‘deselect’ it Please use the space-bar to step to the next slide
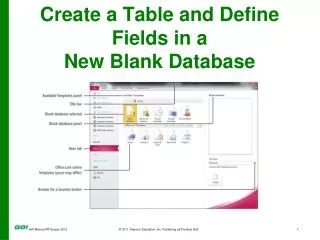
The ‘Mail-merge procedure can be found in the Tools menu, and it will guide us through the process using the ‘Mail-merge Helper’ Here’s a new empty A4 document which we’ll use to set up our output – in this case a set of labels called ‘Avery A4 7163’, widely available from any stationers Please use the space-bar to step to the next slide
Just follow the prompts carefully –- 1 2 and 3 Please use the space-bar to step to the next slide
This just confirms that we want to use our new blank document for the labels setup instructions Please use the space-bar to step to the next slide
Our ‘data source’ is the database we were working with, and the Mail-merge helper wants to know where on the hard disk we put it Please use the space-bar to step to the next slide
No need to have the WORD table document loaded, but Mail-merge Helper needs to know where it is (so that it can read the column headings) Please use the space-bar to step to the next slide
Ready to start setting up labels on our blank ‘Main document’ Please use the space-bar to step to the next slide
What sort of labels are we printing onto? (Avery ‘Standard’ is American – choose Avery A4 instead) L7163 has 14 labels to the A4 sheet Please use the space-bar to step to the next slide
This window will set out the name and address information for all the labels Clicking here will show us the list of fields (column headings) in our WORD database Please use the space-bar to step to the next slide
The first address line will consist of ‘Name’, then a space, then the ‘Surname’ Please use the space-bar to step to the next slide
Just keep adding the fields as you want them to appear on the labels Please use the space-bar to step to the next slide
We’re ready to start the merge operation now, but we only want labels for people from Barset, so we’ll also set up the ‘Query Options’ to select only those records This is the button for selecting which labels we make Please use the space-bar to step to the next slide
The shape of our labels has already been set out on the ‘main document’ Now we need to tell it only to select addresses from the town of ‘Barset’ Please use the space-bar to step to the next slide
Nearly there! Just one more decision to make. Do we send the results direct to a printer, or do we make a document out of it first (so that we can check it)? Please use the space-bar to step to the next slide
Just click on the Merge button and select the option for putting our results into a new document Please use the space-bar to step to the next slide
All done! Now we can put our sheets of labels into a printer and send the document to it as normal. Please use the space-bar to step to the next slide
Here’s the Mail-merge Helper. This extra toolbar is now part of your document The ‘Main document’ you created can be saved and used again. It will remember the location of the database and the settings (such as only selecting addresses from Barset). To change these next time you can select the Mail-merge Helper.