Download

1 / 13
130 likes | 409 Vues
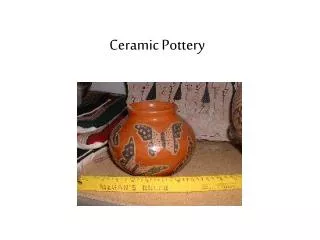
PREHISTORIC POTTERY. Woodland Culture Wisconsin c. 500 BC – 1650 AD By Mrs. Mary Barbara Summerfield. BASIC LANGUAGE OF CLAY. Clay: Fine grained material made of hydrated aluminum silicates, used in making pottery.

E N D
PREHISTORIC POTTERY Woodland Culture Wisconsin c. 500 BC – 1650 AD By Mrs. Mary Barbara Summerfield
BASIC LANGUAGE OF CLAY • Clay: Fine grained material made of hydrated aluminum silicates, used in making pottery. • Temper: Sand, crushed stone, ground mussel shell, crushed fired clay, or plant fibers used to reduce shrinkage, expansion and cracking during firing.
Language of Clay • Slip: Clay mixed with water to make a type of glue used for attaching 2 pieces of clay…such as a handle to a pot. • Pigment: Some stones such as hematite can be ground into powder, and mixed with slip for decoration.
Language of Clay • Fire: Prehistoric pots may have been fired over an open air camp fire. • - Low Fire = Temperature range of 400 – 800 F. - Bisque: Pots that have been fired once.
Language of Clay • Burnish: Small, flat or round stones may have been used to polish clay. • Wedge: Method of removing air bubbles from clay: • - A paddle covered with woven fabric or cord may have been used to beat the clay. • - A large stone would have supported the inside of the pot. • - A pattern would remain on the pot.
Language of Clay • PREHISTORIC BASIC TOOL KIT • - Grinding Stone • - Paddle with Fabric Cord • - Mussel Shells • - Sharp Sticks, Bone, Wood for Decoration
Characteristics of Woodland Pots • Early Woodland • - Plain/Geometric Rim Decoration • Middle Woodland • - Bag-shaped, Cord Marked • Late Woodland • - Cord-decorated
Pinch Pot • Pinch Pot: Basic Pot Form • - Start with Snowball Shape. • - Pierce Center of Clay with Finger. • - Develop into a Bowl Shape. • - Tap botton of pot to create a “foot.”
Coil Pot • Modern coil pots are started by using a slab, or flat base. • Woodland Culture pots may have started as coil pots. After reaching the leather hard stage, coils (snake-like shapes) were wrapped around the pot, slowly adding to the height of the pot. • Collared Rim: Thick rim of clay added to the top of a pot.
Processing Raw Clay • 1. Harvest clay from an area rich in ancient riverbed clay. • 2. Let clay dry thoroughly. • 3. Pound or sift clay to remove heavy clods and grasses. • 4. Soak clay for 2 – 4 days. • 5. Knead clay to further reduce clods.
Adding Temper • Prehistoric potters may have added as much as ½ pound temper for each pound of clay. • Soak the temper. • Knead it into the clay. • The clay should start to become more plastic, or workable.
Color • - Use supplies from your tool kit to decorate your pot, if desired. • - Soak the hematite powder. • - Mix it with some slip. • - Use a brush or your fingers to “paint” a design on your pot.
Drying the Pot • - A pot should dry for at least two weeks prior to firing. • - Prehistoric pots were possibly covered and dried on the ground. As they started to dry, the coverings were removed. • - Pots can also be placed in the sun for sun baking.


![Japanese Prehistoric Jōmon Pottery [Molding Earth & Freeing the Heart]](https://cdn5.slideserve.com/9691106/japanese-prehistoric-j-mon-pottery-molding-earth-freeing-the-heart-dt.jpg)