Computer
520 likes | 634 Vues
In this unit, Grade 4 students will explore the Paint program to create digital art, learning essential skills such as drawing with various tools, managing graphics through copying, moving, and deleting, and using text boxes to label images. Step-by-step lessons highlight tools like the Line, Pencil, Free-Form Select, and the Curves tool, enabling creativity and expression. Additionally, students will work with Microsoft PowerPoint to design presentations, insert WordArt, and utilize ClipArt. Evaluations will reinforce learned concepts through practical assessments. ###

Computer
E N D
Presentation Transcript
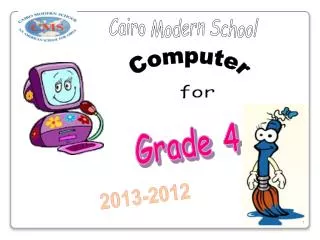
Cairo Modern School Computer for Grade 4 2013-2012
Drawing and Graphics • In this unit you will learn how to use the paint program to draw pictures on the computer. • You will also learn how to delete, move, copy, and paste graphics. • How to open the Paint Program? • Start All Programs Accessories Paint Program
I’m Going to trace the Gray outline of the House using the line Tool, First I will click The line tool.
I’m Going to select the Color from the color Palette to trace the Outside of the house.
I move the cursor back to the screen and drag the mouse to trace a line. When I have completely traced the line I leave the mouse button. I can hold to make a horizontal (left-to-right) or vertical(up-to-down) line.
I’m Going to click the Pencil tool.
Now I pick red, Then I move the cursor to The picture and draw.
Select the Text Box then drag the mouse to the white space and draw a box
Write the word TRAIN then click outside the text box. Note: After clicking outside the box, you will not be able to change the text. You must erase it and write it again.
Lesson 4- Free form Select Tool • Use Free-Form Select to select any irregularly shaped part of the picture. • To use the Free-Form Select tool follow these steps: • Click Free-Form Select in the tool box. • Click a background style, in the options box just below the toolbar. • Drag the pointer to select the part of the picture you want to work with.
Drag the Select Tool so that it creates a box around part of the RAINBOW then press Delete in the keyboard
Drag the Select Tool and drag a selection box around the Sun. Then place the cursor inside the box and click . Now, drag the mouse to move the picture.
First, click the select tool and select the cloud. Then go to Edit menu and choose Copy
8- Text Box tool is used to label pictures. ( ) 9- To select irregularly shaped part of the picture, use the Fill Tool. ( ) 10- Use Curve to draw a free curved line. ( )
Choose the correct answer: 1- To label a picture, use the ……… (Shapes tool – text box – Paintbrush) 2- To draw perfect shapes in a short time, use the……… (Fill tool – Eraser tool – Shapes Tool) 3- To move graphics, use the…….. (Fill tool – Select tool – Shapes Tool) 4- The paint program is used to …….. (Create documents – Draw pictures – Play games) 5- To draw straight lines, use the …… (Spray can tool – line tool – curve)
Match: The Select Tool The Pencil tool The Shape tool The Text Box Free-Form Select tool
Complete the missing Parts: (Fill Tool– Text Box –select tool – Free form Select – Line – Curve - Spray Can – Shape tools – Eraser – Paintbrush)
To create a new presentation, open file, choose new, BlankPresentation and choose create.
Lesson 2:Slide Design • Use the slide Design Option to change shapes of the slides in your presentation. • Microsoft Power Point program provides saved Templates and designs. • To add design to a Presentation, Follow These steps: • Open Design Menu, Choose the design you like by clicking on it.
Change the color of any design you choose using Colors icon.(The same design but with different colors)
Lesson 3: Insert WordArt • To write with different shapes or colors, Use the WordArt Gallery. • To write using WordArt, Use Insert Menu.
Microsoft Office Provides a gallery of pictures. • This gallery is called Clip Art and it contains different categories for pictures. • To add Clip Art, Use Insert Menu.
A dialog box will be opened, write the word you want to search for, then press Go. 2. All related pictures to that word will appear, choose the picture you want by clicking.
Student Assessment(Practice on Computer) Apply the following:- (1). Insert Clip Art about your favorite food. (2). Use different shapes of WordArt to label your picture. Cake
Lesson 5- Copy, Cut and paste a slide • In this lesson you will learn how to cut, copy, and paste a slide. • You can move slides from one place to another by using Cut and Paste. • Use copy and paste to make another copy from the slide, but Cutand pasteis used to move the slide from one place to another. • Watch as I show you how. • 1-To Cut or copy, follow these steps: • a. Right click on the slide. • b. Choose Cut (to change the place of • the slide) or copy (to make another • copy of the slide). • c. Use the cursor to go to the place you • want.
Right click. • Choose paste options. Choose this option to paste the slide with the same format.
Student Assessment Put (T) if the sentence is correct and (F) if the sentence is wrong : 1- Power point program is used to create presentations. ( ) 2- This Icon is called New Slide. ( ) 3- To create a title slide, open slide layout menu. ( ) 4- The page in the power point program is called document. ( ) 5-To change the shape and color of the slide, open Insert menu. ( ) 6-To make another copy of a sentence, use Cut and paste. ( )
Lesson 6- Slide Number • The slide number reflects the position of the slide within the presentation. • The Slide Number Option helps to determine the number of slides in the presentation. • It’s easier to work if there’s a number on each slide. • To Insert slide number, follow these steps: • Open Insert Menu. • Choose Slide Number.
Click on this box to view the slide number This is a preview for your slide.
Lesson 7- Date and Time • The date and time option used to add the current date and time to the presentation. • You can also add a fixed date to the presentation. • You can also update the date automatically in the presentation. • To Insert date and time , follow these steps: • Open Insert Menu. • Choose date and time .