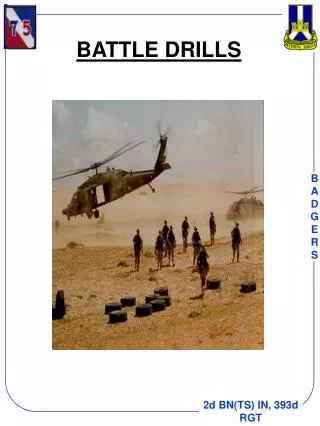
BATTLE DRILLS
BATTLE DRILLS. REFERENCES. FM 7-8 (Infantry Rifle Platoon & Squad) FM 7-8-DRILL (Inf. Rifle Platoon & Squad) 2-325 AIR How We Fight Manual. AGENDA. Purpose Fire and Movement Battle Drill 2: React to Contact Battle Drill 3: Break Contact

BATTLE DRILLS
E N D
Presentation Transcript
REFERENCES • FM 7-8 (Infantry Rifle Platoon & Squad) • FM 7-8-DRILL (Inf. Rifle Platoon & Squad) • 2-325 AIR How We Fight Manual
AGENDA • Purpose • Fire and Movement • Battle Drill 2: React to Contact • Battle Drill 3: Break Contact • Battle Drill 4: React to Ambush • Summary
PURPOSE To provide a review and to train personnel on Infantry Battle Drills and their training at the platoon and squad level.
Fire and Movement SituationResponse/DecisionTL Command Effective OPFOR Fire MAX Fire Individual MIN Movement Individual Movement AR 3 1 UP, 1 DOWN 2 UP, 2 DOWN TL 1 GR 2 3 UP, 3 DOWN 4 R 4 UP, 4 DOWN Slowest Movement and Best Firing Effectiveness
Fire and Movement SituationResponse/DecisionTL Command Moderate OPFOR Fire Balanced Fire and Movement Buddy Team Buddy Team Movement AR 3 1 UP, 1 DOWN TL 1 GR 2 2 UP, 2 DOWN 4 R Moderate Movement and Moderate Firing Effectiveness
3 3 1 1 2 2 4 4 Fire and Movement SituationResponse/DecisionTL Command Minimum OPFOR Fire Minimum Fire & Fire Team Maximum Movement Fire Team Movement “A” UP, “A” DOWN “B” UP, “B” DOWN Fast Movement and Minimal Firing Effectiveness
Battle Drill 1: Platoon Attack • TASK: Conduct Platoon Attack (7-3-D101) • CONDITIONS: An enemy squad has occupied defensive positions or is moving to the platoon front. The enemy has indirect fires. The platoon is attacking separately or as part of a larger unit. Plans, preparation, and movement to the objective have been accomplished. The platoon is directed to attack the enemy. The platoon is tasked organized with FO TM and Medic. Company has ENG. SQD available and Battalion has the capability to deploy AT assets into zone within 1 hour. • STANDARDS: • The platoon main body is not surprised or fixed by the enemy. • The platoon accomplishes its assigned task within the commander’s intent. The platoon kills, captures, or forces the withdrawal of the enemy. • The platoon maintains a sufficient fighting force that can defeat the enemy’s counterattack and continue operations.
Battle Drill 1: Platoon Attack Figure 1-1 (Initial Contact) PL PSG
Battle Drill 1: Platoon Attack Figure 1-2 (Determine COA)
(-) Battle Drill 1: Platoon Attack Figure 1-3 (Platoon Assault) Assault Element Support Element or
Battle Drill 1A: Squad Attack • TASK: Conduct Squad Attack (7-4-D102) • CONDITIONS: The squad is moving as a part of a platoon conducting a movement to contact or hasty or deliberate attack. The enemy has indirect fires. • STANDARDS: • The squad is not surprised or fixed by the enemy. • Squad members locate and engage known or suspected enemy positions with well-aimed fire. • The squad kills, captures, or forces the withdrawal of the enemy and is capable of continuing operations.
Battle Drill 1A: Squad Attack Figure 1A-1 (Initial Contact) 1 2 3 4 SL 1 3 2 4
Battle Drill 1A: Squad Attack Figure 1A-2 (Determine COA) 4 2 1 3 SL 3 1 4 2
Battle Drill 1A: Squad Attack Figure 1A-3 (Squad Assault) 4 3 2 1 2 SL SL 1 1 3 1 Shift Fires O/O or when Base of Fire Ldr. ID danger to assault element 2 2 4 3 4
Battle Drill 2: React to Contact • TASK: React to Contact (Platoon/squad), (7-3/4-D103) • CONDITIONS: The platoon/squad is halted or moving. The enemy initiates fires on the platoon/squad with an individual or crew-served weapon. • STANDARDS: • The unit returns fire immediately. • The unit locates and suppresses the enemy with well-aimed fire. • The leader can point out at least one-half of the enemy positions and identify the types of weapons (such as small-arms, light machine gun).
Battle Drill 2: React to Contact Figure 2-1 (Actions on Contact) 1 2 3 4 SL 1 3 2 4
Battle Drill 3: Break Contact TASK: Break Contact (Platoon/Squad) (7-3/4-D104) CONDITIONS: The platoon/squad is moving or stationary. The enemy fires on the platoon/squad. The platoon/squad leader orders the platoon/squad to break contact. STANDARDS: The unit moves to where the enemy cannot observe or place direct fire on it. The squad continues follow-on operations with sufficient fighting force to continue its mission.
1 2 3 4 SL 1 2 3 4 Battle Drill 3: Break Contact Figure 3-2 (Determine COA) Figure 3-1 (Initial Contact) 4 2 1 3 SL 1 2 3 4
Battle Drill 3: Break Contact Figure 3-3 (Break Contact) 4 2 1 3 2 4 2 1 3 SL SL 1 2 1 3 4 3 4 2 1 3
Battle Drill 4: React to Ambush • TASK: React to Ambush (Platoon/squad), (7-3/4-D103) • CONDITIONS: The platoon/squad enters a kill zone. The enemy initiates fires on the platoon/squad with a casualty-producing device and a high volume of fire. • STANDARDS: • The unit returns fire immediately. • The unit in the kill zone (near ambush) throws grenades and assaults through the enemy position. The unit not in the kill zone locates and suppresses the enemy with well-aimed fire. • The unit in the kill zone (far ambush) take up covered positions and suppress the enemy position with well aimed fire. The unit not in the kill zone moves by a covered ad concealed route and assaults using fire and maneuver.
Battle Drill 4: React to Ambush Figure 4-1 Near Ambush (Initial Contact) Figure 4-2 Near Ambush (Fight Thru Ambush) 1 2 3 1 1 4 2 2 3 3 4 4 SL SL 1 1 SL 3 1 2 2 3 4 2 3 4 4
1 2 3 4 SL 1 2 3 4 Battle Drill 4: React to Ambush Figure 4-4 Far Ambush (Determine COA) Figure 4-3 Far Ambush (Initial Contact) 4 2 1 3 SL 1 2 3 4
Battle Drill 4: React to Ambush Figure 4-5 Far Ambush (Squad Assault) 4 3 2 1 2 SL SL 1 1 3 1 Shift Fires O/O or when Base of Fire Ldr. ID danger to assault element 2 2 4 3 4
Battle Drill 4: React to Ambush Figure 4-6 Far Ambush (Break Contact) 4 2 1 3 2 4 2 1 3 SL SL 1 2 1 3 4 3 4 2 1 3
Battle Drill: React to Indirect Fire • TASK: React to Indirect Fire (Platoon/squad) • CONDITIONS: The platoon/squad is halted or moving. The enemy initiates fires on the platoon/squad with mortars or artillery. • STANDARDS: • The unit immediately gets in the prone and calls out “incoming.” • The squad/platoon leader calls out a direction (clock method) and distance (meters) for the unit to move. Individual soldiers echo the command. • The unit waits until a pause in the firing to move. Unit moves at a double time; consolidates and reorganizes at the rally point.
Battle Drill: React to Indirect Fire Figure 5-1 (Initial Contact) Figure 5-2 (Determine COA) 1 1 2 2 3 3 9 O’Clock, 300 meters 4 4 SL SL 1 1 2 2 3 3 4 4
RALLY POINT Battle Drill: React to Indirect Fire Figure 5-3 (Movement) 1 2 3 4 SL 1 2 3 4
SUMMARY Infantry Battle Drills describe how platoons and squads apply fire and maneuver to commonly encountered situations. They require leaders to make decisions rapidly and to issue brief oral orders quickly. FM 7-8, page 4-1