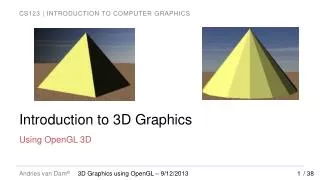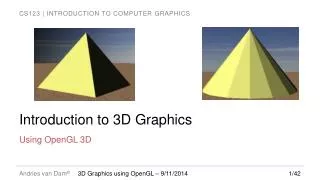
Introduction To 3D Graphics
3D XNA. Introduction To 3D Graphics. From: http://rbwhitaker.wikidot.com/introduction-to-3d-graphics. Introduction To 3D Graphics. Before we get started doing 3D in a game, it is nice to have some 3D models to use in them.

Introduction To 3D Graphics
E N D
Presentation Transcript
3D XNA Introduction To 3D Graphics From: http://rbwhitaker.wikidot.com/introduction-to-3d-graphics
Introduction To 3D Graphics • Before we get started doing 3D in a game, it is nice to have some 3D models to use in them. • However, I can almost guarantee you that those few models won't be enough, or even what you want in your games. • So where do you get models from? There are a few choices. • First, you can find some online. Unfortunately, almost all of the models online (and virtually all of the good ones) cost money. • And I'm not talking about $3 either. They are usually more along the lines of $50 - $300 a model, and some are even more expensive.
Introduction To 3D Graphics • You could hire a artist to make models for you, which might be a good idea, but if you are just trying to learn XNA, you probably don't have money for that either. • A third option is to make the 3D models yourself. • You don't even necessarily need to be good at art or 3D art, because all you really need is some models to experiment with. • Later on, if you build a game that has potential, you can bring in the professional, or shell out the money for the online models. • So in this tutorial, we will look at a few 3D modeling programs, and compare them in terms of price, power, and ease of use.
Some 3D Modeling Programs • 3ds Max: (formerly called 3D Studio Max, sometimes shortened to just "Max") is kind of the industry standard of 3D modeling made by Autodesk. • It is extremely powerful, and easy to use. It can do just about anything that you can dream up. • The real drawback to using 3ds Max is the cost. The newest version, 3ds Max 2011, is $3495. It is so expensive that they have a financing program available! • There is, however, a 30-day trial version available on their website. • You will most likely come to the conclusion that it is well worth the money, after you've used it for a while. • If you are serious about modeling, especially if you can find ways to get paid for it, this would probably be worth the investment. (http://www.autodesk.com/3dsmax)
Some 3D Modeling Programs • Maya: Autodesk has also created Maya, which is a step up from 3ds Max. • You can do even more in Maya, but it, too, comes with a big price: $4995. • People say, though, that it is worth the extra features, and if you have the money, you should get it. • There is a 30-day trial for this program as well. (http://www.autodesk.com/maya)
Some 3D Modeling Programs • Blender: OK, enough with the expensive 3D modeling programs. Let's discuss some free ones. • Blender is the king of free 3D modeling programs. It is extremely powerful and has all sorts of built in features, including the ability to script things with the programming language Python. • It has a steep learning curve. It is not an easy program to learn how to use. I would recommend buying a good Blender book to help you learn it if you want to give it a try. • If you don't have lots of money for a fancy 3D modeling program like 3ds Max or Maya, this is probably your best bet. Just be prepared to spend some time learning how to use it. (http://www.blender.org)
Some 3D Modeling Programs • Wings3D: I've searched all over the web for a modeling program that is free and easy to use. I've played around with a lot, and most just aren't that good. • Wings3D is just about as good as they come, though. It is limited in the number of features that it has (it looks like a toy compared to Blender, Max, and Maya), but still provides you with most of the things that you could want in a simple modeling program. • It is extremely easy to use, and fairly well documented. If you are just beginning with game development, I would recommend that you start with this program for creating 3D models, and then when you are more comfortable with modeling, move on to Blender or something else. • (http://www.wings3d.com or http://sourceforge.net/projects/wings)
Some 3D Modeling Programs • Now that you're armed with a 3D modeling program, take some time to learn it. • Make a few models and get some practice. Your first model will probably look bad, but that's OK. It always takes time. • And remember that if you are working as part of a real game development team, there will be game artists (or you should hire one!) that will do the 3D modeling for you, so you don't have to become an expert. • Along these same lines, most artists are unwilling to commit themselves to the time it will take to create the art for a game, unless they have a good feeling that it is going to work out. • The best solution to this is to go to a potential artist with a (mostly) complete game that is using your own prototype models.
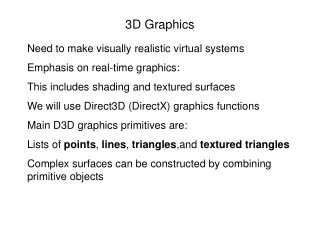
Basic Matrices • In computer graphics and computer games, matrices show up a lot. XNA will do most of the hard stuff for us, so it shouldn't be a big deal. • I've created this tutorial to teach you everything you will need to understand about matrices so that you can get started with your game. • Obviously, there is quite a bit more to matrices than what will be presented here, but this should be more than enough for now. • In this tutorial we will first look at what a matrix is, and then look at the three most common types of matrices in game development, and how to use them in your game.
Basic Matrices • What is a Matrix? • A matrix is simply a two dimensional grid of numbers, like the one below: • This matrix has four rows and four columns, but a matrix can have any number of rows or columns. • And, of course, the numbers in a matrix can have any value in them, not just 1's and 0's. • More than one matrix are called matrices.
Basic Matrices • You can do lots of things with matrices. They can be added, subtracted, and multiplied, like numbers. They also have other operations that you can do with them, aside from these simple ones. • We don't need to look at the details too much, but if you want to know more about them, you can look up 'linear algebra' on Google or Wikipedia. There's a lot of information about them. • What we really care about is how matrices can be used to make cool games. For the purposes of our games, a matrix is just a mathematical toy that takes points in one coordinate space and transforms them into another coordinate space.
Basic Matrices • For example, let's say we have a model that we've created in a 3D modeling program. When we create the model, all of the vertices are centered around the origin of the center of the model. However, in our game, we want to draw the model in a particular spot in our world, not at the origin. A matrix can be used to transform the model's coordinates into coordinates in our game world. • In our games, we can think of matrices as a type of transformation. We will see that matrices can do all sorts of things. And the best part is that XNA is built in such a way that we don’t even have to really know how it is doing it. Let’s now take a look at several matrices that are used throughout computer graphics.
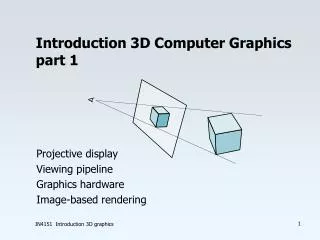
World, View, and Projection Matrices • When we go to draw a model on the screen, there are typically three different transformations that need to be done. • There are three different matrices that correspond to these three transformations. • The standard transformation path looks like the image below:
Basic Matrices • We start off with our vertices in model space. The coordinates of our vertices represent where they are in relationship with the rest of the model. • At this point, we apply the world matrix. This transforms our model space coordinates into world space. World space coordinates represent where the vertices (and the entire model) are in relationship to the whole world. • The world matrix basically tells us where the model is located in the world. • The next step is to take our world space coordinates and apply another transformation to them. This next transformation is the view matrix.
Basic Matrices • This matrix will put our coordinates into view space, which is where the vertices are in relationship to the viewer. That is, where the player's camera or eye is located at. In a sense, this transformation tells us where the player is located in the world. • The third and final step of the process is to apply the projection matrix. This matrix essentially tells us what type of camera we are using. • It gives the computer the information it needs to determine where on the screen each of our vertices should appear. (It "projects" the points onto the screen.) • This transformation essentially gets the vertices into screen coordinates, although the computer still has more work to do as it draws the model on the screen (like rasterization).
World Matrices in XNA • World matrices can be the trickiest matrices to make, but just to be consistent with ordering, let’s discuss them first. • There are three basic types of world matrices that we would want to use. • First, we might want to translate (slide or move) the points of a model from one location to another. • Second, we might want to rotate the points of a model. • Third, we might want to scale the points of a model to make it bigger or smaller.
World Matrices in XNA • These can all be done as follows: • To create a translation matrix: Matrix.CreateTranslation(Vector3 position); • To create a matrix that rotates around the x-axis: Matrix.CreateRotationX(float angleInRadians); • (Don’t forget that you can use the MathHelper.ToRadians(float degrees) to convert from degrees if you want.)
World Matrices in XNA • To create a matrix that rotates around the y-axis: Matrix.CreateRotationY(float angleInRadians); • To create a matrix that rotates around the z-axis: Matrix.CreateRotationZ(float angleInRadians); • Or to create a matrix that rotates points around an arbitrary axis: Matrix.CreateFromAxisAngle(Vector3 axis, float angleInRadians); • Or to create a matrix from yaw, pitch, and roll (which will be discussed in a future tutorial): Matrix.CreateFromYawPitchRoll(float yaw, float pitch, float roll);
Multiple World Transformations in XNA • The important thing to keep in mind with world matrices (all matrices in general, but more commonly with world matrices) is that you can also combine any the matrices above to make a combination matrix that performs both. • For example, you could do the following to make a matrix that will rotate a model and then move it, as shown in the code below: Vector3 v = new Vector3(10, 0, 0); Matrix result = Matrix.CreateRotationX( MathHelper.ToRadians(45)) * Matrix.CreateTranslation(v);
Multiple World Transformations in XNA • It is important to do these multiplications in the correct order. • In normal math, 3 * 2 is the same as 2 * 3. Order doesn’t matter. However, with matrices, the order matters. • The order reflects the order we perform our operations in. • As an illustration, imagine you are standing at a particular point facing north, and you are going to move ten feet forward, and also turn right 90°. • If you move forward then turn right 90°, then you will be ten feet north of where you were, facing east. If you turn first, then move, you will be ten feet east of where you were, facing east.
Multiple World Transformations in XNA • Getting the order wrong makes very weird things happen. • Make sure you get your matrices in the correct order. And the correct order is in the reverse order of the order you want them done. • The example before will rotate first, and then after that, translate.
View Matrices in XNA • View matrices are much easier to work with than world matrices. In fact, there’s really only one method that you need to know. You can create a view matrix with the following line: Matrix.CreateLookAt(Vector3 cameraPosition, Vector3 cameraTarget, Vector3 cameraUpVector); • cameraPosition is the location of the camera in your 3D world, cameraTarget is the point in your world that the camera is looking at, and cameraUpVector is the direction that is ‘up’ for the camera. • The up vector needs to be specified, because even though the camera has a location in space, and is looking at a particular point, the camera could still rotate around.
View Matrices in XNA • You will only really deal with the up vector if you get into a sophisticated flight simulator or something like that. • For the most part, you could use Vector3.Up (along the y-axis) for this value, and not worry about it beyond that. • You also want to make sure that the up vector is not in the exact same direction as the direction the camera is looking, or nothing will be drawn.
Projection Matrices in XNA • Projection matrices are not that difficult to work with either. • There are several built in choices for projection matrices, depending on what you want the projection to look like. • The two most common projections are orthographic projections and perspective projections. • The main difference is that perspective projections have a vanishing point and orthographic projections do not. • This means that distant objects in perspective projections will look small, while in orthographic projections, they will look the same size.
Projection Matrices in XNA • The images below show the differences between these two projections. The first image is a perspective projection, and was created in Wings3D.
Projection Matrices in XNA • This second image shows the same scene with an orthographic projection. This image was created in Wings3D as well.
Projection Matrices in XNA • Perspective projections tend to look more realistic, because it gives the feeling of depth. • However, there can be times that orthographic projections are better. Many of the older real time strategy games used orthographic projections. • If things are all relatively equidistant from the camera, then they are roughly equivalent in appearance, and using an orthographic projection may make it easier to do certain things, both for the user and for the programmers.
Projection Matrices in XNA • An orthographic projection can be created with the following code: Matrix.CreateOrthographic(float width, float height, float zNearPlane, float zFarPlane); • With this, the width is the number of units across the projection should be, height is how tall the projection should be in units, and the zNearPlaneandzFarPlane are the near and far clipping planes. • You can also create an off-center orthogonal projection (for example, the left side goes out farther than the right side). The following method creates an off-center orthogonal projection: Matrix.CreateOrthographicOffCenter(float left, float right, float bottom, float top, float zNearPlane, float zFarPlane);
Projection Matrices in XNA • In this case, you need to specify how far out all four directions are (left, right, bottom, and top) and the zNearPlane is the near clipping plane and zFarPlane is the far clipping plane. • It will probably come as no surprise to you that this method could also be used to create any ‘centered’ orthographic projection. For example, the following two lines are equivalent: Matrix.CreateOrthographicOffCenter(-1, 1, -1, 1, 0.1f, 100f); Matrix.CreateOrthographic(2, 2, 0.1f, 100f);
Projection Matrices in XNA • There are three methods for creating perspective projections. The first one that we will discuss is the one that will be used in many of the other tutorials. Matrix.CreatePerspectiveFieldOfView(float fieldOfView, float aspectRatio, float nearPlaneDistance, float farPlaneDistance); • The first value is the field of view angle. The field of view angle represents the angle that the camera can see. The diagram below shows two different field of view angles.
Projection Matrices in XNA • In this case, you need to specify how far out all four directions are (left, right, bottom, and top) and the zNearPlane is the near clipping plane and zFarPlane is the far clipping plane. • It will probably come as no surprise to you that this method could also be used to create any ‘centered’ orthographic projection. For example, the following two lines are equivalent: Matrix.CreateOrthographicOffCenter(-1, 1, -1, 1, 0.1f, 100f); Matrix.CreateOrthographic(2, 2, 0.1f, 100f);
Projection Matrices in XNA • Although these numbers are measured in degrees, the parameter in the CreatePerspectiveFieldOfView() method needs to be in radians, so you may have to convert from degrees to radians. • The aspectRatio parameter is the aspect ratio of the window. That is, it is the ratio of how long the window is to how tall the window is. • An aspect ratio of 1.0 means that it is as tall as it is wide. An aspect ratio of 2.0 means that the window is two times as wide as it is tall. An aspect ratio of 0.5 means that it is half as wide as it is tall. • Many times, it will be useful to just get the window size from the system, rather than guessing, or trying to remember what it was set to.
Projection Matrices in XNA • This can be done with code similar to the following: float aspectRatio = graphics.PreferredBackBufferWidth / graphics.PreferredBackBufferHeight; • Finally, the nearPlaneDistance and farPlaneDistance are the near and far clipping planes that we have discussed before. • A second method for creating a perspective projection is found below: Matrix.CreatePerspective(float width, float height, float nearPlaneDistance, float farPlaneDistance);
Projection Matrices in XNA • In this method, the width is the width of the viewing area at the near clipping plane. The height is the height of the viewing area at the near clipping plane. • The nearPlaneDistance and farPlaneDistance are once again the near and far clipping plane distances. Similar to the off-center orthographic projection, there is an off-center perspective projection, as shown below: Matrix.CreatePerspectiveOffCenter(float left, float right, float bottom, float top, float nearPlaneDistance, float farPlaneDistance); • Like with the off-center orthographic projection, you need to specify how far out the window extends to the left, right, bottom, and top. These values are, once again, the values at the near clipping plane. • The nearPlaneDistance and farPlaneDistance values are the near and far clipping plane distances.
Custom Matrices in XNA • While we have discussed numerous ways to create matrices, what if the matrix we need doesn’t have a method for creating it? • As the last topic in this tutorial, let’s take a look at how to create a custom matrix. The Matrix constructor can be used to create a matrix with given values, as shown below: • Matrix customMatrix = new Matrix( float m11, float m12, float m13, float m14, float m21, float m22, float m23, float m24, float m31, float m32, float m33, float m34, float m41, float m42, float m43, float m44);
A Final Matrix Example • This tutorial is probably already long enough, but I thought that it would be good to put one last example in, showing some code that prepares all three of the standard matrices: Vector3 cameraPosition = new Vector3(30.0f, 30.0f, 30.0f); // Look back at the origin Vector3 cameraTarget = new Vector3(0.0f, 0.0f, 0.0f); // convert 45 degrees to radians float fovAngle = MathHelper.ToRadians(45); float aspectRatio = graphics.PreferredBackBufferWidth / graphics.PreferredBackBufferHeight; float near = 0.01f; // the near clipping plane distance float far = 100f; // the far clipping plane distance Matrix world = Matrix.CreateTranslation(10.0f, 0.0f, 10.0f); Matrix view = Matrix.CreateLookAt(cameraPosition, cameraTarget, Vector3.Up); Matrix projection = Matrix.CreatePerspectiveFieldOfView(fovAngle, aspectRatio, near, far);
Using 3D Models • In previous tutorials, we've talked about where to get 3D models from, or how to make your own. • In this tutorial, we will take a look at how to use a 3D model in your game. • This tutorial will just cover the basics, but in future tutorials we will look at a few more advanced features of drawing in 3D and working with models.
Loading the Model • The first thing we need to do is acquire a 3D model to place in our game. There's a good chance that you've already got something that you want to put in your game, but if not, you can go over to my 3D Model Library and grab one. • For this tutorial, I will use the SimpleShip model there, but you are more than welcome to use one of your own. • Take your model, and all associated textures, and add them to the content of your project. See the tutorial on managing content if you don't remember how to do this.
Loading the Model • Now, we want our game to manage the model, but we don't want it to manage the texture, other than when it loads the model, so we will want to exclude any textures by right clicking on the texture in the Solution Explorer and choosing Exclude From Project. • When we do this, the content pipeline will no longer process the file, but it will still be in the location that the model will look for it at. • The next step is to actually load the model into our game. This is pretty easy to do. We will first create a variable to store the model. XNA has a type already created specifically for this called the Model class.
Loading the Model • So go to the beginning of your class where your other instance variables are (with the template, you should already have one called graphics and one called spriteBatch), and add the following line of code: private Model model; • Now we just need to load our model into this object. Go down to the LoadContent() method, and add the following line of code (replace "Ship" with the name of your model if you are using a different model): model = Content.Load<Model>("Ship");
Drawing the Model • We are now ready to draw our model. It is at this point that we will use the stuff we talked about in the previous tutorial, which discussed Basic Matrices. • If you haven't been through that tutorial, I would recommend going back to them now, but I've made the tutorial in such a way that if you want to continue without it, you can still do that. • In order to draw, we will need to define the three standard matrices.
Drawing the Model • So go back up to your instance variables section and add the following code: private Matrix world = Matrix.CreateTranslation(new Vector3(0, 0, 0)); private Matrix view = Matrix.CreateLookAt(new Vector3(0, 0, 10), new Vector3(0, 0, 0), Vector3.UnitY); private Matrix projection = Matrix.CreatePerspectiveFieldOfView(MathHelper.ToRadians(45), 800f / 480f, 0.1f, 100f); • With these created, we have everything we need to draw. • To make things easy for us, let's go down just below the Draw() method and create a new method, that will draw a single model, with given matrices.
Drawing the Model • We can do this by adding the following code to our program: private void DrawModel(Model model, Matrix world, Matrix view, Matrix projection) { foreach (ModelMesh mesh in model.Meshes) { foreach (BasicEffect effect in mesh.Effects) { effect.World = world; effect.View = view; effect.Projection = projection; } mesh.Draw(); } }
Drawing the Model • This code shouldn't be too difficult to understand. • All it does is goes through each of the model's meshes (a model can be made up of multiple objects, which are called meshes), and it goes through each of the effects and sets the effect's matrices to be the matrices that we want. • We will talk about effects a lot more later. For now it is enough for you to know that an effect simply determines how a model is to be displayed on the screen. • Finally, we tell each mesh of the model to be drawn, and we're done. • All we need to do now is call this method with the appropriate values, and we will see our model appear on the screen.
Drawing the Model • This code shouldn't be too difficult to understand. • All it does is goes through each of the model's meshes (a model can be made up of multiple objects, which are called meshes), and it goes through each of the effects and sets the effect's matrices to be the matrices that we want. • We will talk about effects a lot more later. For now it is enough for you to know that an effect simply determines how a model is to be displayed on the screen. • Finally, we tell each mesh of the model to be drawn, and we're done. • All we need to do now is call this method with the appropriate values, and we will see our model appear on the screen. So add the following line of code to your Draw() method: DrawModel(model, world, view, projection);
Drawing the Model • You should now be able to run your game, and see the model being drawn, as shown below:
Simple 3D Animation • In a 3D game, one of the big things we want to do is be able to have our game objects move around, which is called animation. • This is a simple tutorial that discusses the basics of 3D animation in your XNA game. For this tutorial, we will start with where we left off in the introductory tutorial on using 3D models. • It might be a good idea to get the code from the end of that tutorial to use as a starting point for this one. • In this short tutorial we will take a look at how animation is done in XNA, in its simplest form. There are other more advanced techniques that we will discuss in future tutorials.
Simple 3D Animation • In the real world, we think about moving objects as a continuous process that is gradually happening across a span of time. In video games, like in movies and cartoons, animation does not occur continuously, but rather in discrete time intervals. • By default, an XNA game will be redrawn 30 times a second. You can actually configure this to be different in XNA, but that is a different topic for another tutorial. • This is actually a good thing, because otherwise, you would need to know Calculus in order to make a game! • Instead, 30 times a second, we will be given an opportunity to update the state of our game, including the positions of our objects, and then we can draw the models in the current position each time. • By doing this, an object will be able to move around in our game world.
Create a Place to Store the Position • The first thing we will want to do is to create something to store the position of our model in our 3D world. • We will use a Vector3 object. Remember that a vector is simply a list of numbers. • In this case, there are three numbers, which represent the x-, y-, and z-coordinates of the position of our object. • So let's add the following line of code as an instance variable to our game class: private Vector3 position;
Initialize the Position • Next, let's initialize the position. Depending on what your game does, and how you've got it set up, you can initialize the position anywhere, but for now, let's go to the LoadContent() method and put this line of code, to start our object's position at the origin: position= new Vector3(0, 0, 0);