Download
1 / 14
140 likes | 301 Vues
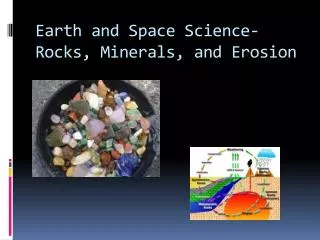
Earth and Space Science- Rocks, Minerals, and Erosion. RM 4.1 Investigate physical properties of rocks and minerals RM 4.2 Investigate processes of weathering on the landscape RM 4.3 Identifying uses of rocks and minerals including cultural uses. Lesson #1 and 2. Lesson #3 KWL. What I KNOW

E N D
RM 4.1 Investigate physical properties of rocks and minerals • RM 4.2 Investigate processes of weathering on the landscape • RM 4.3 Identifying uses of rocks and minerals including cultural uses
Lesson #3 KWL • What I KNOW • What do you WANT to know? • What I LEARNED • Make a KWL chart with the class what they know and want to know about rocks • Examine different rocks with partners.
Lesson # 4 and 5 • Brain Pop http://www.brainpop.com/science/earthsystem/mineralidentification/ • Exploring rocks and minerals worksheet
Lesson #6 • http://www.whps.org/school/websterhill/library/scavenger%20hunts/Rocks%20and%20Minerals%20Scavenger%20Hunt.htm • Student’s will go online and browse. • Use journals to reflect
Lesson #7 and 8 • Rock Cycle Experiment
Lesson #9 • Weathering and Erosion Experiment
Lesson #10 • Give the students a rock and ask them to turn it into sediment • Compare the rock to cake mix
Lesson #11 • How Are Earth Materials Used Around Us
Lesson #12 • Center #1 • Sample Soil • It’s time to explore sample soil. Get ready to spot the differences in the soils. Use the magnifying glass to observe the three different types of soil. Keep in mind the following questions: • What do you see in the soil? • How does this relate the rock cycle? • What do you notice about the soil?
Center #2 • Investigating • You are about to travel down a rocky path exploring formations of rock. • Put ¼ cup full of soil into the jar • Add ¼ cup of pebbles • Add ¼ cup of shell and twig mixture • Put the lid on (ask for help, so there will not be a mess) • Start by gently shaking the jar • Watch what happens as it settles • Record what you saw on the paper provided • Add water to cover all the contents • Put the lid on the jar (ask for help, so there will not be a mess) • Observe • Record what you saw on the paper provided • Questions: • What happened to the layer? • What did you notice about the colours? • What did the water do? • What is happening?
Center #3 • In this center you are going to grow your own crystals! How are you going to do that? You already know that crystals aren’t grown over night. Well, we are going to grown our own SPECIAL crystals. Follow the steps: • Stir in the salt slowly, about a teaspoon at a time. • Continue until the salt is starting to collect at the bottom of the jar. • Choose a color for your crystals and add a couple drops of food coloring. • Tie one end of piece of a string around a pencil and tie a paper clip to the other end. • Place the pencil over the jar so that the string hangs down and the paper clip almost touches the bottom of the jar. • Allow jar to sit someplace where it will be undisturbed. • Fill in POE (predict, observe, explain) sheet and let the crystals sit until tomorrow.