22sas arica harbour presentation
100 likes | 516 Vues
arica harbour attacking rush tactics

22sas arica harbour presentation
E N D
Presentation Transcript
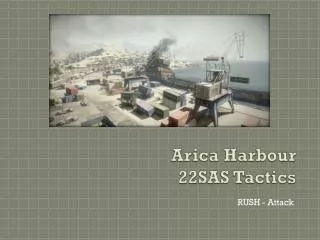
Arica Harbour22SAS Tactics RUSH - Attack
Map - Overview RP = Rush Point
Notes • Before commencing squad members will: • Have been allocated into their squads (This presentation is based on two 4 man squads -Alpha/Bravo) • Designate a squad leader (SL). SL role: • Coordinate squad attacks • Act as principal spawn point • Spot/communicate • Limited cover fire
Notes Cont. • Squad members roles: • Do your best and have fun! • Follow outline strategy in this tactics guide to the best of your ability • Communicate/spot = keep relevant and punchy (if possible!!!) • Use your selected class perks where possible (revive/heal/ammo/repair etc) • KILL KILLKILLmuhahahahahaha
RP1 - Attacking • Note Vehicles: • 3no. Abrahams MBTs • 2no. HUMVEEs • 1no. Bugee • Alpha Squad • Objective – MCOMM A • Takes Left flank • SL keeps spawn on cabins to left of A as shown in screenshot. • SM’s attack A from this position • Bravo Squad • SL attacks right Hand flank • Establish spawn Point behind/to right Of first green cabin In this screenshot. SM’s pick off inf & Attack MCOMM B • Using opposite Cabin to sandwich Suppressive fire on MCOMM
RP2 - Attacking • Alpha Squad • As soon as RP2 becomes available Quickly flank left Down the hill using Cover • SL uses building(s) Opposite objective • Be aware of Stationary AT position On top of construction Site if armour is active • Bravo Squad • Push right flank Asap • Support Alpha By engaging inf/armour From elevated position • Push objective B • When taken, move Down street ready to Flank right to RP3
RP3 - Attacking • Alpha Squad • Push down to A, SL using 2nd stacked cabin shown below as a Spawn Point/observation. • Use hill/rocks to left for route to objective • Bravo Squad • Continue around the far right of the map using low fence line/single brick building as cover and spawn point for attacking objective B in the destroyed bus
RP4 - Attacking • Alpha Squad • Push onto A using bridge or flank route on right. • Ensure you blow out front train carriage to kill waiting defenders • Once armed, suppress with grenades (hand/40mm etc) • Bravo Squad • Attack MCOMM B using left hand route shown below (drop down from bridge, break wire fence) • SL to maintain spawn behind blue hoarding shown in screenshot behind enemy position
Curiousity Note how this train carriage door can be blown open revealing a stationary AT – between RP4 and RP5 – worth remembering!
RP5 (Last Stand) - Attacking • Alpha Squad • Pushes straight on targeting objective A on ground floor • SL to maintain spawn behind/near yellow skips in screen shot below • Note position of heavy MG/Stationary AT on 1st/2nd floors • Cover stairwells from position indicated and shoot enemy in back of head as they run upstairs. Grenades are also effective • Bravo Squad • Pushes down right behind trains and maintain spawn behind/far left of objective B on 1st floor. • Note enemy spawn points behind cabin/rocks to right of this position – pick off as they run into defend MCOMMS