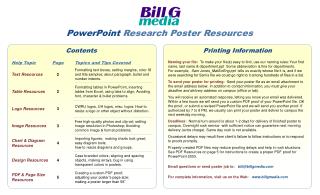
Research Poster Printing Guidelines for Easy File Management
50 likes | 74 Vues
Learn how to name, send, and prepare your poster file for printing efficiently and effectively. Follow guidelines for quick turnaround and professional results.

Research Poster Printing Guidelines for Easy File Management
E N D
Presentation Transcript
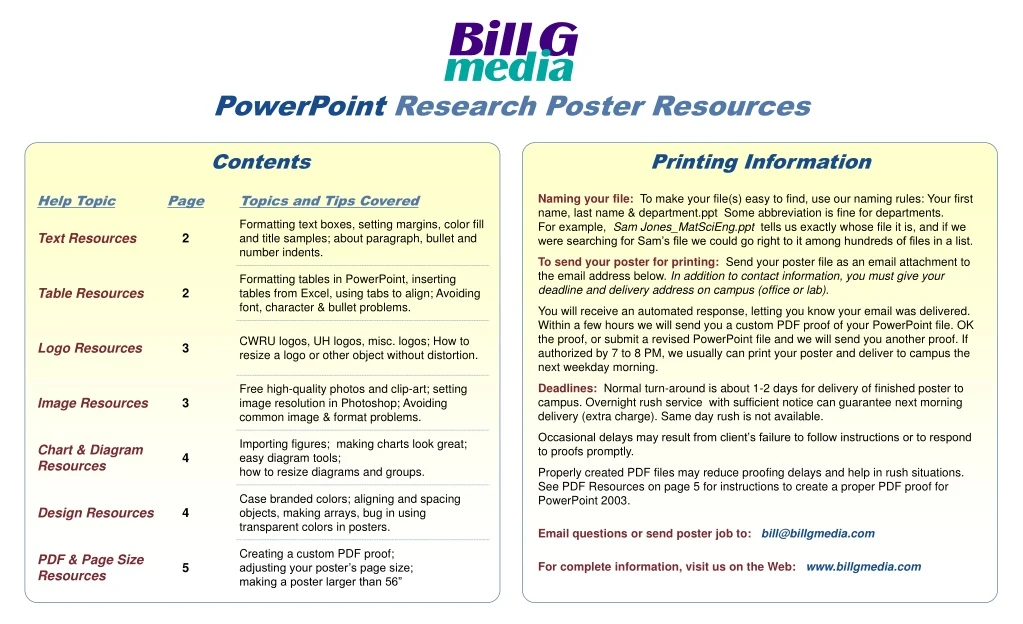
PowerPoint Research Poster Resources Contents Printing Information Naming your file: To make your file(s) easy to find, use our naming rules: Your first name, last name & department.ppt Some abbreviation is fine for departments.For example, Sam Jones_MatSciEng.ppt tells us exactly whose file it is, and if we were searching for Sam’s file we could go right to it among hundreds of files in a list. To send your poster for printing: Send your poster file as an email attachment to the email address below. In addition to contact information, you must give your deadline and delivery address on campus (office or lab). You will receive an automated response, letting you know your email was delivered. Within a few hours we will send you a custom PDF proof of your PowerPoint file. OK the proof, or submit a revised PowerPoint file and we will send you another proof. If authorized by 7 to 8 PM, we usually can print your poster and deliver to campus the next weekday morning. Deadlines: Normal turn-around is about 1-2 days for delivery of finished poster to campus. Overnight rush service with sufficient notice can guarantee next morning delivery (extra charge). Same day rush is not available. Occasional delays may result from client’s failure to follow instructions or to respond to proofs promptly. Properly created PDF files may reduce proofing delays and help in rush situations. See PDF Resources on page 5 for instructions to create a proper PDF proof for PowerPoint 2003. Email questions or send poster job to: bill@billgmedia.com For complete information, visit us on the Web: www.billgmedia.com
TEXTBOX SAMPLE WITH SOLID COLOR FILL • Lorem ipsum dolor sit amet, consetetur sadipscing elitr, sed diam nonumy eirmod tempor invidunt ut labore et dolore magna aliquyam erat, sed diam voluptua. At vero eos et accusam et justo duo dolores et ea rebum. Stet clita kasd gubergren, no sea takimata. • Iriure dolor in hendrerit in vulputate velit esse molestie consequat, vel illum dolore eu feugiat nulla facilisis at vero eros et accumsan et iusto odio dignissim qui blandit praesent. • BULLET TEXT USES HANGING INDENTS, SET IN RULER • Lorem ipsum dolor sit amet, consetetur sadipscing elitr, sed diam nonumy eirmod tempor invidunt ut labore et dolore magna aliquyam erat, sed diam voluptua., 1985 • Lorem ipsum dolor sit amet, consetetur sadipscing elitr, sed diam nonumy eirmod tempor invidunt ut labore et dolore magna aliquyam erat, sed diam voluptua., 1985 TEXTBOX SAMPLE WITH SOLID FILL Text Resources Table Resources 2 Textbox Sample with Shaded Fill Lorem ipsum dolor sit amet, consetetur sadipscing elitr, sed diam nonumy eirmod tempor invidunt ut labore et dolore magna aliquyam erat, sed diam voluptua. Duis autem vel eum iriure dolor in hendrerit in vulputate velit esse molestie consequat, vel illum dolore eu feugiat nulla facilisis at vero eros et accumsan. Meeska mooska mouskateer, mouse cartoon time now is here. Lorem ipsum dolor sit amet, consetetur sadipscing elitr, sed diam nonumy eirmod tempor invidunt ut labore et dolore magna aliquyam erat, sed diam voluptua. At vero eos et accusam et justo duo dolores et ea rebum. Stet clita kasd gubergren, no sea takimata sanctus est Lorem ipsum dolor sit amet. Lorem ipsum dolor sit amet, consetetur sadipscing elitr, sed diam nonumy eirmod tempor invidunt ut labore et dolore magna aliquyam erat, sed diam voluptua. At vero eos et accusam et justo duo dolores et ea rebum. Stet clita kasd gubergren, no sea takimata sanctus est Lorem ipsum dolor sit amet. Lorem ipsum dolor sit amet, consetetur sadipscing elitr, sed diam nonumy eirmod tempor invidunt ut labore et dolore magna aliquyam erat, sed diam voluptua. At vero eos et accusam et justo duo dolores et ea rebum. Stet clita kasd gubergren, no sea takimata sanctus est Lorem ipsum dolor sit amet. This Excel table was pasted in. Type and cell options are set within Excel (double-click to edit). When done editing, tables should be copied and pasted using Paste Special > Picture (Windows Metafile) to lock down the image for printing. This table was created in PowerPoint using Insert > Table. Text can be formatted, tabbed and rotated. Cell formatting includes: custom fills and borders, padding, merging and splitting, and nested tables. Formatting uses the Tables and Borders Toolbar. • About Textboxes: • Double-click on text box edge, or hold Shift and double-click anywhere inside to bring up the Format… dialog box. • Margins are set in the Text Box tab. • Check the Resize Autoshape checkbox to have the box grow as text is added/resized. • Outline and Fill colors are set in the Colors and Lines tab. • To convert to round-corner boxes: select box, go to Draw menu > Change AutoShape > Basic Shapes and highlight the rounded box. To adjust the corners, grab the yellow diamond and drag. How to set tabs within a text block • This table is a PowerPoint text block using tabs. • Do not try to align columns with spaces! • Animal Qty. Cost Each Favorite Food • Lions3 $50,000.15 Tigers • Tigers2 $60,000.65 Bears • Bears1 $5,000.48 Lions • To set tabs: • Turn on Rulers (View menu > Ruler). When insertion point is inside a text block, tabs and indents will show. • Cycle through different tab styles by clicking Tab Well (at intersection of rulers): Right, Left, Center, Decimal. • To place a tab, click inside the horizontal ruler, and drag it to desired location. • Big Tip! Font / Symbol Problems • If you use a font we don’t have, your proof will probably show errors. Be sure to check math and greek symbols in your proof. • Check the fonts in your file! Go to File > Properties > Content to see the list. • Use OpenType fonts for math & greek symbols whenever possible. OpenType fonts are identical for PCs and Macs. Go to Insert > Symbol to see the special characters available. • You can embed TrueType fonts in the poster file. Go to Tools > Options >Save and click the Embed TrueType fonts box at the bottom. • Alternatively, you can email us a copy of the font(s) in question for temporary printing purposes. To open the Fonts folder, go to Start > Control Panels > Fonts. • Custom bullets can remap to wrong characters if we don’t have your font. Either use bullets within PPT, or use characters from standard fonts. • “Picture” bullets are always jaggy. Never use them. • TEXTBOX SAMPLE WITH ROUNDED CORNERS • Lorem ipsum dolor sit amet, consetetur sadipscing elitr, sed diam nonumy eirmod tempor invidunt ut labore et dolore magna aliquyam erat, sed diam voluptua. At vero eos et accusam et justo duo dolores et ea rebum. Stet clita kasd gubergren, no sea takimata. • Iriure dolor in hendrerit in vulputate velit esse molestie consequat, vel illum dolore eu feugiat nulla facilisis at vero eros et accumsan et iusto odio dignissim qui blandit praesent. • At vero eos et accusam et justo duo dolores et ea rebum. Stet clita kasd gubergren, no sea takimata. • Use separate boxes for bullet text and paragraph text • Bullet and Number text has a “hanging” (negative) indent • Paragraph text has a positive or no indent. • Unlike Word, PowerPoint won’t let you mix different indents within the same text block. So use two different textboxes for bullet text and block text! • You can adjust indents for Bullet & Number text by having Rulers visible (see Tip at right) Tabs: Left Center Right Center Tab Well Title Using Box with Gradient Fill Background: Lorem ipsum dolor sit amet, consetetur sadipscing elitr, sed diam nonumy eirmod tempor invidunt ut labore et dolore magna aliquyam erat, sed diam voluptua. At vero eos et accusam et justo duo dolores et ea rebum. Stet clita kasd gubergren, no sea takimata sanctus est Lorem ipsum dolor sit amet. Lorem ipsum dolor sit amet, consetetur sadipscing elitr, sed diam nonumy eirmod tempor invidunt ut labore et dolore magna aliquyam erat, sed diam voluptua. At vero eos et accusam et justo duo dolores et ea rebum. Stet clita kasd gubergren, no sea takimata sanctus est Lorem ipsum dolor sit amet. Lorem ipsum dolor sit amet, consetetur sadipscing elitr, sed diam nonumy eirmod tempor invidunt ut labore et dolore magna aliquyam erat, sed diam voluptua. At vero eos et accusam et justo duo dolores et ea rebum. Stet clita kasd gubergren, no sea takimata sanctus est Lorem ipsum dolor sit amet. Nam liber tempor cum soluta nobis eleifend option congue nihil imperdiet doming id quod mazim placerat facer possim assum. Lorem ipsum dolor sit amet, consectetuer adipiscing elit, sed diam nonummy nibh euismod tincidunt ut laoreet dolore magna aliquam erat volutpat. Ut wisi enim ad minim veniam, quis nostrud exerci tation ullamcorper suscipit lobortis nisl ut aliquip ex ea commodo Duis autem vel eum iriure dolor in hendrerit in vulputate velit esse molestie consequat, vel illum dolore eu feugiat nulla facilisis at vero eros et accumsan et iusto odio dignissim qui.. TITLE USING BOX WITH SOLID FILL
Logo Resources Image Resources 3 High resolution logos with tranparent backgroundsCopy and paste into your poster layout. See resize tip below. • High-quality images and clip-art • Free from Microsoft’s collection • Click on the Clip Art button in the Drawing Toolbar to bring up the Clip Art panel. • Enter a Search keyword or keywords • Make sure the Web collections are checked for searching (requires Web connection). • Check Media Types such as Clip Art and Photos (uncheck Movies and Sounds). • Scroll through the search results and click on a desired image to load into your page! • Scale, crop, recolor as needed. Many pieces can be ungrouped to use the part you want. Set image resolution for best quality & file size! Make sure your files can be emailed! It only takes a minute to optimize resolution for large digital photos. If your poster is larger than 7-8 MB, your images probably have way too much data. Big Tips! Avoid common image errors • GIF format always prints badly. Convert to JPG or a PNG (for a transparent background). • For posters never use the Set Background Transparent tool in PowerPoint (on the Picture Toolbar). It will convert your image to a GIF file. • Never use Paste to insert TIFF files on a Mac. • Make sure Black and White photos are set to Grayscale (In Photoshop: Image > Mode > Grayscale). RGB files are 3X larger and will make your images look off-color when printed. • Digital cameras can create huge files. Use the steps shown at right to quickly set an optimal resolution. • Insert a copy of your photo or scan into PowerPoint and scale it to the size you want. Double-click it and choose the Size tab in the dialog box. Write down the dimensions. • Open a copy of the image in PhotoShop, go to the menu Image > Image Size. Follow the screen capture above: 300 to 400 pixels/inch for ½ scale templates; 150 to 300 pixels/inch for full-scale. • Save the resized file as a JPG, maximum quality. Insert the finished image into PowerPoint, replacing the old bloated version. Big Tip! Resize objects without distortion! • Click on the object to be scaled. • Click on a corner selection node. • Hold the Shift key to constrain the aspect ratio as you scale. Perfecto!
RGB values for CWRU branded colors from Case Branding Guide, pg 2.3 CaseGray CaseBlue Navy Olive Teal Rust Cranberry Beige Forest Lime Turquoise Marigold Purple 75% tint 50% tint 25% tint Step 1 Step 2 Review 2 Review 1 Step 3 Revision Chart & Diagram Resources Design Resources 4 • To apply a CWRU brand color • Double-click a swatch. In the dialog box select the Colors & Lines tab. • Click the drop-down arrow next to the swatch and pick More Colors… • Click OK to close the dialog box. The swatch is now available in the Custom colors on any color menu. • Excel charts, only better • Excel charts & tables are great, but the default settings are kind of lame. • Before locking down (see tip at left), open and make axis labels larger, lines thicker, and data points larger. Bars and pie wedges can receive gradient fills. • To make all figures look consistent, duplicate styled text boxes for titles and captions in PowerPoint (below). • Tables, Charts and Vector Art • Excel figures can move or resize accidentally. You can lock finalized figures down using this method: Copy the figure in PowerPoint then use Edit > Paste Special > Picture (or Picture > Enhanced Metafile), whichever preserves the figure best. • This eliminates common printing problems with Visio objects also. • Frustrating bugs can be eliminated by creating a high-rez JPG of the figure. This converts buggy text symbols & labels to pixels. • Easy align • Click on Grids & Guides under View menu, then check Display guides in the pop-up dialog box. • Use Guides to line up objects. • Guides can be repositioned by clicking and dragging. They are in the background, so to select them click well away from any objects. • To clone a Guide, click on it and hold down Control and drag out a new Guide. • Guides are invisible on print-outs. • Selected objects have “nodes” which can snap to guides, making alignment easy (see example, right). • Easy array • Multiple selected items can be aligned or spaced evenly using the Align or Distribute (spacing) commands. • Select items to align or space. • On the Draw toolbar’s pop-up menu (bottom left of screen), choose the desired command. • Align left and right columns first, then distribute row by row. Finally top or center-align each row for a perfect array. • Pro tip: Make ONE label and format it first. THEN duplicate and change text. Not only does it save time, but all labels are consistent! • Big Tip! Pasting Items into PowerPoint • Except for Microsoft Office objects (Excel, Word, PowerPoint), do not use Copy and Paste to place items into PowerPoint. • The clipboard can lose important print data (such as line thickness), which often is not noticeable until after it is printed! • From the original program,Export (or Save As) a Windows Metafile (.wmf), Enhanced Metafile (.emf) or high-rez JPG for charts, tables and diagrams. • In PowerPoint use Insert > Picture > From File • Never paste TIFF images into PPT on a Mac! This Chart Title Created in a PowerPoint Textbox for Consistency. • Diagramsare a Snap • Use AutoShapes and AutoShape Connectors found in the DrawingToolbar. • To place text in AutoShape, select shape and click on any text-formatting button and an insertion point will appear. • Connector arrows and lines snap to shapes and can be formatted with Line, Dash and Arrow Style pop-ups menus. Figure 4: This figure caption was added inside PowerPoint as a textbox. By formating and duplicating figure titles and boxes you can make your figures look consistent, even though the figures may come from several different sources. 1 Say NO to tranparency! 2 • Transparency set within PowerPoint creates huge files that may print badly. Almost 100% it can be substituted with a solid color. TURN IT OFF! • Double click on the shape to open the Format dialog. • Choose Colors and Lines. If the Transparency is greater than 0%, fix it by… • Click the Fill Color drop down and choose More Colors. • Slide Transparency to 0%, then move the Hue / Saturation crosshairs and Brightness arrow to lighten or darken the color swatch. 3 Big Tip!Painless scaling for groups! • Select all objects to be scaled together. • Copy the group. • Choose Edit > Paste Special > Picture (Windows Metafile or Enhanced Metafile). One format may work better than another depending on your objects. • This trick welds text, arrows, lines, labels & images into one unit that can be scaled without problems! • The diagram is scaled from the sample at left. 4 Fine adjustments Under View > Grids and Guides turn off Snap-to-Grid to make fine layout adjustments. Now you can nudge any selected item(s) using your keyboard’s Arrow keys!
Proofing Resources Page Size Resources 5 About custom PDF proofs and Acrobat (for PPT 2003 only!) Although Bill G Media will send you a custom PDF proof when you submit a PowerPoint file, sometimes it’s helfpful to make your own. A custom Acrobat file is a much better representation of how your poster will print than the PowerPoint preview, so it can be used for pre-proofing and sending your file ready-to-print. Important: you must have Adobe Acrobat Standard version or Professional version installed on the computer you are making the PDF file on (not merely the free Acrobat Reader). This is available to all CWRU students and staff through the Software Center (http://www.cwru.edu/softwarecenter). • Tips for changing your poster’s page size in a PowerPoint file • You are not limited to the template sizes or the 56” limit! • Always check your display area first (in your conference information), before working! • If creating a custom page size, work on a copy of the template. • Resize the poster in the File > Page Setup menu. Do this first thing to avoid fix-ups later! • To go beyond the 56 inch page size limit, make your page setup ½ scale. For example, a 42” x 72” wide poster would be set up as 21” x 36” in Page Setup. • Several Bill G Media templates are already set up at ½ scale for your convenience. • Paste your logos and figures in after resizing the page. This avoids distorting them. • Everything scales mathematically. If you need to work at ½ scale, your text and figures should be set up at ½ of their final size. Text that is 15 pt. in your template will become 30 pt. when printed at 200%. • Our printer’s maximum short dimension is 42 inches. The other dimension can be whatever length you wish, up to 96” (although we recommend ≤ 72”). If you go higher than 42” (on the short dimension), we will scale the poster down to fit on the paper. • If you must resize after your poster is designed, be aware that changing the ratio of height to width will distort objects like charts, tables, images, logos and figures. You will have to readjust each item. • Making your custom PDF proof • Select PDF as your "printer." With your poster file open, go to FIle > Print. In the Printer drop-down menu, choose Adobe PDF as your printer. Also select Current Slide, Print: Slides; Color; 1 Copy and Scale to Fit Paper • Customize the output. (this sets print quality and custom size**) • (a) Click the Properties button. The dialog box that appears will have 3 tabs. On the Adobe PDF Settings tab, click the Default Settings drop down menu, and select High Quality Print. • While still in the Adobe PDF Settings tab, uncheck "Do not send fonts to PDF.” • (b) Go to the Layout tab. Check either Portrait or Landscape to match your poster layout. • Now click the Advanced button. • (c) Choose the Paper Size drop down menu and select Postscript Custom. In the Custom Page Size Definition box, enter the dimensions of your PowerPoint page size, putting the smaller dimension in the Width box. Even if your page is landscape, put the smaller dimension in the top box called Width. Don't worry—the page will automatically rotate if you clicked Landscape layout. • Very Important! If either of your page dimensions is wider than about 40 inches, you must enter both at 1/2 their size and tell us to enlarge the print 200%. This avoids common PDF output errors. • Click OK to close. • (d) While still in the Advanced dialog, choose Print Quality: 600 dpi, TrueType: Download as Softfont and Postscript Options: Output: Optimize for Portability. When done, click OK. • "Print" your PDF and proof it. Click OK in the PDF Document Properties dialog, and click OK in the Print dialog to invoke Acrobat Distiller's powerful postscript engine. When the distillation process is done, you will be prompted to Save the file. Name the file using your first name, last name and department abbreviation: John Smith_BME.pdf Big Tip! Bill’s 2003 PDF instructions preserve quality and avoid PDF errors. We’ve done thousands of PDFs from PowerPoint. If you follow the instructions at left carefully, you will get a valid PDF for PPT 2003 at the right size and resolution. Warning: If you use the Acrobat defaults, or use the Make PDF button in PowerPoint, or don’t scale your pages size as shown (if over 40”), then your PDF file will probably have errors and we will need your PowerPoint file instead.