Download
1 / 24
290 likes | 1.16k Vues
The Roland VS-1880. An introduction and basic guide. By Nick Bedell. Overview.

E N D
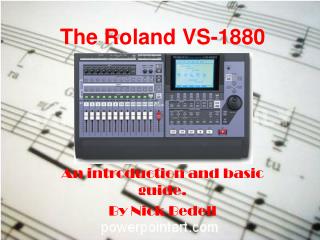
The Roland VS-1880 An introduction and basic guide. By Nick Bedell
Overview • As this presentation will mark the first regarding a self contained recording device (that is to say, one that runs independently from a computer and/or sequencing software) I will start off by saying, it would be impossible for me to run through all the features and abilities of this machine. Therefore, it has been designed to use in conjunction with the manual, available in the ADRS or online. • The purpose I am hoping this presentation will serve, is that of an informative introduction and basic start up guide for those wishing to familiarize themselves with Roland’s 24 bit digital studio workstation, the VS-1880.
What is this Gizmo?? • The VS-1880, which I shall hereafter refer to as simply “the 1880” is a recording studio in a box. It is an extremely portable multi-tracking device that is perfect for recording in a home studio environment, or for recording live performances. It is a relatively inexpensive piece of gear capable of assisting the aspiring artist/engineer/producer through the entire recording process. As all the inputs and outputs, the mixer and graphic display screen are located on the box, the 1880 is an all in one deal. While it is more expensive to purchase compared with some sequencing software, it needs no external hardware to serve as a fully functional audio workstation.
What is the VS-1880? Continued… More specifically, the 1880 is an 18 track DAW with a built in 28 channel, fully automated digital mixer, optional effects processor, and CD burner. It can play back 18 tracks simultaneously and record up to 8 tracks at once. In total, counting virtual tracks, the 1880 can record using 288 tracks. It also has a function for mastering. My apologies but, we must now explore all of the buttons and dials of the front and rear panel. Let us begin with…
Peak Indicators – Lights that will flash when the input audio level reaches 0 dB. • Input knobs – Are used to adjust the sensitivity of the input jacks 1 through 8. • Select/Channel edit buttons – Used to change the input mixer settings for the analog, digital, stereo inputs and effect returns. The indicator will light for the selected channel. By pressing a tracks status button followed by the desired select button for the source you want to record, you can assign an input to be recorded to a track. • More select/channel edit buttons – used to change track mixer settings and to change track channels. • Status Buttons – Switch the status of each track. SOURCE (orange) means the input source or track assigned to the channel is being output. REC (blinking red) Record is selected for the track assigned to the channel. PLAY (Green) The track assigned to the channel will play back. OFF (off) The channel is muted. • Channel Faders • Monitor Knob – Volume output from the monitor jacks. • Phones Knob – Volume for headphones. • Auto mix Button - switches auto mix on and off. • EZ Routing Button – Brings up the EZ routing screen • Edit/Solo Button – Pressing this button will enable you to make block settings for the master section of the mixer. To solo a specific channel, press while holding down the select/ channel edit button. • Fader/Mute Button – To mute the channel press this button while holding down the Select/Channel edit button. • Master Fader
Graphic Display – Screen that displays data corresponding to the present status of the 1880 ie. During playback, recording, editing etc. • Function Button – Used to switch the various display screens. • Page (Jump) Button – Used to switch pages in a screen that may have more than one page. • Preview Button – Used to play a pre set time value before and after the current location. • Locator/Scene Button – Allows you to store or recall locators and markers or to recall certain mixer settings. • Transport Control Buttons – Zero (current time is sent back to 00h00m00s00) REW, FF, STOP, PLAY, REC. • Contrast Knob – Allows you to change the brightness of the screen. • CD-RW/ Mastering button – Press to master your work, or to write to a CD. • MIDI/DISK Indicator – Lights green when there are incoming MIDI messages. Lights red when data is being written or read on the disk drive. Lights orange if both occur simultaneously. • External SYNC Button – Use to determine which device (1880 or external MIDI device) will function as the slave unit. • Cursor Buttons – Used to move the cursor (for time selection as well as to select parameters in edit mode) • Play (Display) Button – Press to return to the first screen that appears when the unit is turned on. (like a home button, and trust me, this is a very helpful feature when you are on your first date with the 1880) • Time/Value Dial – Used for adjusting time, selecting parameters. • Loop Button – Turns the loop recording feature on and off. • AUTO PUNCH Button – Turns the auto punch in feature on and off. • Undo/Redo Button – Press to undo a recording or editing step. Press along with Shift to redo. • Shift Button – This button is used to access additional functions of buttons. • Enter/Yes Button – Press to execute an operation. • Exit/No Button – Press to cancel an operation.
Power Switch • AC IN (AC Inlet) – Jack for power cable. • SCSI Connector – For connecting SCSI devices such as external hard disk, CD-R etc. • MIDI Connectors – (IN, OUT, THRU) for various MIDI devices. • Phones Jack (outputs same signal as monitor) • Monitor Jacks – (L, R) RCA type analog audio output jacks. • AUX B jacks (L,R) • AUX A jacks (L,R) RCA type analog audio output jacks. • Master OUT jacks - RCA type analog audio output jacks. • Foot Switch Jack – Input for optional foot switch used for various controls ie. Punch ins and outs, record on and off etc. • Digital Connectors – (IN, OUT) The 1880 will accept coaxial and optical digital I/O connectors (conforming to S/P DIF) IN accepts a stereo digital audio signal. OUT sends out a stereo digital audio signal. • Phantom Switch – Turns Phantom power on or off (+48 V) • Guitar (Hi-Z) jack – ¼’’ high impedance jack that is specifically designed to work with guitar, providing a louder, cleaner signal. It may be used instead of, but not at the same time as the regular input 8 jack. • ¼’’ Input jacks (3-8) – Tip ring sleeve (TRS) connections. • XLR Balanced Inputs – Balanced XLR connections.
Signal Flow (Busses) • In the 1880, audio signals flow through what are known as busses. Busses are shared pathways through which multiple signals can be routed to multiple tracks or channels. The manual for the 1880 uses an analogy of the flow of water through pipes to various destinations in a building to explain signal flow and how it occurs in the 1880. The following diagram should clear up any confusion related to busses and signal flow.
Busses… • The water supplied to the house from a water line is directed to a variety of locations. Once used, the water is collected by a drain and then carried elsewhere. • It is now useful to visualize the 1880 as the house. The water line into the house represents the input of signals to the 1880, for example a mic or guitar. Some of the inputs are sent directly to recording tracks to be recorded. • Other inputs may be sent to the effects processor, where the signal may have reverb or chorus added to it before it is output. By specifying where a signal comes from, and to where, the common lines run, we are able to determine which inputs are recorded to which tracks. Similarly, which signals are sent to which effect and finally, from where they will be output.
Recording Bus • A signal that is assigned to the recording bus, is routed to the recorder section to be recorded. There are eight channels to which signals can be routed from the input mixer, track mixer and effects return. It must be noted that Signals assigned to the recording bus can NOT be routed to the mix bus simultaneously.
Mix Bus • If a signal is assigned to the mix bus, it is sent to the master jacks for monitoring. The mix bus consists of two channels, being Left and Right, and can accept signals that come directly from the Input Mixer, the Track mixer, or from the effects return section. Again, a signal can not be routed to the Mix and Recording bus at the same time.
Effect Bus • Signals that are routed to the effect bus are sent to the optional VS8F-2 to have effects added to them. This bus consists of four channels (FX1 L/R, FX2 L/R). This bus can process signals that flow from the input mixer as well as the track mixer. Signals that are assigned to the recording bus as well as the mix bus may also be routed to the effect bus.
AUX Bus • Signals flowing to the AUX bus are routed to the AUX jacks to allow for additional monitoring which is useful for headphone mixes. This bus consists of 6 channels. 3 AUX lines with a left and right channel for each. Signals that are assigned to the recording and mix busses may also be routed to the AUX bus. This is useful when connecting an external effects device, as well as when an output independent from the Master out jacks is desired.
Auxiliary Tracks • The 1880 has 18 tracks available for playback. • However, within each concrete track there are 16 supplementary tracks that may be used for either playback or recording. • These tracks are referred to as virtual tracks.
DO THE MATH… • 18 tracks multiplied by 16 virtual tracks equals a total recording capacity of 288 tracks. • However… Only one of the supplementary tracks for each of the 1880s 18 tracks can play back at one time.
The Quick Start • There is no substitute to experimenting with a piece of equipment to gain an understanding of how it works. Working with this machine is somewhat like learning how to use a computer all over again. Learning to use the 1880 is a huge undertaking, and before one can work it efficiently, one must spend a number of hours with a manual and the device itself. • The following section however, is my attempt at a quick start guide. It will be an extremely limited tutorial used to set up the machine and record a track.
Quick Start • Connect source to input. (If using a mic that requires phantom power, be sure to switch it on before the 1880 itself) • Turn the machine on. Hold [SHIFT] and press [F1 song]. • Press [F1 (NAME] and then use the arrow keys and time dial to enter letters to name the song. • Choose a sample rate. (44.1 kHz is usually preset) • Select a track to record on. To do this, hold down [REC] and press the status button for that track. The STATUS button should then begin to blink red. This indicates that the track is record enabled. • Next, select the source to be recorded for the track you have enabled. Do this by pressing the STATUS button for the track to be recorded. Then press the input SELECT button for the input you want assigned to the track. The select button should now blink. • Adjust the input sensitivity. • Press [REC]. The button indicator will blink red. • Press [PLAY]. The button indicator will blink green, and recording will commence. [To listen to your track, press [zero] to return to the start of the track] • Press play for playback. • Use the channel fader to adjust volume. • Press stop when you have finished recording your source. • If you are satisfied with your recording, save your work by holding [SHIFT] and pressing the [ZERO/STORE] button. “Store OK?” will then appear. Press YES. If the song saved properly, the startup display will reappear. • To shut down the 1880, hold [SHIFT] and press [STOP (SHUT/EJECT] “SHUTDOWN/EJECT?” will then appear. Press [YES]. “STORE CURRENT” appears. Press Yes. Once the shut down is complete, you will see “PowerOFF/Restart” in the display. Turn down the volume of all audio equipment, and shut off the power.
Useful? • I think so. The 1880 is very compact, very portable, and very compatible with other devices. Via digital out, you can dump tracks recorded outside of the studio into Pro Tools, Digital performer or even your laptop. It can be connected to external effect boxes and is extremely MIDI friendly. • However, as mentioned previously, it takes much time and practice to learn this device through and through.
Conclusion • In conclusion, Roland’s VS-1880 is a highly useful, highly frustrating tool. While it shares essentially the same features as for example Cubase, it is as far away from a sequencing program for a computer as is possible. The good news is, once you get the hang of a portable recording studio such as the 1880, using similar devices such as it’s big brother, the VS-2480 becomes much easier. Though I am more in favor of using software for my recording projects, I believe this type of device certainly has its place in the field of music technology. It is a much more hands on way of approaching a recording project, what with its built in mixer and all in one design. I believe devices such as this are sort of a post laptop studio era toy for garage musicians and recording engineers alike. Studios like the 1880 have certainly had an impact on music making. The biggest being that they were and continue to serve as an inexpensive alternative to professional recording studios. Ultimately, they make creating and sharing music easier to do…and we can’t complain about that.
Sources • Roland web site :http://www.rolandus.com/ • VS-1880 Owners manual from the ADRS