Download
1 / 30
330 likes | 533 Vues
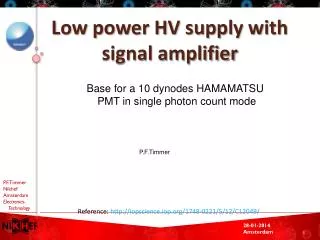
Low power HV supply with signal amplifier . Base for a 10 dynodes HAMAMATSU PMT i n single photon count mode. P.F.Timmer. Reference: http://iopscience.iop.org/1748-0221/5/12/C12049/. PMT-base. Optical module Incl. Storey logic. Requirements. Low power Low RFI Low ripple

E N D
Low power HV supply with signal amplifier Base for a 10 dynodes HAMAMATSU PMT in single photon count mode P.F.Timmer Reference: http://iopscience.iop.org/1748-0221/5/12/C12049/ 28-01-2014 Amsterdam
PMT-base. Optical module Incl. Storey logic Requirements • Low power • Low RFI • Low ripple • Adjustable HV • Small foot print Version-1 Version-3 28-01-2014 Amsterdam
E/O Diagram 12+19 CLB conversions photons ln+1 analog.out pre-amp 2 comp spherelogic LVDS pin BOB Octopus ln thdac HV tim.,sc ID decoder cpld i2c i2c 3V3 osc.1 feedback hvdac 12V switch 3V3 switch switch PMT-base PMT-module extraelectr. 28-01-2014 Amsterdam
PMT proposed form factor <105 dimensions in mm PCB space PCB space 28-01-2014 Amsterdam
HV generation d1 d2 d9 d10 k a Cb a d9 d10 k d1 d2 Cp ~ Uhv Uhv Resistor base • - High power • Temp. Sensitive • Volume Cockroft Walton base +Low power -Fixed voltage ratio 28-01-2014 Amsterdam
Simplified diagram of HAM_PROMiS2_V1 base Voltage ratio: total 13 steps -700V to -1500V k 100n 22n 3 3G 22n 100n 3V3 3V3 22n d1 100n 1 L2 L4 22n d2 100n 22n L1a 220pF L3 100n 6 FB COCO 100n L1b 1M5 22n d8 1uF 1 1M5 100n 22n 22k 56 22k d9 HV DAC out 1 47n 47n 100n 22n d10 56 22n 22k 22k I2C A PROMiS2 Analog and digital output 47n 47n 100n 1 28-01-2014 Amsterdam
HV actual wave forms KD1 D9 D10 I-fet 28-01-2014 Amsterdam
Design considerations Select components which can withstand the high voltage in the CW multiplier. Check dissipation of every component. Check distance on PCB between high voltage components. Determine on which side of the PCB which part of the circuit will be placed. Find a connector system which is sturdy enough. 28-01-2014 Amsterdam
Overview component specs. 28-01-2014 Amsterdam
Layout 28-01-2014 Amsterdam Limited space. High dv/dt in parts of the circuit. High voltage on PCB. Constraint editor is used. Very low signal amplification. For one photon 480 fC (PMT gain = 3E+6) DFM check of the PCB.
Reliability of components components 9% design 22% manufactering 20% 9% ware out system management induced 12% 15% no defects 9% 4% software Tests evaluation • Components @ 45 °C : 865 FIT • Stress factors; • Stationary use: 0.5 • Temperature @ 20 °C: 0.18 • Evaluated value: 200 FIT 28-01-2014 Amsterdam
Specifications • HV circuit, for 10 dynodes PMT • Low ripple • 706 mV11708.5 < T(°C) < 22.1 • 0.07% 8.5 < T(°C) < 22.1 • Voltage stable at 3 V < Vinput < 3.6 V • Low total power • Vinput 3.3 V • 4,5 mW 1500V for HV generation • 30 mW for PROMiS2 • Low RFI • dV/dt < 75 mV/µs, RFI -20 dB @ 150 kHz-10 MHz • Adjustable HV • cathode voltage -700 _ -1500 V • Adjustable threshold for pulse width adjustment • ~ 30nSec for one photon • Small foot print • PCB = 43 mmØ • Reliability • 200 FIT @ 20°C, stationary use, after tests 28-01-2014 Amsterdam
Test procedures • Validation tests chips • Tests the PROMiS2 and COCO chips by a test house. • (Functional, HTOL, HTSL, ESD ad Q&R tests.) • PCB tests • Storage;Tamb->30min-10 °C ->1h->60 °C ->1h->60 °C ->-10 °C ->30min->Tamb • Temp. Shock;Tamb->Tamb+50 °C ->1h->Tamb+50 °C -> 0sec ->Tamb • Influence oscillator frequency on PMT output • Acceptance tests (meet specifications) • Done with PMT base tester • Cleaning + Drying • Ultra sone • Coating • Polyurethane 28-01-2014 Amsterdam
Test setup HV barrier PMT base adapter Safety system HV measurement unit 1 supply PMT base Voltage Adjustment and Current measurement PMT Tail Adapter HV barrier Test PROMIS outputs HV measurement unit 14 supply CW High Voltage circuit Digital value PROMIS outputs omi CoCo CoCo test frequentie and pulse width Promis PROMIS Digital values frequency and pulse width Control Board Electronics for charge injection PROMIS Test HV Control And I2C Digital value for charge adjust Digital value HV control Discharge capacitors from CW high voltage circuit Digital value of inter dynode voltages 28-01-2014 Amsterdam
PMT functionality tests. • Check if supply current is in range. • Check I2C communication. • Check DACHV output of PROMiS2. • Check switch output of COCO. • Check pulse width of switch output of COCO. • Check maximum frequency of COCO. • Check if HV is coming up. All inter dynode voltages are measured separately. • Check range of HVDAC output and HV output. (steps of 50V). • Check if HV diodes and capacitors don’t leak. • Check system with supply voltage variations from 3V – 3.6V. • Check pulse width output of PROMiS2 when charge is injected. Comparator DAC will be set to give the right pulse width. • Check analogue output of PROMiS2 when charge is injected. 21-05-2013 Amsterdam
Mechanical overview of tester HV measurementunit(Mezzanine) PMT baseto be tested PMT Baseadapter setwith contactpins FPGA boardwith USBinterfaceto PC Mother board 28-01-2014 Amsterdam
The test setup 28-01-2014 Amsterdam
Start up wave forms of dynode connections 21-05-2013 Amsterdam
Discharge waveforms of dynode connections 21-05-2013 Amsterdam
File with test results 21-05-2013 Amsterdam
Where are we now? • Little update of PCB layout • Test setup is functional • Acceptance test • Production PMT • Tender • Assembling with PM • Soldering? • Cleaning, coating device • Testing? • Where • External? • Internal? • Institute? Dy6 Dy5 Dy7 Dy4 Dy3 Dy2 Dy8 Dy1 Dy9 nc Dy10 P K Anode Base for Hamamatsu PMT 28-01-2014 Amsterdam
Status of the bases. 10 prototypes of the HAM_PROMiS2_V1 are produced, tested and functional. 80 bases for a pre series are produced. 72 are tested and functional. 8 bases are still in a panel. 72 bases are sent to Erlangen. 540 base arrived. The preparation for a tender of 15000 bases has started. 21-05-2013 Amsterdam
Questions 28-01-2014 Amsterdam
Extra sheets Temerature influence DAC value versus HV Tail protection against HV RoHS directive (thin whiskers) Hamamatsu tube with base 28-01-2014 Amsterdam
Temperature influence (shock test) 28-01-2014 Amsterdam
Temperature influence 28-01-2014 Amsterdam
DAC value to HV value DAC=HEX2DEC(dac) HV=3.0887*DAC+686.2 dac=DEC2HEX(DAC) DAC=0.3238*HV-222.16 28-01-2014 Amsterdam
HV-protection Protect HV from neighbour bases Protect neighbour tails from HV 28-01-2014 Amsterdam
RoHS directive Restriction of the use of certain Hazardous Substances in electronic equipment. Consequences; Higher solder temperatures (up to 260°C) Favorite solder: SnAgCu alloy (217°C) Chance for more excessive tin whisker growth Tin whiskers, length up to 10mm, diameter up to 10µm. Optimal growth at 50°C Ref: http://nepp.nasa.gov/whisker/background/index.htm electrical short circuitsdebris, contamination,metal vapor arc, due to HV. Image Courtesy of T. Riccio (STPNOC) Conformal coating like Parylene Ctends to buckle the whisker. 28-01-2014 Amsterdam