Engineering Graphics: Auxiliary Views for Inclined Surfaces
Learn to generate views showing inclined surfaces in true shape and manipulate 3-D objects for solid modeling using fold line method and descriptive geometry.

Engineering Graphics: Auxiliary Views for Inclined Surfaces
E N D
Presentation Transcript
Auxiliary Views Engineering Graphics Stephen W. Crown Ph.D.
Objective • To understand how to generate views that show inclined and oblique surfaces in true shape in multiview drawings • To better understand the manipulation of 3-D objects using successive 90 degree rotations in preparation for solid modeling
Outline • Definition and Use • Fold Line Method • Primary Auxiliary Views • Review of descriptive geometry • Example: Inclined surface • Secondary Auxiliary Views • Example: Oblique surface • Example: A surface with no true length lines
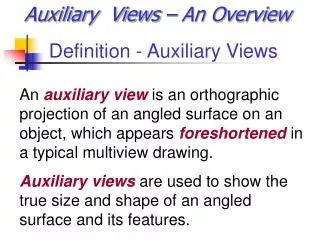
Auxiliary Vs. Principle Views • Principle planes • Horizontal (Top and bottom view) • Frontal (Front and back view) • Profile (Left and right side view) • Auxiliary views • Definition: An orthographic view that is projected into a plane that is not parallel to any of the principle planes • Purpose: To show the true shape of a detail that does not lie in on of the principle planes
Review: Fold Line Method • A fold line (hinge) may be placed between adjacent views to aid in the construction and interpretation of multiview drawings • Projection lines are always perpendicular to fold lines • The distance from a fold line to any specific point on an object is the same for any related views (ex. top and side view) • Fold lines represent a 90 degree rotation in viewpoint
Example: Fold Line Method • Distances from the fold line in View A are equal to the distance from the fold line in View C • Follow projection lines to keep track of vertices • Use offset when creating View C from View A & B • Note that the projection lines are always perpendicular to fold lines.
Primary Auxiliary View • Definition: Any view that is projected from (adjacent to) one of the principle views and which is not parallel to any of the principle planes • A primary auxiliary view is perpendicular to only one of the principle planes • Any inclined surface may be shown in true shape in the appropriate primary auxiliary view • If the fold line for an auxiliary view is parallel to the edge view of an inclined surface the inclined surface will appear in true shape in the auxiliary view
Example: Primary Auxiliary Views • Use the UCS command to rotate about the Z axis and align the x axis up with the inclined surface • Project perpendicular projection lines from the inclined surface (ORTHO) • Determine the depth of each point from related views (OFFSET) • Use DDOSNAP to quickly select features
Projection Planes • A fold line represents the projection plane for the adjacent view • A line appears true length if it lies in a plane parallel to the projection plane • A line which is not parallel to the projection plane appears foreshortened • A line which is perpendicular to the projection plane appears as a point
Lines • A line which is parallel to a fold line will appear true length in the adjacent view • A true length line which is perpendicular to a fold line will appear as a point in the adjacent view • Line 1-3 is parallel to the fold line in the right side view and true length line in the front view • Line 1-2 is true length in the right side view and is a point in the front view
Lines • All views adjacent to a point view of a line will show the line in true length • A line which does not appear true length in any of the principle views is called an oblique line
Surfaces • A Surface appears in “true shape” (undistorted) if it is parallel to the projection plane • A surface appears as an edge parallel to the fold line in all views adjacent to the true shape view of the surface • If any line on a surface appears as a point then the surface will appear as an edge • A surface which does not appear as an edge in any of the principle views is called an oblique surface
Secondary Auxiliary Views • An oblique surface requires a secondary auxiliary view to show the surface in true shape
Secondary Auxiliary Views • Definition: A secondary auxiliary view is any view which is not perpendicular to any of the principle views • Purpose: A secondary auxiliary view is used to show the true shape of an oblique surface • A secondary auxiliary view is constructed as an auxiliary view to a primary auxiliary view using fold lines and perpendicular projectors
Example: Secondary Auxiliary View • The top view shows the oblique surface • A secondary auxiliary view is needed to show the surface in true shape • The lengths of sides and angles are distorted in all other views • Perpendicular projection lines and reference planes are used to construct the right side view from the front and top view
Example: Secondary Auxiliary View • A true length line on the oblique surface is identified in the right side view • Placing a fold line which is perpendicular to the true length line gives the edge view of the surface • This auxiliary view is a primary auxiliary view • The edge view of the surface is needed to obtain the true shape view
Example: Secondary Auxiliary View • A fold line which is draw parallel to the edge view of the oblique surface gives the secondary auxiliary view showing the surface in true shape • Perpendicular projectors are used to determine the location of vertices • Often only the inclined or oblique surface is shown in auxiliary views
Example: Secondary Auxiliary View • Simplify the construction of drawings by starting with only a portion of the drawing • The right side view is constructed by measuring along projection lines in the top view • Vertices are numbered to help keep track of correct distances from reference planes
Example: Secondary Auxiliary View • A true length line is identified in the right side view line 2-4 is parallel to the fold line in the front view, therefore line 2-4 is a true length line in the right side view • A fold line perpendicular to the true length line gives the edge view of the oblique surface
Example: Secondary Auxiliary View • Use UCS to rotate about the Z axis and align the X axis with the edge view of the oblique surface • Perpendicular projection lines are constructed (ORTHO) • The distance along projection lines are measured in relative views (OFFSET and DDOSNAP) • The secondary auxiliary view shows the oblique surface in true shape
Memorize These Statements Before The Quiz • A fold line that is parallel to a line gives a view that shows the “true length” of the line • A fold line that is perpendicular to a “true length” line on a surface gives a view that shows the surface as an edge. • A fold line that is parallel to the edge view of a surface gives a view that shows the “true shape”
Another Example • The top view and front view of a surface is shown • Is an auxiliary view needed to show the surface in true shape? • Yes: The surface does not appear as an edge in either view
Example • Construct the right side view using projection lines and reference planes • Note that there are no true length lines in any of the principle views
Example: Secondary Auxiliary View • Since the surface does not appear as an edge in any of the principle views the surface is oblique and requires a secondary auxiliary view • A line is drawn on the surface which is parallel to the fold line between the front and right side view • This line appears as a true length line in the right side view
Example: Secondary Auxiliary View • The true length line is used to get an edge view of the surface • A fold line perpendicular to the true length line gives a point view of the line in the adjacent view • Since the line is on the surface the surface will appear as an edge
Example: Secondary Auxiliary View • The secondary auxiliary view gives the true shape of the surface • The secondary auxiliary view is constructed by placing a fold line parallel to the edge view of the surface
Example: Secondary Auxiliary View • Fold lines are labeled by the name of the principle plane or the level of auxiliary view • Primary auxiliary view (1) • Secondary auxiliary view (2)
Helpful Visualization Tools • Label surfaces • Label vertices - List nearest vertex first at each location (1,2) • Follow construction lines to determine location • Equal number of sides - A surface with 3 sides will have three sides in every view • Parallel edges - If lines are parallel in one view they will be parallel in every view

