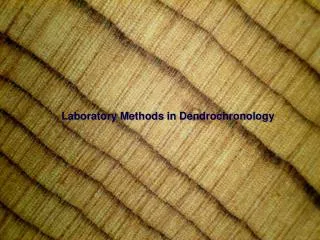
Laboratory Methods in Dendrochronology
180 likes | 443 Vues
Laboratory Methods in Dendrochronology. Now, let’s take our wood samples back to the laboratory: Pre-process our cores: Lay out all cores in their straws so they can air-dry. Once dry, select a core and write its ID on a core mount (both sides).

Laboratory Methods in Dendrochronology
E N D
Presentation Transcript
Now, let’s take our wood samples back to the laboratory: • Pre-process our cores: • Lay out all cores in their straws so they can air-dry. • Once dry, select a core and write its ID on a core mount (both sides). • Carefully remove the core from the straw – there’s a right way and a wrong way to do this. • If the core is in pieces, ensure that all pieces are in their correct order and in their correct alignment! • Lay the core alongside the core mount and place glue in the groove of the mount the length of the core.
Mount your core properly! • The core must be mounted with its cells vertically aligned, i.e., straight up and down, similar to how they were positioned originally in the tree. • If the core is mounted improperly, you may have ruined any chance of the sample being used, because… • …if the core is mounted with the cells at an angle or horizontal, the ring boundaries will not be distinct. • First, inspect the core and find the “shiny sides.” These are the sides of the core. Why does a core have shiny sides?
Individual wood cells “Shiny side”! “Shiny side”!
Mount your core properly! • Second, inspect the ends of the core to verify your evaluation. The ends of the core will clearly show the alignment of the cells. • Press the core into the groove. Excess glue is no problem. • Tape the core down onto the mount firmly at both ends and in the middle of the core.
What if your core is twisted? • The sample must be mounted with the cells vertically aligned. Some samples, however, may be twisted. This is common. • If the core is only slightly twisted, you can simply break the core into two or three pieces and mount these correctly. • If the core is badly twisted (many turns), you have to steam the core while simultaneously untwisting it gently. Don’t have to do this too often.
Measuring the ring widths: • Preferably should be done after you have crossdated your samples. • If the rings are not problematic, you can measure your cores first and then crossdate them statistically. • Total ring width is only one physical property of a tree ring we can measure. What others can we measure?
Measuring the ring widths: • Four parts to a measuring system • Movable stage micrometer with trigger • Digital display • PC running measurement software • Stereozoom boom-arm microscope with crosshair reticule and light source. • This is NOT cheap. Basic system = $3,000 + $2,000 + $1,500 + $200 = $6,700.
Advanced measuring system: CCD camera Microscope 21” TV monitor Light source Movable stage Digital display
Measuring the ring widths: • Crosshair guides you from one ring boundary to the next. • Make sure you measure perpendicular to the ring boundary, always! • Turn the handle on the stage from one boundary to the next. • Hit the trigger to record the measurement. • MeasureJ2X most popular software for measuring. Java based, requires Pentium PCs or Macs. • Measures to the nearest 0.01 mm or 0.001 mm (preferred).
Sometimes you have to physically move or relocate the core to ensure that you measure the width of the ring perpendicular to the ring boundaries.
Finally… • Measurements must be archived in several locations. • All tree-ring measurements are also archived at the International Tree-Ring Data Bank of the World Data Center for Paleoclimatology (part of the National Climatic Data Center) in Asheville, North Carolina.
Crossdating tree rings • Consumes the majority of time learning about tree-ring dating. • The more you do it, the better you become. • Revolves around pattern recognition. • Three basic techniques: • Graphical techniques… then • Statistical techniques, which lead to… • Memorization techniques
Crossdating tree rings • Graphical techniques • Two techniques: • Skeleton plots (favored in the U.S.)
Crossdating tree rings • Graphical techniques • Two techniques: • Alignment plots (favored in Europe)
Crossdating tree rings • Remember the ultimate goal: you must start memorizing which rings are particularly narrow or which have noteworthy properties. • Other properties: • very wide rings • frost rings • thin latewood rings • light rings • rings with resin ducts • false rings
Crossdating tree rings • Let’s try crossdating via skeleton plots by visiting Dr. Paul Sheppard’s excellent educational web site at the Laboratory of Tree-Ring Research, University of Arizona in Tucson …