Using Dial Indicator On a Lathe
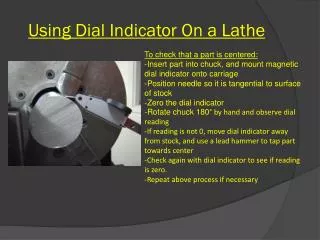
Using Dial Indicator On a Lathe. To check that a part is centered: Insert part into chuck, and mount magnetic dial indicator onto carriage Position needle so it is tangential to surface of stock Zero the dial indicator Rotate chuck 180 ° by hand and observe dial reading

Using Dial Indicator On a Lathe
E N D
Presentation Transcript
Using Dial Indicator On a Lathe • To check that a part is centered: • Insert part into chuck, and mount magnetic dial indicator onto carriage • Position needle so it is tangential to surface of stock • Zero the dial indicator • Rotate chuck 180° by hand and observe dial reading • If reading is not 0, move dial indicator away from stock, and use a lead hammer to tap part towards center • -Check again with dial indicator to see if reading is zero. • -Repeat above process if necessary
Using Dial Indicator On a Lathe To check if a surfaced part is centered: -Insert parallels into the back of the chuck, then insert part into chuck and tighten -REMOVE PARALLELS! -Position dial indicator on the carriage so needle is touching part as shown in picture -Zero the indicator -Spin chuck by hand and observe any movement of dial -If dial does not read zero, tap high point with lead hammer to set face perpendicular to axis of rotation and check with dial indicator again