Download

1 / 10
100 likes | 391 Vues
VHDL Project I: Introduction to Testbench Design. Slides Available at: www.pages.drexel.edu/~mjm46. Matthew Murach. Goals for this Lab/Announcements. Finish up the design of the Shift Registers, Controller, and Packaging by the end of today. Start on the testbench design layout.

E N D
VHDL Project I:Introduction to Testbench Design Slides Available at: www.pages.drexel.edu/~mjm46 Matthew Murach
Goals for this Lab/Announcements • Finish up the design of the Shift Registers, Controller, and Packaging by the end of today. • Start on the testbench design layout. • The first quiz will be given next week and will cover materials covered in the first few labs as well as chapters 1,2 in the text.
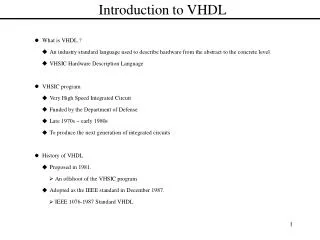
Testbench Description • A testbench is a tool used by VHDL designers to ensure timing, correctness, and to speed up testing. • Usually the testbench will contain several user defined test vectors. • Previously you had to force signals and setup the clock. A testbench sets this up for you.
Testbench Layout • A testbench is just a basic VHDL file with a few more features. • A major difference is that a testbench will NOT have any port declarations in the entity section. This is because a testbench generates all the signals for the design. • Several constants will be needed however such as the length of the test vectors and the number of vectors in the design.
Architecture Section • You will most likely want to use at least three vectors for testing. To accomplish this, you will need to declare a logic type. • You’ll need an array of the std_logic_vector type. This can be declared as the following: Type my_array is array(natural range <>) of std_logic_vector(N-1 downto 0); -- Declare test vectors for A and B My_A : my_array(n_of_tests-1 downto 0) := ("1011","1100","0110"); My_B : my_array(n_of_tests-1 downto 0) := ("1011","1100","0110");
Architecture Section (cont) • Just like the VHDL file you created for connecting the components together, you must declare and map this master to your testbench. • You will also need to declare the port mappings for the master to internal wirings of the testbench.
Architecture Section (cont) • In this design you defined a clock so you will need to generate this clock signal inside the testbench. -- Clock Definition (place after the 1st begin) clk <= not clk after 50 ns; • This tells the clock to operate at 100 MHz or change states every 50 ns.
New Features in Testbench • User defined timing with “after” -- Waits for a user defined time in this case 350 ns to assign b to a a <= b after 350 ns; • Error reporting with assert/report assert (condition) report “message” -- printout the word mismatch if a != b assert ( a = b) report “mismatch”; • Notice that assert takes a boolean expression and reports only if that expression is false.
State Machine Description • The testbench you will be designing will implement 4 states: • Assign – Loads the a test vector into the serial adder. • Waiting – Waits until the serial adder finishes • Check – Checks the answer against IEEE library call • Done – After the number of user defined test patterns is finished the program tells the user it is done.
Testbench State Diagram Time < 2N clocks Go = ‘1’ and Rst = ‘1’ Assign Waiting Rst = ‘0’ Time >= 2N clocks Tests < N_of_tests Done Check Tests = N_of_tests