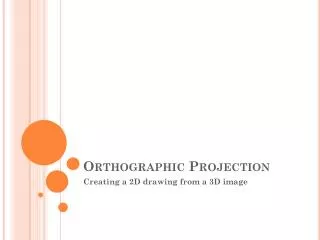
Steps for ORTHOGRAPHIC PROJECTION
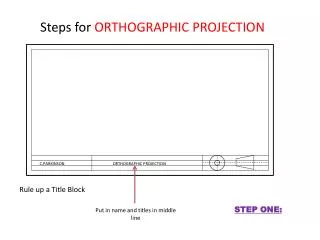
Steps for ORTHOGRAPHIC PROJECTION. ORTHOGRAPHIC PROJECTION. C.PARKINSON. Rule up a Title Block. STEP ONE:. Put in name and titles in middle line. WHAT TO DO!:. 1. Decide on the actual measurements of your chair. ( the height width and length) (always in MM)

Steps for ORTHOGRAPHIC PROJECTION
E N D
Presentation Transcript
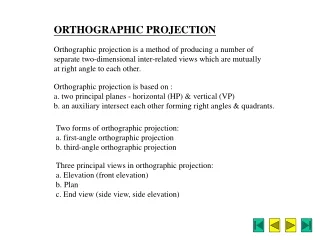
Steps for ORTHOGRAPHIC PROJECTION ORTHOGRAPHIC PROJECTION C.PARKINSON Rule up a Title Block STEP ONE: Put in name and titles in middle line
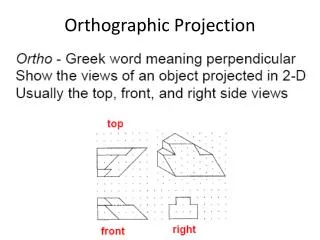
WHAT TO DO!: 1. Decide on the actual measurements of your chair. ( the height width and length) (always in MM) 2. Start with vertical axis, come away from the boarder (20mm from left side and 20mm up from title block) 3. From this line (and going vertical (up)) mark out the height of your chair, then 10mm and 10mm for the space for headings, then the width of the chair 4. From these points take your lines across horizontally Width 10 10 Height ORTHOGRAPHIC PROJECTION C.PARKINSON STEP TWO: SORTING OUT LAYOUT FOR YOU DRAWING
WHAT TO DO!: Lets work on the horiziontal line, on the line you marked 20mm up from your title block…. And from the left hand line (you drew 20mm in from the left hand border) mark in your length of chair then 10, 10mm (for the correct spacing between drawings) Then extend these lines Vertically Width 10 10 Height Length 10 10 ORTHOGRAPHIC PROJECTION C.PARKINSON STEP THREE: SORTING OUT LAYOUT FOR YOU DRAWING
WHAT TO DO!: Last but not least put in the ‘mirror projection line’ the 45degree line Where the lines intersect (cross through each other) in the middle draw you 45 degree line out to the border. Width PLAN 10 10 Height FRONT ELEVATION END ELEVATION Length 10 10 ORTHOGRAPHIC PROJECTION C.PARKINSON STEP FOUR: SORTING OUT LAYOUT FOR YOU DRAWING
WHAT TO DO!: Begin with plan drawing Work within the plan box PLAN Width 10 10 Height Length 10 10 ORTHOGRAPHIC PROJECTION C.PARKINSON STEP FIVE: DRAWING TIME!!!
WHAT TO DO!: Then project lines horizontally to the mirror line then once it hits here project down vertically into the end elevation space PLAN Width 10 10 END ELEVATION Height Length 10 10 ORTHOGRAPHIC PROJECTION C.PARKINSON STEP SIX: DRAWING TIME!!!
WHAT TO DO!: Draw in you end elevation view Then project lines horizontally (across) and vertically down (from your plan) to produce a grid in your FRONT ELEVATION box Draw your front elevation view PLAN FRONT ELEVATION END ELEVATION ORTHOGRAPHIC PROJECTION C.PARKINSON STEP SEVEN: FINISH DRAWING TIME!!!