Download
1 / 102
1.33k likes | 3.3k Vues
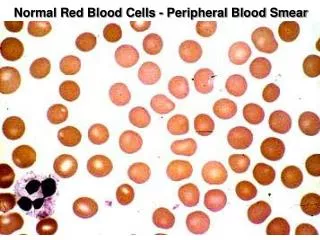
Examination of Peripheral Blood Smear. Dr S Homathy. Complete blood count The most common test used in clinical medicine Determine type and severity of blood cell abnormalities Nowadays, CBC is fully automated and highly reproducible.

E N D
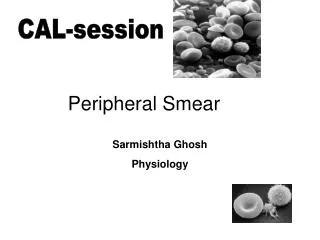
Examination of Peripheral Blood Smear Dr S Homathy
Complete blood count • The most common test used in clinical medicine • Determine type and severity of blood cell abnormalities • Nowadays, CBC is fully automated and highly reproducible. • Correct interpretation of automated CBC can reduce rate of unnecessary blood smear examination • Provide useful information for provisional diagnosis of RBC and WBC diseases
A well Made and well Stained Smear can provide: • Estimates of cell count • Proportions of the different types of WBC • Morphology
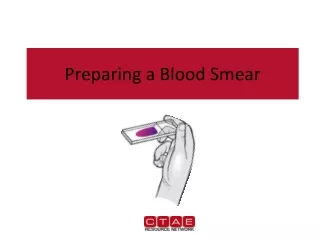
Preparation of blood smear • There are three types of blood smears: • The cover glass smear. • The wedge smear . • The spun smear. • The are two additional types of blood smear used for specific purposes • Buffy coat smear for WBCs < 1.0×10⁹/L • Thick blood smears for blood parasites .
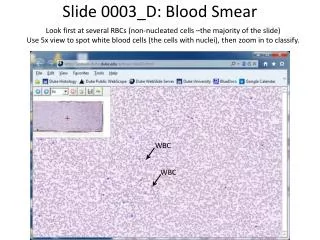
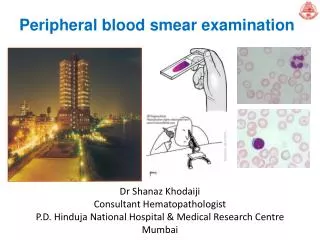
Peripheral Blood Smear • Objective 1. Specimen Collection 2. Peripheral Smear Preparation 3. Staining of Peripheral Blood Smear 4. Peripheral Smear Examination
Specimen Collection • Venipuncture • should be collected on an EDTA (Disodium or Tripotassium ethylene diamine tetra-acetic acid) Tube • EDTA liquid form preferred over the powdered form • Chelates calcium
Specimen Collection Advantages • Many smears can be done in just a single draw • Immediate preparation of the smear is not necessary • Prevents platelet clumping on the glass slide
Specimen Collection Disadvantages: PLATELET SATELLITOSIS • causes pseudothrombocytopenia and pseudoleukocytosis • Cause: Platelet specific auto antibodies that reacts best at room temperature
Specimen Collection • Platelet satellitosis
Peripheral Smear Preparation • Wedge technique • Coverslip technique • Automated Slide Making and Staining
Peripheral Smear Preparation Wedge technique • Push Type wedge preparation • Pull Type wedge prepartion • Easiest to master • Most convenient and most commonly used technique
Material needed • Glass slide 3 in X 1in • Beveled/chamfered edges
Peripheral Smear Preparation • Procedures: • Drop 2-3 mm blood at one end of the slide Diff safe can be used a. Easy dropping b. Uniform drop
Precaution: Too large drop = too thick smear Too small drop = too thin smear
The pusher slide be held securely with the dominant hand in a 30-45 deg angle. - quick, swift and smooth gliding motion to the other side of the slide creating a wedge smear
Control thickness of the smear by changing the angle of spreader slide • Allow the blood film to air-dry completely before staining. • Do not blow to dry. • The moisture from your breath will cause RBC artifact
Peripheral Smear Preparation Precautions: • Ensure that the whole drop of blood is picked up and spread • Too slow a slide push will accentuate poor leukocyte distribution, larger cells are pushed at the end of the slide • Maintain an even gentle pressure on the slide • Keep the same angle all the way to the end of the smear.
Peripheral Smear Preparation Precautions: Angle correction: 1. In case of Polycythemia: • high Hct • angle should be lowered - ensure that the smear made is not to thick 2. Too low Hct: • Angle should be raised
Feature of a Well Made Wedge Smear • Smear is 2/3 or 3/4 the entire slide • Smear is finger shaped, very slightly rounded at the feathery edge: • widest area of examination • Lateral edges of the smear visible • Should not touch any edge of the slide.
Should be margin free, except for point of application • Smear is smooth without irregularities, holes or streaks • When held up in light: • feathery edge should show rainbow appearance • Entire whole drop of blood is picked up and spread
Cover Slip Technique • rarely used • used for Bone marrow aspirate smears • Advantage: • excellent leukocyte distribution • Disadvantage: • labeling, transport, staining and storage is a problem
22 x 27mm clean coverslip • More routinely used for bone marrow aspirate • Technique: 1. A drop of marrow aspirate is placed on top of 1 coverslip 2. Another coverslip is placed over the other allowing the aspirate to spread. 3. One is pulled over the other to create 1 thin smears 4. Mounted on a 3x1 inch glass slide
Precautions: • Very light pressure should be applied between the index finger and the thumb • Crush preparation technique • Too much pressure causes rupture of the cells making morphologic examination impossible • Too little pressure prevents the bone spicules from spreading satisfactorily on the slide
Thin area: • Spherocytes which are really "spheroidocytes" or flattened red cells. • True spherocytes will be found in other (Good) areas of smear.
Thick area: • Rouleaux, which is normal in such areas. • Confirm by examining thin areas. • If true rouleaux, two-three RBC's will stick together in a "stack of coins" fashion.
Common causes of a poor blood smear • Drop of blood too large or too small. • Spreader slide pushed across the slide in a jerky manner. • Failure to keep the entire edge of the spreader slide against the slide while making the smear. • Failure to keep the spreader slide at a 30° angle with the slide. • Failure to push the spreader slide completely across the slide.
6.Irregular spread with ridges and long tail: Edge of spreader dirty or chipped; dusty slide 7.Holes in film: Slide contaminated with fat or grease 8.Cellular degenerative changes: delay in fixing, inadequate fixing time or methanol contaminated with water
Biologic causes of a poor smear • Cold agglutinin: • RBCs will clump together. • Warm the blood at 37° C for 5 minutes, and then remake the smear. • Lipemia: • holes will appear in the smear. • There is nothing you can do to correct this. • Rouleaux: • RBC’s will form into stacks resembling coins. There is nothing you can do to correct this
Automatic Slide Making and Staining • SYSMEX 1000i
Peripheral Smear Preparation • Drying of Smears • Fan • Heating pans • No breath blowing of smears – may produce crenated RBCs or develop water artifact (drying artifact)
Romanowsky staining Leishman's stain : a polychromatic stain • Methanol : fixes cells to slide • methylene blue stains RNA,DNA • blue-grey color • Eosin stainshemoglobin, eosin granules • orange-red color • pH value of phosphate buffer is very important
Pure Wright stain or Wright Giemsa stain • Blood smears and bone marrow aspirate
Procedure • Thin smear are air dried. • Flood the smear with stain. • Stain for 1-5 min. • Experience will indicate the optimum time. • Add an equal amount of buffer solution and mix the stain by blowing an eddy in the fluid. • Leave the mixture on the slide for 10-15 min. • Wash off by running water directly to the centre of the slide to prevent a residue of precipitated stain. • Stand slide on end, and let dry in air.
Features of a well-stained PBS • Macroscopically: color should be pink to purple • Microscopically: RCS: orange to salmon pink WBC: nuclei is purple to blue cytoplasm is pink to tan granules is lilac to violet Eosinophil: granules orange Basophil: granules dark blue to black
Optimal Assessment Area: • RBCs are uniformly and singly distributed • Few RBC are touching or overlapping • Normal biconcave appearance • 200 to 250 RBC per 100x OIO
Trouble shooting • Macroscopic • Overall bluer color: increased blood proteins (multiple myeloma, rouleaux formation) • Grainy appearance: RBC agglutination (cold hemagglutinin diseases) • Holes: increased lipid • Blue specks at the feathery edge: Increased WBC and Platelet counts
Microscopic: • 10x Objective • Assess overall quality of the smear i.e feathery edge, quality of the color, distributin of the cells and the lateral edges can be checked for WBC distribution • Snow-plow effect: more than 4x/cells per field on the feathery edge: Reject • Fibrin strands: Reject • Rouleaux formation, large blast cell assessment
Too Acid Stain:RBC too pale, WBC barely visible • insufficient staining time • prolonged buffering or washing • old stain • Correction: • lengthen staining time • check stain and buffer pH • shorten buffering or wash time
Too Alkaline Stain:RBC gray, WBC too dark, Eosinophil granules are gray • thick blood smear • prolonged staining • insufficient washing • alkaline pH of stain components • heparinized sample • Correction : • check pH • shorten stain time • prolong buffering time
Problem encountered during staining Water artifact: • moth eaten RBC, • heavily demarcated central pallor on the RBC surface, • crenation, • refractory shiny blotches on the RBC 49
What contributes to the problem: • humidity in the air as you air dry the slides. • Water absorbed from the humid air into the alcohol based stain • Solution: • Drying the slide as quickly as possible. • Fix with pure anhydrous methanol before staining. • Use of 20% v/v methanol