Rock Dissection and Mineral Identification Activity
210 likes | 307 Vues
Explore rock properties by dissecting and identifying minerals in classroom-made rocks. Conduct sediment settling experiments to learn about different rock compositions. Includes mineral tests and evaporation techniques. Engaging hands-on lesson.

Rock Dissection and Mineral Identification Activity
E N D
Presentation Transcript
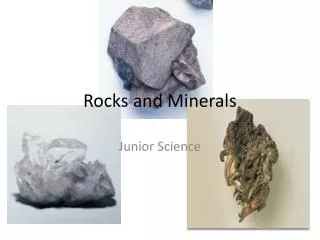
Rocks and MineralsLesson 9 BIG IDEA: Rocks and minerals have properties that can be: observed, tested, described, identified and recorded.
Kit Inventory • What does the object look like? • Where have you seen it before? • What is it used for? • What do you think it is?
Engaging Scenario The Geologist thinks we are ready to start identifying the rocks in the collection and believes some of the ingredients that make up the rocks look like minerals we have already identified. Remember, rocks are different than minerals because they are often a combination of minerals and other materials. He recommends that we start with investigating the rocks we made in class. The geologist would like us to prepare a report of the minerals found in the rocks we created and describe the properties we observe. To assist in our rock investigation he has sent some information and materials that will help us dissect the rocks and further identify their materials.” What does the geologist want us to do? What did the geologist give us to help? What is the problem we need to solve?
Focus Question How can we…
Prediction I think that we can…because…
Background Knowledge • Before we begin our investigation, and test our predictions, lets review how rocks are formed and the processes we used to create our own rocks. • What are the three main earth processes in which rocks are formed? • igneous, metamorphic, and sedimentary • How is the process by which you formed your rock different from how rocks are formed in nature? • Our rocks were formed in a matter of weeks. In nature this often takes thousands of years and extreme pressure or heat.
Word Wall Conglomerate A rock made of mineral and rock fragments held together in clay or another cementing material. Breccia A sedimentary rock composed of angular mineral and rock fragments held together in clay or another cementing material.
Dissecting our Rocks Before we begin dissecting our rocks I would like you to review and create a checklist of the ingredients you used to make your rocks in your scientist notebook. Rock Materials: • Alum • Clay • Gravel • Salt • Sand • Talc • Water • 3 mystery minerals • An item to fossilize When we dissect our rocks I would like you to keep track of each ingredient you can find and identify. Record and draw examples of any interesting observations you find in your science notebook. For example: If you have a fossil imprint what does it look like?
Dissecting our Rocks • Use a nail to carefully pry apart and dissect your rock • Sort the larger solid pieces to one side (gravel, sand, mystery materials) • Put the powder residue and small particles into a vial • Identify each mystery mineral using your mineral tests
Identifying Mystery Minerals What are the mystery minerals found in your rocks? How were you able to identify them… What’s your Evidence? Which Rock Ingredients Have You Found so Far? Rock Ingredients: Alum Clay Gravel Salt Sand Talc Water 3 mystery minerals An item to fossilize
Preparing your Vial • After you have placed the powder residue into your vial, add some sand and other small solid materials. The vial should be about ½ full. • Fill the remainder of the vial ¾ full of water. • Cap the vial and shake vigorously. • Place the vial in a location that it will not be disturbed until our next meeting. Quick Write: We know that sedimentary rocks are formed from layers of material that have settled and become compacted or cemented together. What will your vial look like after the materials settle? How will the small pieces of gravel, sand, clay, or talc settle and distribute themselves?
Part II: Examining the Solutions Be extremely careful to not disturb your sediments in the vial! We recently identified the 3 mystery materials in the rocks we formed and set a solution of sediments from those rocks aside to see how they would settle. Which particles settled to the bottom first and which particles settled toward the top? • Larger pieces (gravel and sand) are on the bottom while smaller pieces (clay and talc) are on the top. Why does this happen? • The size and density of the particles determines which will settle first. Layers of sediment in sedimentary rocks are also deposited in this way.
Examining the Solutions Why do you think I asked you to shake the vials of sediment and water? Do you think this may have caused some of the materials to dissolve in the water? • Some of the particles will dissolve in water. What have we previously learned from our geologist about materials that dissolve in water? • If the liquid evaporates the particles could be crystallized and identified.
Focus Question How can we… How can we identify the materials that have dissolved in the solution of water?
Prediction I think that we can…because… Hint: Which rock ingredients from your list are still missing?
Preparing your Evaporation Tray • Carefully pour just the liquid from your vial into an evaporation tray. • Place the tray in a warm, ventilated area so the water can evaporate. Quick Write:What do you think you will find when all the water evaporates?
Data Collection Using your magnifying glasses, I want you to examine and record your observations in your scientist notebook.
Evaporation Observations Now that your liquid solutions have evaporated, were you able to observe crystals that formed? What is the shape of the crystals? Based on the materials that we used to form our rocks (Gravel, sand, salt, clay, and talc) discuss with your group and try to identify the cubic-shaped crystals you see in your tray? Be ready to provide evidence that will support your opinions. Identify the type of crystals you drew today in your scientist notebook and explain why they are in fact salt crystals.
Making Meaning Conference • What is the difference between a rock and a mineral? • Minerals are one solid material • Rocks are made of several materials • What minerals were present in your rocks? How do you know for sure? • Quartz, pyrite, calcite • Why does sediment from rocks settle in layers? • The materials settle based on their density. Heavier materials sink/settle faster while lighter materials settle slower. • Why were the crystals that formed from our evaporated solution cubic? • Salt was an ingredient in our rocks that dissolved in the water we added to the vial. Salt will always have cubic crystals no matter were they are found and how they are formed.
Claims and Evidence Based on what you have learned from your investigation of crystals, you need to record at least 3 claims and evidence statements in your science notebook. I claim that… I know this because… Possible Examples: I claim that our rocks contained pyrite, calcite, and quartz. I know this because… I claim that the crystals that formed from our solution were salt crystals. I know this because…
Reflection and Conclusion • What did you learn…? • What really surprised you…? • What new questions do you have…? • What would you like to know more about…?