Download
1 / 3
30 likes | 246 Vues
Lab 12 :JK Flip Flop Fundamentals:. Slide 2. JK Flip-Flop . Slide 3. JK Flip-Flop and waveform diagrams. J. K. Q. J. Q. 0. 0. No Change. Toggle . Set or Jump. Reset or Kill . >Clk. K. Q. 0. 1. 1. 0. 1. 1. 1. J. S. 0. Q. 1. >Clk. 1. 0. R. 1. Q. K.

E N D
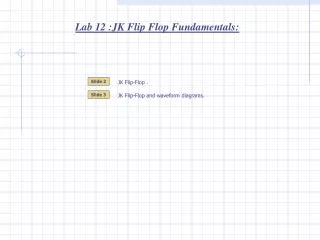
Lab 12 :JK Flip Flop Fundamentals: Slide 2 JK Flip-Flop . Slide 3 JK Flip-Flop and waveform diagrams.
J K Q J Q 0 0 No Change Toggle Set or Jump Reset or Kill >Clk K Q 0 1 1 0 1 1 1 J S 0 Q 1 >Clk 1 0 R 1 Q K Lab 12: The JK Flip Flop : The JK flip flop is an improved SR flip flop. The improvement is the replacement of the Ambiguous mode with the Toggle mode. The Set, Reset and No Change modes are still used. The JK flip flop in the example has a negative edge triggered clock. To help remember the RESET mode you can think of “K=1” means KILL the output. To help remember the SET mode you can think of “J=1” means the output will JUMP high. J=1 and K=1 is called the TOGGLE mode. The AMBIGUOUS mode has been removed. TOGGLE = Change the output logic level. -If Q starts at 0 then Q will toggle high.-If Q starts at 1 then Q toggle low. If you study the construction diagram of the JK flip flop you can see how the TOGGLE mode works. Begin by connecting J=K=1. TOGGLE Mode. Assume Q =0 is the initial condition 1 1 0 Trace the logic levels back through the AND gates. Write the logic levels at the output of the AND gates. 0 1 Inside the JK flip flop there is an SR flip flop ready to set the output to logic 1 when the clock is asserted. Proceed and you will see the output Q toggle and you will also see how the internal SR is setup to toggle again if a second clock pulse was asserted. 0 Slide #2
Jump J Q >Clk K Q Kill Clock Lab 12: The JK Flip Flop and waveform diagrams. A waveform for a JK flip flop will be drawn. It will demonstrate the new toggle mode. The JK flip flop in the example has a negative edge triggered clock. The initial condition Q =1 is marked as a dot on the output waveform diagram. The flip flop has a negative edge triggered clock. The clock is asserted when Clk makes a transition from 1 to 0. The asserted zone is marked off in yellow. Analyze the waveform and draw Q. On this negative edge J=K=1. TOGGLE Mode. Thus Q changes to the other logic level. No analysis is required until the next negative edge. On this negative edge J=0 and K=1. KILL Mode. Thus Q is reset. No analysis is required until next negative edge. Until the clock changes from 1 to 0 it is NOT asserted. Thus Q holds at 0. On this negative edge J=K=1. TOGGLE Mode. Thus Q changes to the other logic level. Slide #3