Download

1 / 24
260 likes | 632 Vues
Design of 8-BIT ALU. SANGAM SUBHASH REDDY AHMED SYED WASIF SADDAPALLI RUDRA ABHISHEK ANURAG SINGH. Advisor: Dr. DAVID W. PARENT. Agenda. Abstract Introduction Why Simple Theory Back Ground information (Lit Review) Summary of Results Project (Experimental) Details Results

E N D
Design of 8-BIT ALU SANGAM SUBHASH REDDY AHMED SYED WASIF SADDAPALLI RUDRA ABHISHEK ANURAG SINGH Advisor: Dr. DAVID W. PARENT
Agenda • Abstract • Introduction • Why • Simple Theory • Back Ground information (Lit Review) • Summary of Results • Project (Experimental) Details • Results • Conclusions
Introduction Why this project? ALU is the building block of several circuits. • Challenging to design a 16 logic level design working at 5ns. • Challenging to layout. .
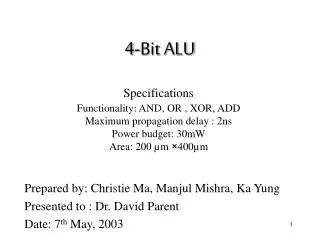
Abstract • Goal is to design an 8-bit ALU driving up to 20fF. • Arithmetic operations are A+B, A+B+1, A+ B', Transfer A, Transfer B, A + 1. • Logical operations are A XOR B, A AND B, A OR B, NOT A. • The data should be transferred at clock rates of 200 MHz , with 2ns setup and hold times. • Maximum area is 800 µm2. ×600 µm2.
AOI Technique • Technique used for designing digital circuits more directly. • This technique becomes specifically important when speed and power considerations are not important. Instead area and number of transistors are reduced to minimum.
Propagate Generate C0 C1 C2 C3 C4 C5 C6 C7 C8 ADD AxorB AB A+B ABN NAND ZERO MOV B MOV A M XNOR
Carry Look Ahead Adder • Addition of digits done parallely. • The carry propagation time is the limiting factor in design of any adder. • So carry propagation time has to be reduced to minimum. • CLA is most widely used technique to reduce carry propagation time.
MUX Based D Flip Flop • Flip Flop used to store input and output bits. • Edge triggered device meant for synchronous systems. • Master is negative edge sensitive, Slave is positive edge sensitive.
Project Summary • The Look Ahead Carry logic makes the adder faster than a conventional ripple carry adder. • Adder design has been given due consideration because all other arithmetic functions depend on adder performance, and thus adder effects performance of entire ALU.
Results • The ALU performs all 12 functions at a 200Mhz clock and a load of 30fF. • Worst-case Power dissipation is 26.7 mW. • Area of the layout is 530×515µm2.
Summary • Designed and tested almost all the design units that we learnt in the class. • Designed an 8-Bit ALU that performs eight arithmetic and four logical functions at 200MHz frequency with setup and hold time 1ns, driving up to 30fF. • This circuit can be used as a building block for 16/32-bit ALU. • The Logic design can be modified to perform more functions.
Lessons Learned • Got a good insight into solving LVS errors. • Learned to take independent design decisions. • Experience to work in a team with coordination to obtain desired results.
Time spent on each phase of project • Basic logic design and verification: 3 days • Transistor sizing: 3 days • Layouts and Schematic: 2 weeks • Circuit integration: 4 days • Post Extraction Checks: 2 days
ACKNOWLEDGEMENTS • Thanks to Professor David W.Parent for his guidance and timely help. • Thanks to Cadence Design Systems for the VLSI Lab. • Thanks to our classmates who helped us in the lab.